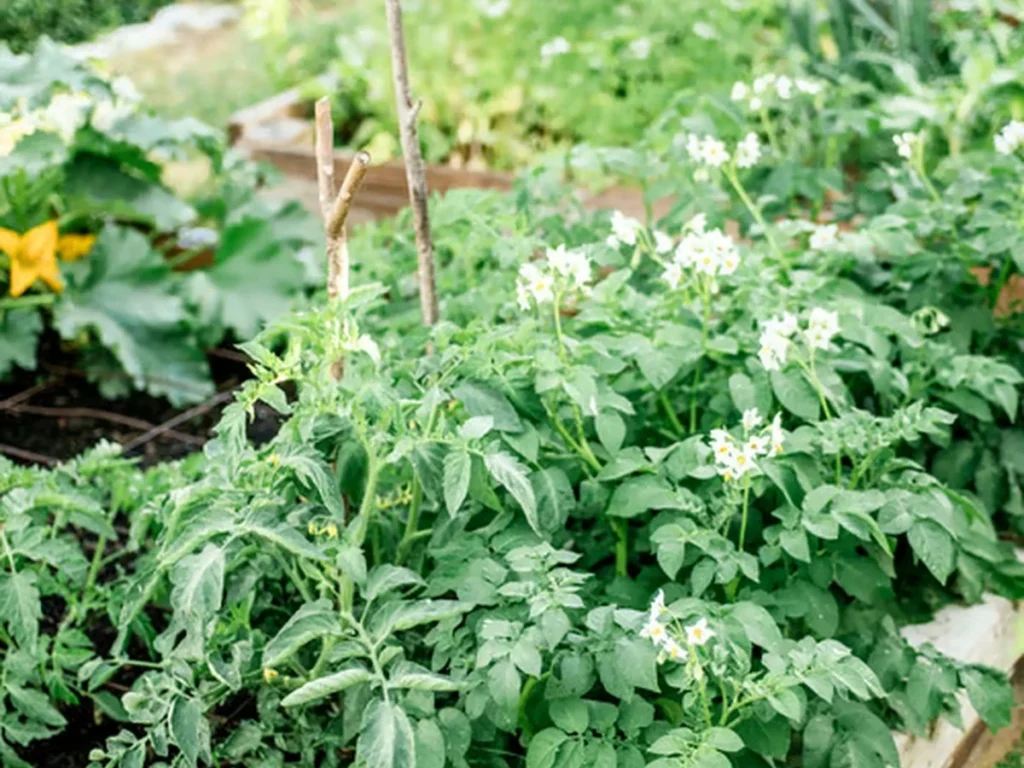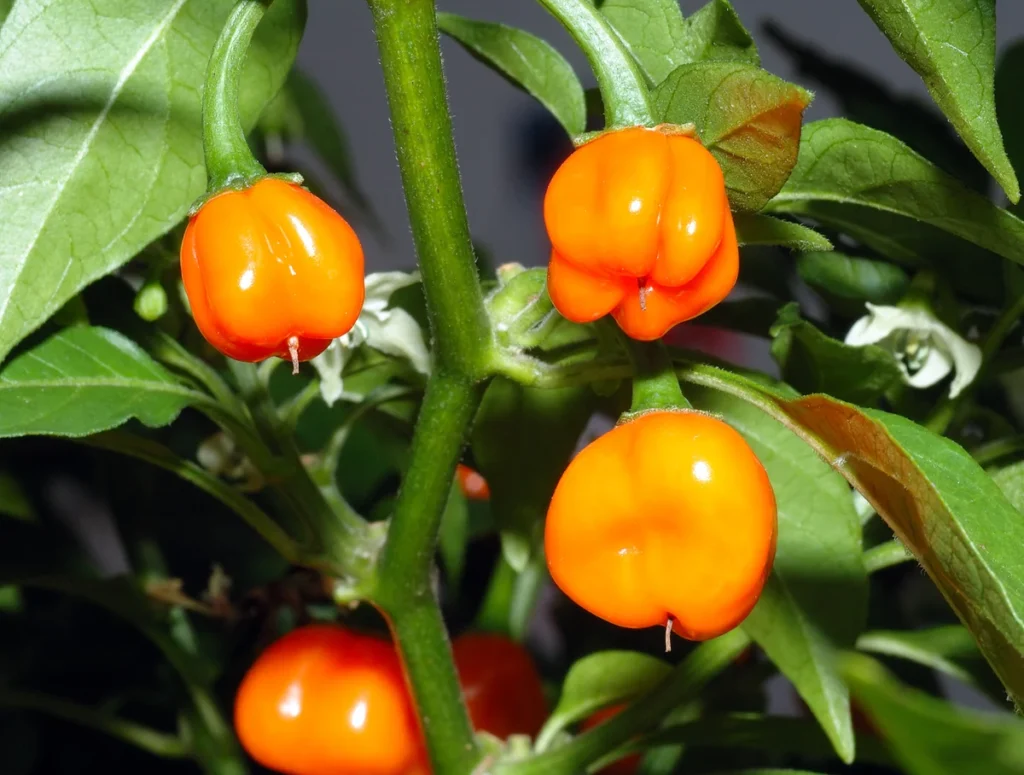
Imagine enjoying all the explosive tropical aromatics, apricot undertones, and floral sweetness of a sun-ripened habanero pepper without a single drop of scorching heat. That is precisely what the extraordinary habanada pepper delivers to home gardeners and gourmet chefs alike.
Developed by pioneering plant breeder Dr. Michael Mazourek at Cornell University, the habanada pepper represents a crowning achievement in modern non-GMO horticultural breeding. By isolating an uncommon, naturally heatless mutant within the fiery Capsicum chinense family, Mazourek spent thirteen years stabilizing a cultivar that registers exactly 0 Scoville Heat Units (SHU).
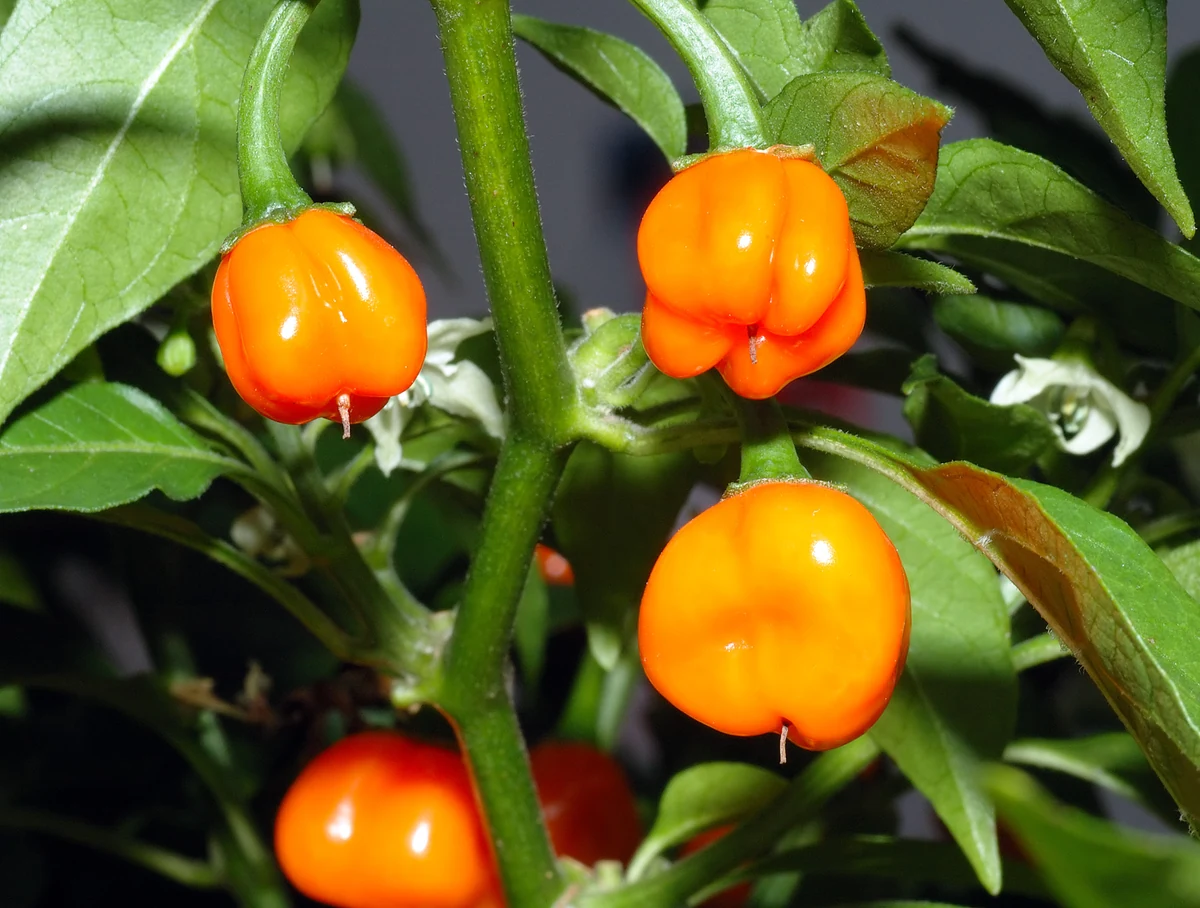
While standard habaneros pack anywhere from 100,000 to over 350,000 SHU, the habanada pepper lets you experience their hidden bouquet of floral esters and fruity terpenes unmasked by pain. Conforming to USDA botanical classification for solanaceous nightshades, whether you grow in indoor hydroponics, patio containers, or raised garden beds, this guide provides complete step-by-step instructions from seed to harvest.
⚡ Quick Answer
The Habanada pepper is a stabilized non-GMO heatless habanero (0 Scoville Heat Units) bred at Cornell University. It delivers the floral sweetness and apricot aroma of a habanero with zero burning heat. It matures in 70–80 days from transplant, requiring warm soil (70–85°F), full sun or 16-hour LED grow lights, and balanced potassium-rich feeding.
💡 Quick Habanada Pepper At-A-Glance Profile
Species: Capsicum chinense | Heat Level: 0 SHU (Completely Heatless) | Days to Maturity: 70 days (Green) / 100 days (Tangerine Orange) | Plant Height: 3 to 4 feet | Canopy Spread: 2 to 3 feet | Germination: 10 to 21 days (Requires 80–85°F bottom heat) | Best Systems: Deep Water Culture (DWC), Dutch Buckets, 5-Gallon Fabric Pots.
What Makes the Habanada Pepper Truly Unique?
Is the habanada pepper actually the same botanical species as a fiery habanero, or is it a completely separate plant? Habanadas belong strictly to Capsicum chinense, the celebrated pepper species that includes scotch bonnets, fatalis, and ghost peppers.
Unlike sweet bell peppers (Capsicum annuum), which possess thicker walls and grassy undertones, chinense peppers are renowned worldwide for complex flavor volatiles. Habanadas retain the exact genetic coding for these luscious apricot, peach, and citrus aromas while lacking the genetic trigger that activates capsaicinoid biosynthesis.
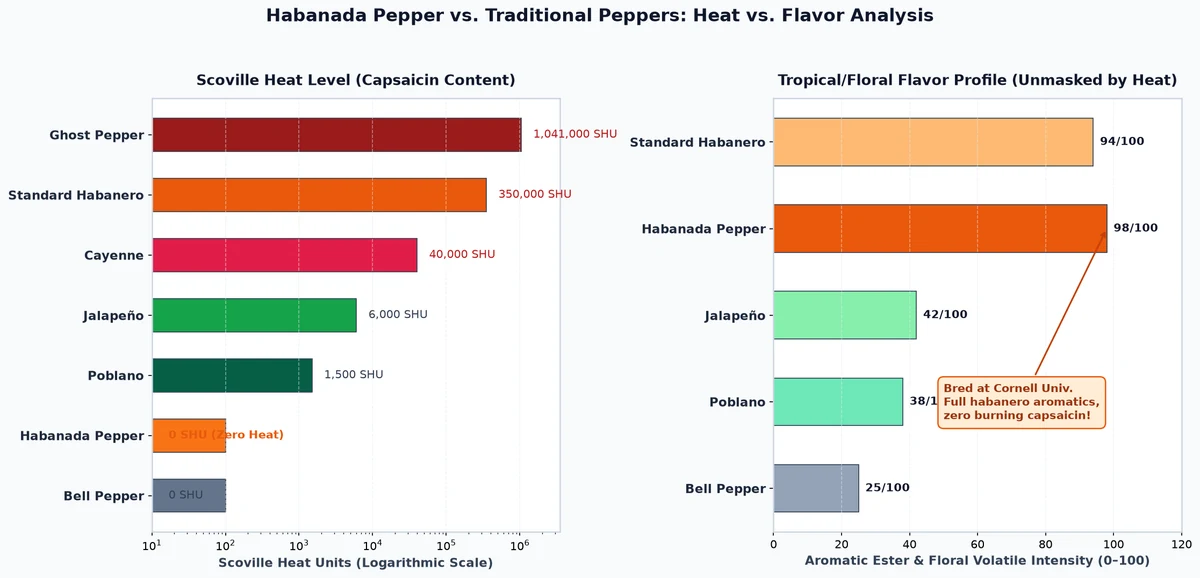
When you take a bite of an orange habanada pepper, your palate immediately detects honeysuckle, ripe melon, and tropical papaya. There is no tongue burn, no watering eyes, and no throat constriction—just pure, luxurious fruit flavor followed by a crisp, juicy crunch.
Botanical Growth Habit and Structure
In the garden or grow tent, habanada pepper plants exhibit a spreading, bush-like architecture that differs subtly from common garden peppers. Mature plants typically reach 3 to 4 feet in height with a lateral canopy extending nearly 3 feet across.
The foliage consists of broad, dark green leaves with undulating margins characteristic of chinense cultivars. Stems develop strong wooden cores as the plant enters vegetative maturity, yet the sheer volume of fruit clusters frequently necessitates supplementary staking or trellis netting.
| Pepper Cultivar | Species | Scoville Heat Units (SHU) | Primary Flavor Profile | Wall Thickness |
|---|---|---|---|---|
| Habanada Pepper | Capsicum chinense | 0 SHU | Floral, Apricot, Tropical Melon | Medium-Thin, Crisp |
| Orange Habanero | Capsicum chinense | 100,000 – 350,000 SHU | Pungent Tropical, Fiery Burn | Medium-Thin |
| Nadapeño | Capsicum annuum | 0 – 500 SHU | Grassy, Crisp Green, Earthy | Thick, Juicy |
| Biquinho (Sweety Drop) | Capsicum chinense | 500 – 2,000 SHU | Sweet, Tangy, Slight Warmth | Firm, Tear-Shaped |
| Sweet Bell Pepper | Capsicum annuum | 0 SHU | Sweet, Watery, Mild Herbal | Very Thick, Fleshy |
Starting Habanada Pepper Seeds: Overcoming the Germination Hurdle
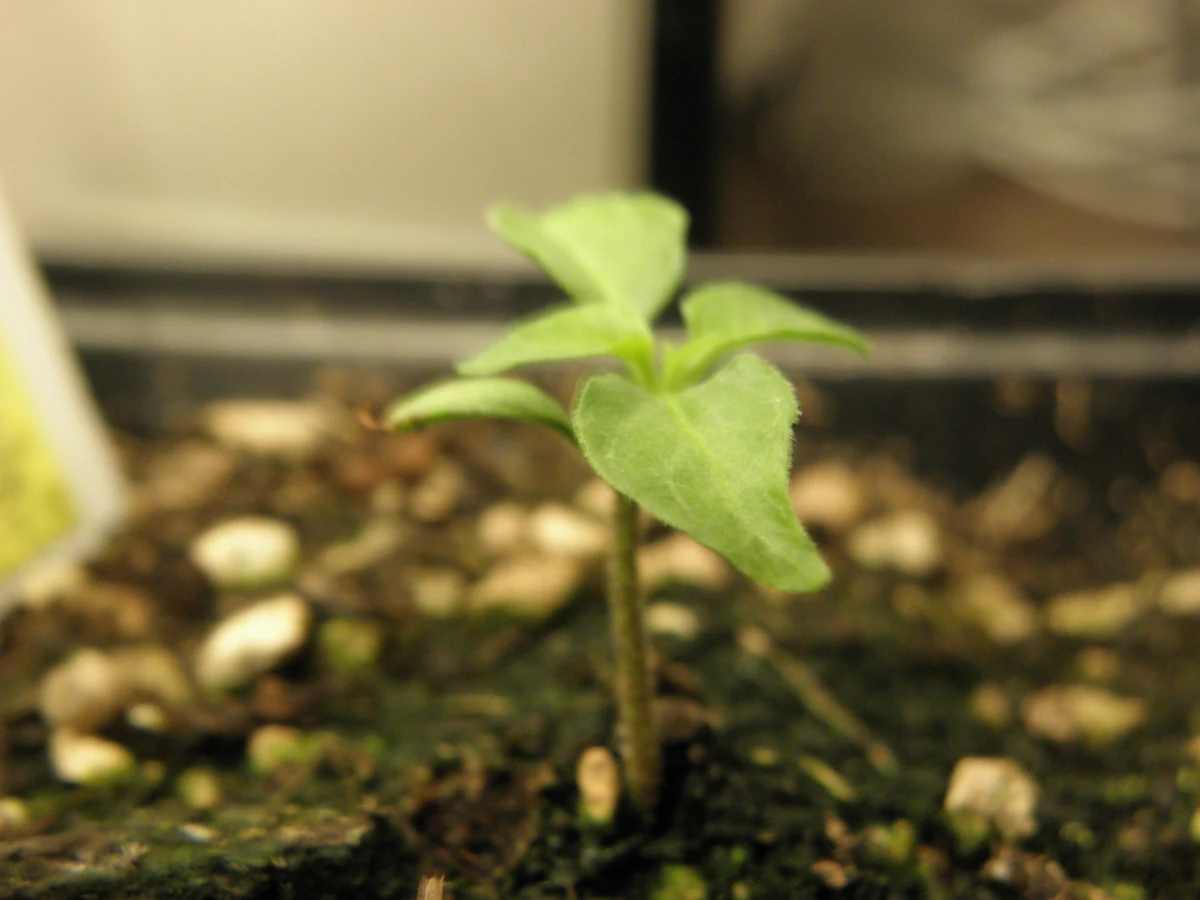
The single biggest mistake growers make with habanada pepper seeds is premature abandonment. Unlike quick-sprouting annuum varieties that emerge within 5 to 7 days, habanada seeds require anywhere from 10 to 21 days to sprout.
Because Capsicum chinense originated in the humid tropical lowlands of the Amazon basin, its seeds possess stubborn dormancy mechanisms designed to protect them until sustained soil warmth arrives.
Essential Seed Starting Equipment and Setup
To ensure a near 100% germination rate for your habanada seeds, assemble the following supplies approximately 8 to 10 weeks before your region’s last expected spring frost:
- Thermostatically Controlled Heat Mat: Set temperature strictly between 80°F and 85°F (27°C–29°C). Room temperature soil (65°F–68°F) can delay emergence past 30 days or lead to seed rot.
- Sterile Soilless Starting Medium: Fine peat moss, coco coir, or rockwool starter plugs provide optimal moisture retention without pathogen pressure.
- Humidity Dome: Retains 70–80% ambient relative humidity during incubation to soften tough seed hulls.
- Clean Water with Neutral pH: Moisten the medium with water adjusted to pH 6.0 to 6.5 before sowing.
Step-by-Step Germination Protocol
1. Pre-Soaking (Optional but Recommended): Soak seeds in lukewarm chamomile tea or weak kelp solution for 8 to 12 hours prior to planting. The mild tannins help soften the seed coat and activate enzymatic germination pathways.
2. Sowing Depth: Plant seeds exactly 1/4 inch deep. Place two seeds per cell or rockwool plug to guarantee uniform tray occupancy. Gently tamp the medium over the seed to ensure intimate contact.
3. Moisture Management: Keep the starter mix damp like a wrung-out sponge. Avoid waterlogged conditions that drown embryonic roots. Bottom-watering through the nursery tray prevents disturbing shallow seeds.
4. Heat Mat Deployment: Keep the tray on the active heat mat 24 hours a day until cotyledons emerge. As soon as the first green loops appear, immediately remove the humidity dome and position seedlings under bright lighting.
💡 Patience is Paramount
If day 14 arrives and your seed cells remain bare, do not discard them! Check your substrate temperature with an instant-read soil thermometer. As long as the root zone holds at 82°F, habanadas will emerge robustly between days 15 and 21.
Indoor Hydroponic and Environmental Requirements
Can habanada peppers flourish indoors as a year-round perennial crop? Absolutely! In fact, controlled indoor environments often produce heavier, more consistent yields than fluctuating outdoor gardens.
However, growers must appreciate the physical stature of the habanada pepper. While micro-dwarf tomatoes like Orange Hat micro-dwarf tomatoes thrive in compact 12-inch countertop units, habanadas need ample vertical clearance.
Selecting the Right Hydroponic System
Confining a habanada pepper to a 1-gallon reservoir or a short tabletop system creates rootbound stunting, early blossom drop, and poor yields. For vigorous long-term production, choose one of these proven systems:
- Deep Water Culture (DWC) 5-Gallon Bucket: Highly recommended. Continuous oxygenation from an air stone suspended in a 5-gallon bucket drives explosive vegetative branching and massive fruit clusters.
- Dutch Bucket (Bato Bucket) System: Ideal for multi-plant setups using perlite or clay pebbles with top drip fertigation.
- Sub-Irrigated Planters or Large Kratky Reservoirs: If using passive hydroponics, utilize a minimum of 3.5 to 5 gallons of nutrient solution per plant, following our Kratky hydroponics fundamentals with appropriate scaling.
Photoperiod and Light Intensity (PPFD)
Peppers are sun-worshiping crops that require powerful illumination indoors. Supply 14 to 16 hours of daily light using high-efficiency full-spectrum LED grow fixtures.
Target a Photosynthetic Photon Flux Density (PPFD) of 300–450 µmol/m²/s during the vegetative stage, ramping up to 600–800 µmol/m²/s once flower buds form. A Daily Light Integral (DLI) between 25 and 35 mol/m²/day ensures thick, stocky stems capable of holding heavy fruit loads.
| Growth Stage | Day / Night Temp (°F) | Relative Humidity (RH) | Vapor Pressure Deficit (VPD) | Daily Photoperiod | Target PPFD |
|---|---|---|---|---|---|
| Seedling / Clone | 75°F – 80°F / 70°F | 65% – 75% | 0.8 – 1.0 kPa | 16 Hours | 200 – 350 µmol/m²/s |
| Vegetative Growth | 74°F – 82°F / 68°F | 55% – 65% | 1.0 – 1.2 kPa | 16 Hours | 400 – 600 µmol/m²/s |
| Flowering & Fruit Set | 72°F – 78°F / 65°F | 50% – 60% | 1.2 – 1.4 kPa | 14–16 Hours | 600 – 800 µmol/m²/s |
| Fruit Ripening | 72°F – 80°F / 66°F | 45% – 55% | 1.3 – 1.5 kPa | 14 Hours | 600 – 750 µmol/m²/s |
Hydroponic Nutrient Formulation, EC, and pH Management
Habanada peppers possess voracious appetites, particularly for calcium and potassium once fruit set begins. Providing balanced nutrition prevents common solanaceous disorders like blossom-end rot and leaf chlorosis.
Maintain your reservoir electrical conductivity (EC) between 1.8 and 2.4 mS/cm (900–1200 ppm on the 500 scale) during peak flowering and fruiting. Maintaining reservoir pH strictly between 5.8 and 6.3 ensures all essential macro and micronutrients remain fully bioavailable.
Two-Phase Feeding Strategy
Vegetative Phase (Weeks 4 to 8): Provide a nitrogen-rich formula (such as a 3-1-2 NPK ratio) supplemented with calcium nitrate and magnesium sulfate. This fuels sturdy branches, broad foliage, and an expansive root system.
Flowering & Fruiting Phase (Week 8 through Harvest): Transition to a high-phosphorus, high-potassium blend (such as 1-2-3 or 2-4-6 NPK). Potassium directs carbohydrate transport into developing fruit, maximizing sugar synthesis and aromatic ester production.
💡 Calcium & Magnesium Safeguard
Capsicum chinense cultivars are notorious for rapid cell wall expansion during fruit enlargement. Always add 3 to 5 mL of Cal-Mag per gallon of nutrient solution, especially if using reverse osmosis (RO) water or coco coir substrates.
The 100-Day Habanada Pepper Growth Lifecycle
Understanding the chronological development of your habanada pepper plant allows you to proactively adjust environmental controls, pruning schedules, and nutrient formulations.
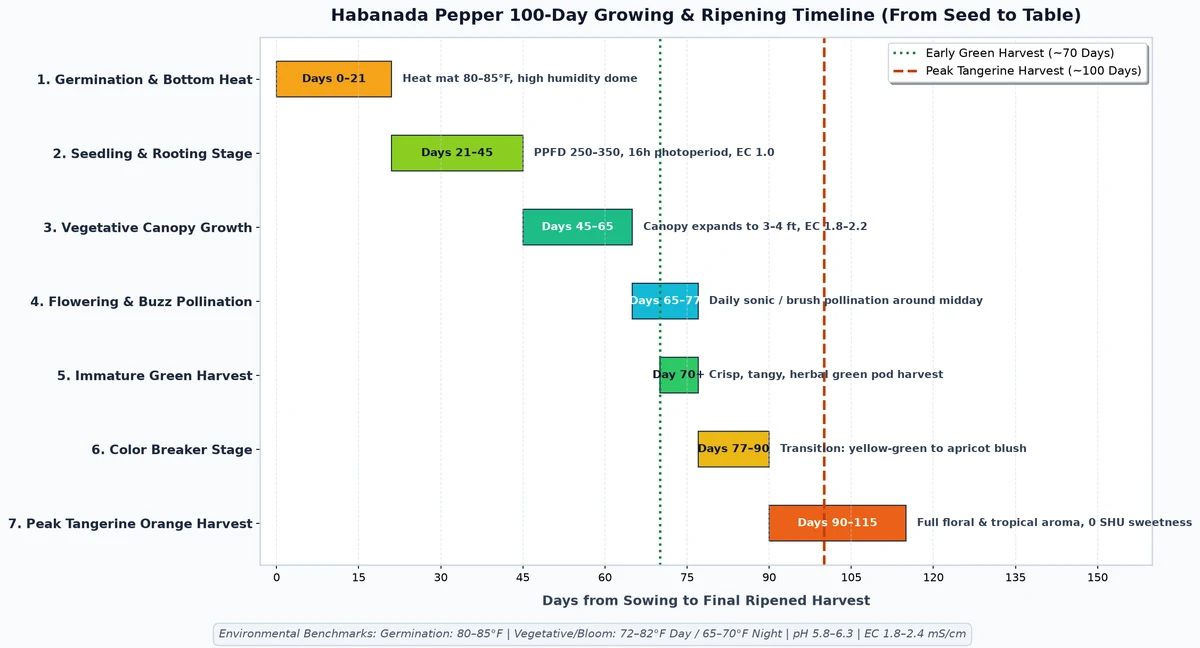
Here is the detailed developmental timeline you can expect when cultivating habanadas under optimal indoor conditions:
Days 1 to 21: Germination and Radicle Emergence
Seeds absorb water, swell, and sprout their taproot. Keep humidity high and bottom heat steady at 82°F. Thin to the single healthiest seedling per cell once cotyledons fully expand.
Days 22 to 45: Early Vegetative Growth and First Transplant
True leaves emerge with characteristic crinkled venation. When seedlings form 4 to 6 true leaves, transplant them into their intermediate container or net cup. Begin mild feeding at EC 1.0–1.2 mS/cm.
Days 46 to 65: Rapid Canopy Expansion and Branching
The plant develops multiple lateral shoots, forming a dense bush. Many growers top the central stem at the 5th or 6th node to stimulate an even wider canopy with 6 to 8 primary flowering branches.
Days 66 to 75: First Blooms and Pollination Window
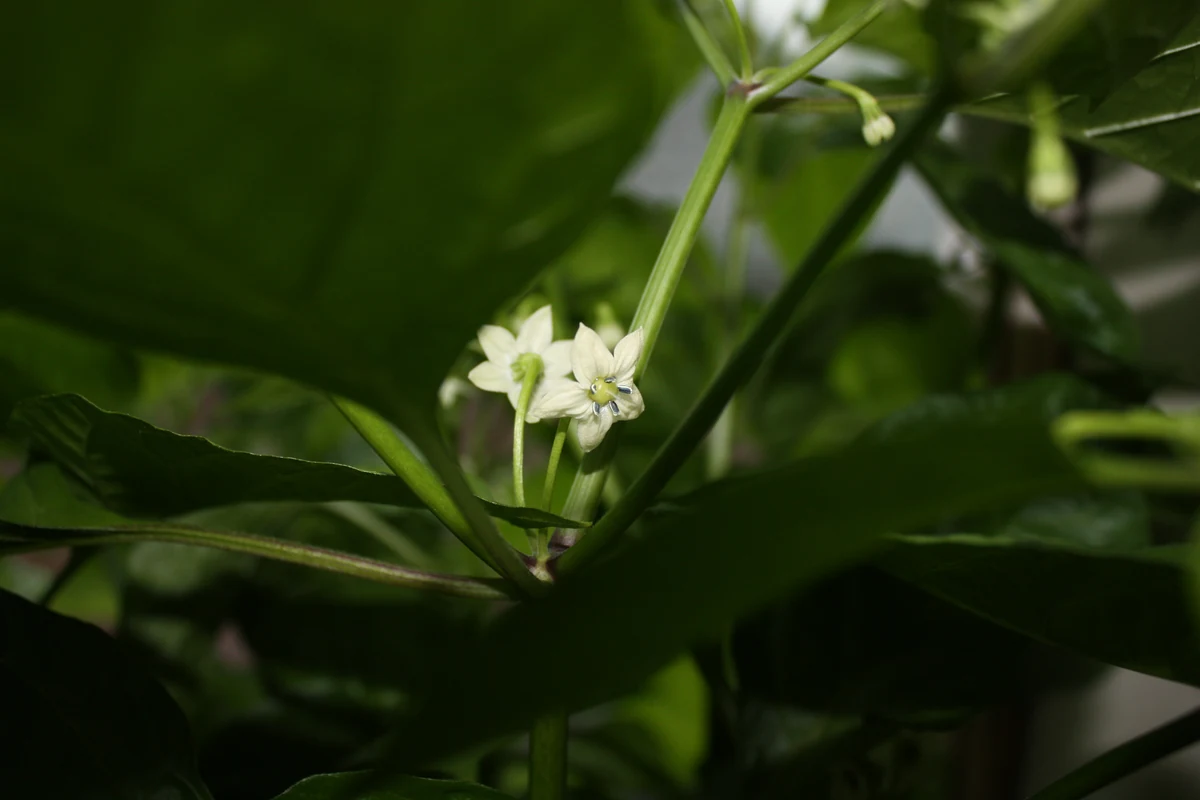
Dozens of small, white, star-shaped blossoms open across the nodes. Hand-pollination is required indoors during this critical window to trigger fruit set.
Days 70 to 80: Green Fruit Formation and Early Harvest
Small green lantern-shaped pods expand rapidly. At day 70, immature green peppers reach full physical size and can be harvested for a crisp, mildly herbal culinary experience.
Days 80 to 100+: Ripening and Tangerine Color Shift
The peppers enter the breaker stage, shifting from pale green to golden apricot, and finally to deep tangerine orange. Full sugar and aromatic volatile concentration occurs in these final 15 days.
Indoor Pollination: The Secret to Bountiful Fruit Set
One of the most frequent complaints from indoor pepper growers is: ‘My habanada plant produces dozens of flowers, but they all dry up and fall off without setting fruit!’
In an outdoor garden, wind currents and foraging bumblebees provide natural vibration that dislodges pollen grains from the anthers onto the receptive stigma. Indoors, without air movement, self-pollination rarely happens automatically.
To achieve heavy fruit set, growers must take an active role. For broader foundational concepts and automated multi-tier LED setups, review our master manual on growing peppers indoors as well as our foundational guide on indoor pepper cultivation.
Three Highly Effective Hand-Pollination Methods
- Electric Toothbrush Buzz Pollination: Touch the vibrating back of an electric toothbrush or sonic wand against flowering stems for 2 to 3 seconds. The high-frequency vibration mimics the sonic buzz of a bumblebee, releasing a visible cloud of golden pollen directly onto the flower’s stigma.
- Fine Artist Paintbrush: Gently swirl a soft, dry camel-hair or sable paintbrush inside each open blossom around midday, transferring pollen grains between neighboring flowers.
- Gentle Canopy Shaking: Simply grasp the main stem or trellis wire twice daily around noon and vibrate the entire canopy vigorously for 5 to 10 seconds.
💡 Pollination Timing Pro Tip
Pepper pollen is most viable between 10:00 AM and 2:00 PM when grow lights have been running for several hours and relative humidity hovers around 55%. Avoid pollinating immediately after heavy misting, as wet pollen sticks together and cannot travel.
Growing Habanadas Outdoors: Hardening Off and Spacing
If you plan to grow habanada peppers outdoors in raised beds or patio containers, transitioning your indoor-started seedlings requires careful acclimation. Moving tender seedlings straight into blazing outdoor sunlight will instantly scorch foliage.
Begin the hardening off process 10 to 14 days before transplanting outdoors, once nighttime temperatures consistently remain above 55°F (13°C).
- Days 1–3: Place containers in dappled shade sheltered from strong wind for 2 to 3 hours per day, then bring them back inside.
- Days 4–7: Gradually increase direct morning sunlight exposure to 4 to 6 hours daily, closely monitoring soil moisture.
- Days 8–10: Leave plants in full sun throughout the afternoon, exposing them to gentle breezes that strengthen stem cellulose.
- Days 11–14: Allow plants to stay outside overnight if temperatures exceed 55°F, completing their adaptation.
Garden Spacing and Physical Support
Provide 18 to 24 inches of spacing between outdoor habanada plants in rows set 30 to 36 inches apart. If using outdoor containers, select heavy-duty 5-gallon or 7-gallon fabric pots filled with an organic, well-draining potting blend.
Because mature habanada plants grow wider than traditional narrow habaneros, install a tomato cage or sturdy bamboo stakes early in the season. A mature plant can carry over 50 dense peppers simultaneously, causing unsupported branches to snap under their own weight.
Harvesting Habanada Peppers: Green vs. Orange Maturity
When is a habanada pepper truly ready to pick? The answer depends on your intended culinary application and flavor preferences.
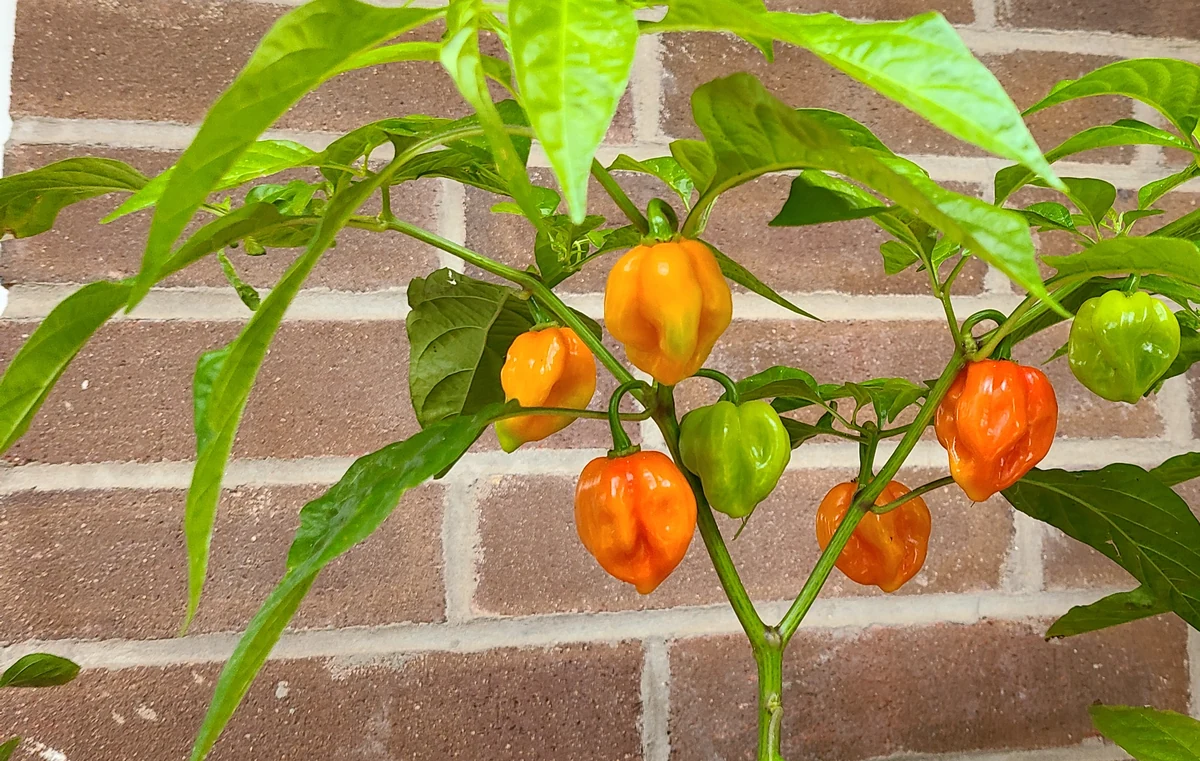
Habanada fruits embark on a mesmerizing color transition that spans roughly four weeks:
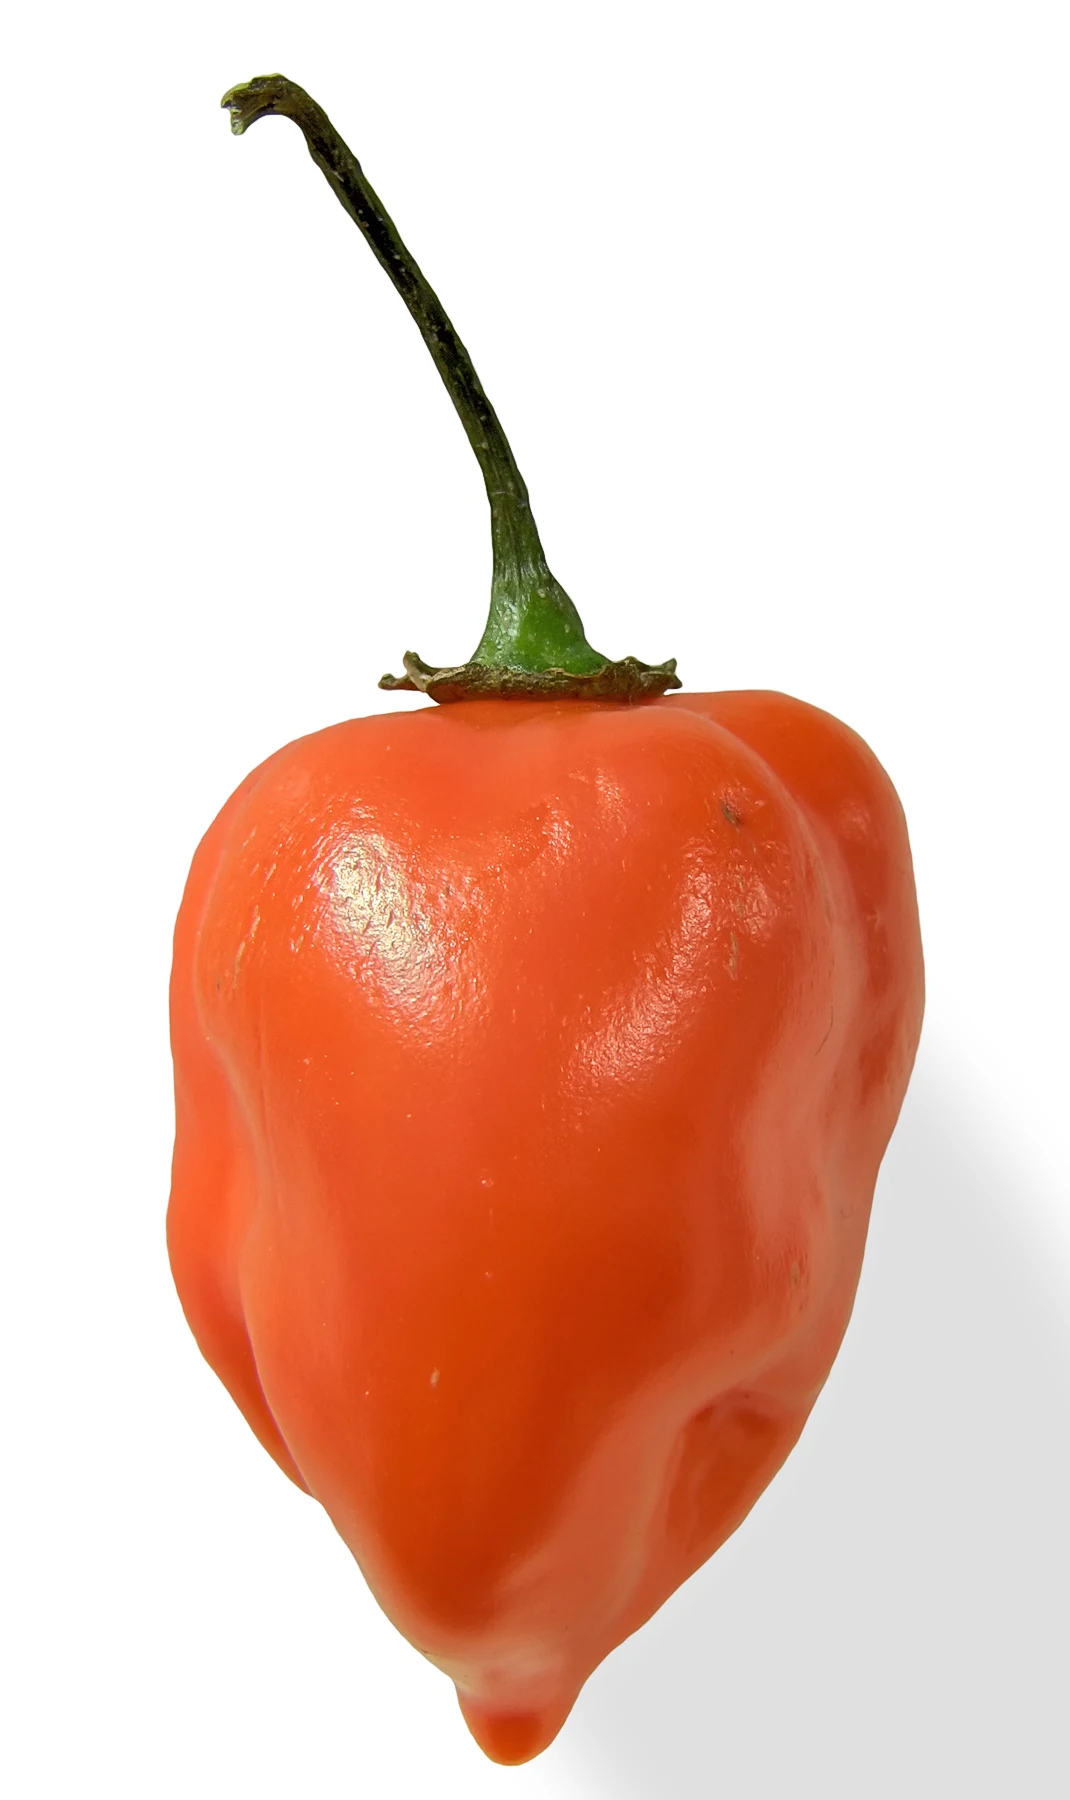
- Immature Green Stage (Days 65–75): The pods are pale, glossy lime-green with firm walls. They taste crisp, slightly tangy, and clean, reminiscent of a mild shishito or green bell pepper.
- Breaker Stage (Days 75–85): The skin softens slightly to a chartreuse yellow-green before blushing with apricot hues. Aromatic sweetness begins to synthesize.
- Full Tangerine Orange Ripeness (Days 90–105): The pepper glows with a brilliant, deep tangerine-orange finish. This is where the habanada reaches its pinnacle of floral perfume, juicy sweetness, and zero heat.
Proper Harvesting Technique
Always harvest habanada peppers using clean, sharp pruning shears or floral snips. Cut the stem roughly 1/2 inch above the calyx.
Never yank or pull peppers from the branch with your fingers. Capsicum chinense branches are brittle, and pulling often tears off entire fruiting nodes, severely curtailing future flower production.
Culinary Excellence: How to Use and Store Habanadas
Because the habanada pepper contains zero capsaicin, you can handle, slice, seed, and cook it without wearing rubber gloves. You will never have to worry about accidental eye burns or burning hands!
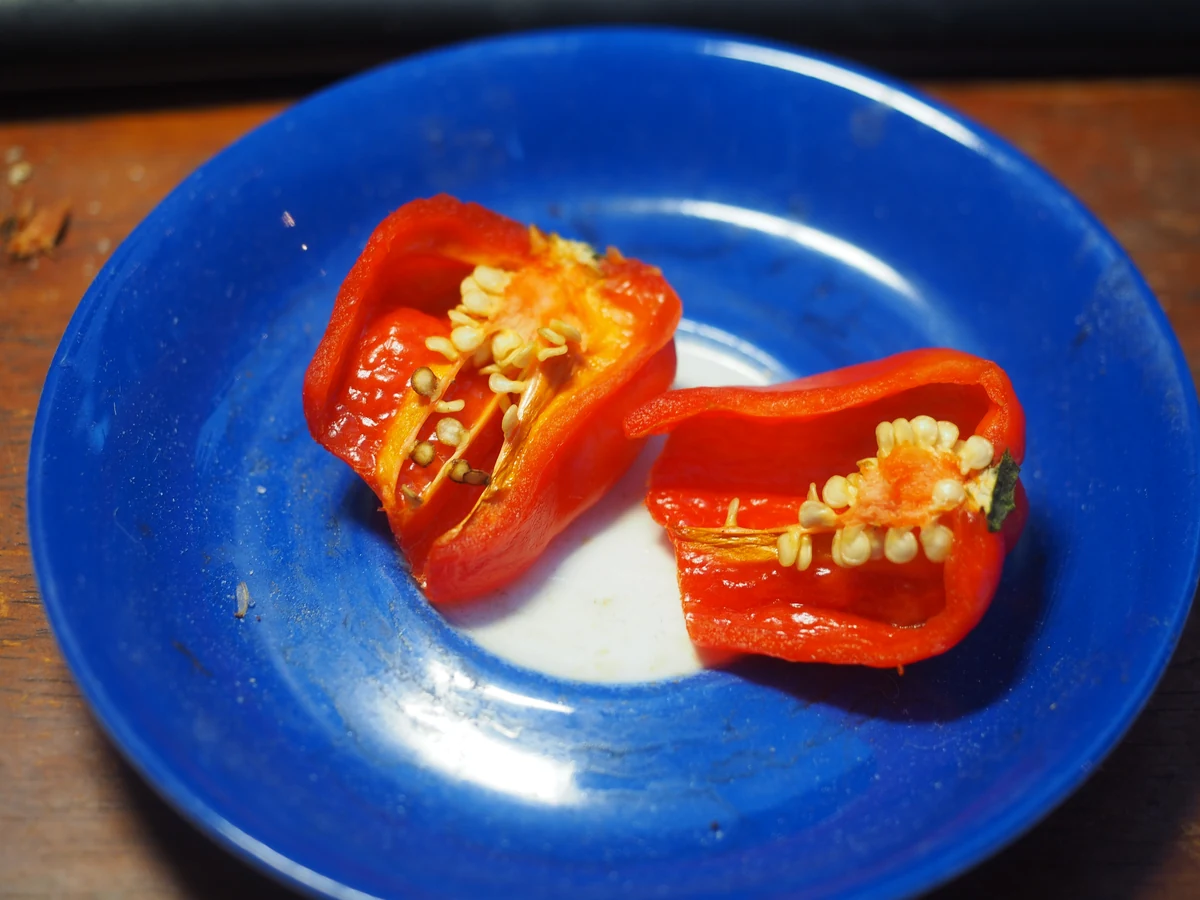
Exceptional Kitchen Uses for Fresh Habanadas
- Tropical Fruit Salsas: Dice ripe orange habanadas with mango, pineapple, red onion, cilantro, and lime juice for a dazzling salsa that everyone can enjoy regardless of spice tolerance.
- Heatless Habanero Hot Sauce: Blend roasted habanadas with garlic, carrots, apple cider vinegar, and sea salt. You achieve the world-famous complexity of Caribbean habanero sauces with a smooth, child-friendly finish.
- Dehydrated Pepper Powder: Slice peppers thinly and dehydrate at 125°F (52°C) for 10 hours. Grind into a brilliant orange seasoning powder that adds floral depth to grilled fish, chicken, and roasted vegetables.
- Artisanal Pepper Jellies: Simmer finely minced habanadas with raw sugar, pectin, and lemon juice to create an exquisite spread for brie, goat cheese, and crackers.
Storage and Preservation Guidelines
Refrigeration: Keep unwashed, freshly picked habanada peppers in a paper bag or perforated container in your refrigerator’s crisper drawer. They retain optimal crispness for 10 to 14 days.
Freezing: Wash, dry thoroughly, and halve peppers, removing seeds if desired. Flash-freeze on a baking sheet for 2 hours, then transfer into vacuum-sealed bags. Frozen habanadas retain their aroma for up to 12 months.
Troubleshooting Common Habanada Growing Problems
Even experienced growers occasionally encounter challenges when cultivating Capsicum chinense varieties. Here are proven diagnostic solutions to the four most prevalent habanada pepper issues:
1. Blossom Drop (Flowers Falling Off Without Setting Fruit)
Causes: High ambient temperatures exceeding 88°F (31°C), low relative humidity below 40%, excessive nitrogen fertilizer, or total lack of mechanical pollination.
Remedy: Lower grow room temperatures to 75°F–78°F, buzz flowers with an electric toothbrush daily, and transition nutrient solutions to a bloom formulation rich in potassium and phosphorus.
2. Blossom-End Rot (Sunken Black Spots on Fruit Bottoms)
Causes: Calcium deficiency in developing fruit tissue, frequently triggered by inconsistent watering or extreme reservoir EC swings rather than a true absence of calcium in the media.
Remedy: Maintain steady root zone moisture. Check that reservoir EC does not exceed 2.4 mS/cm and supplement with 3 mL/gallon of liquid calcium-magnesium.
3. Pale Green Leaves and Stunted Growth
Causes: Root zone saturation causing oxygen deprivation, cold root temps below 65°F, or nutrient lockout from pH drifting outside the 5.8–6.3 range.
Remedy: Test reservoir pH and calibrate meters. Ensure air pumps deliver a minimum of 1 liter of air per minute per gallon of reservoir solution.
4. Bland or Bitter Flavor in Harvested Peppers
Causes: Harvesting prematurely before fruits complete their chlorophyll breakdown and carotenoid synthesis.
Remedy: Allow peppers to remain on the plant until they turn completely deep tangerine orange. The final two weeks on the branch are where flavor compounds peak.
Frequently Asked Questions: 25 Common Queries Answered
Explore our comprehensive expert answers to the most common questions regarding cultivating, caring for, and enjoying the heatless habanada pepper.
The Bottom Line: Why the Habanada Belongs in Your Garden
The habanada pepper is truly in a league of its own. It successfully bridges the gap between the fiery, complex aromatics of gourmet chili peppers and the gentle, approachable crispness of sweet salad cultivars.
While the growing process demands extra patience during the 10-to-21-day germination period and slightly more vertical canopy room than micro-dwarfs, the reward is boundless. You gain abundant harvests of luminous tangerine lanterns that bring gourmet tropical fragrance to salsas, braises, and seasonings without searing anyone’s palate.
If you are ready to expand your indoor or outdoor pepper garden, be sure to explore our related master guides on how to grow peppers at home and our beginner-friendly indoor hydroponics guide.