⚡ Quick Summary: The Science of Mason Jar Hydroponics
Mason jar hydroponics using the passive Kratky method is the simplest, most reliable way to grow crisp loose-leaf lettuce, butterhead greens, and culinary herbs indoors without pumps, electricity, or aeration. A seedling is suspended in a net cup at the top of a wide-mouth glass jar filled with balanced hydroponic nutrient solution. As the plant absorbs water and transpires, the liquid level gradually recedes, creating an expanding humid air zone inside the jar.
Horticulturist Takeaway: Mason jar hydroponics succeeds because the plant develops two anatomically distinct root zones: upper adventitious air roots with oxygen-absorbing lenticels and lower water roots absorbing mineral ions. Two cardinal rules govern success: completely block light from reaching the glass to starve algae, and never refill a low reservoir past the halfway mark, as submerging air roots causes fatal root asphyxiation within 48 hours.
🔬 Sophia Reed’s Bench Notes & Field Disclosure
On my controlled environment agriculture (CEA) testing benches at Hydroponic Raise, I have cultivated hundreds of crops using mason jar hydroponics across 32-ounce quarts, 64-ounce half-gallons, and amber glass vessels. We run rigorous side-by-side trials testing dry commercial mineral salts against single-bottle liquids, comparing rockwool against coco coir plugs, and tracking exact pH and electrical conductivity drift from seed to harvest. We accept zero paid brand sponsorships. If you are exploring broader indoor setups, check out our foundational guides to indoor hydroponics for beginners, our full indoor hydroponic gardening guide, and our lab-reviewed tested indoor garden systems.
Core Principles for Mason Jar Hydroponics Success
- The Non-Drowning Air Gap Rule: Dr. Kratky designed this system so a single filling of nutrient solution carries a quick crop (like Butterhead lettuce) from seedling to harvest without ever refilling. If you must top off long-season herbs like basil, never fill past the bottom 1/3 to 1/2 of the jar.
- Total Light Blockout Is Mandatory: Algae requires light, water, and dissolved minerals. Clear mason jars create an ideal algae incubator. Completely wrap, paint, or sleeve the glass to prevent green slime from consuming your nitrogen and rotting roots.
- Condition Your Growing Media: Commercial rockwool cubes have a naturally alkaline pH of 7.5 to 8.5 due to residual manufacturing lime. Pre-soak rockwool in water adjusted to pH 5.5 for 30 minutes before sowing seeds to avoid stunted germination.
- Follow the Chemical Dissolution Order: Always mix dry hydroponic nutrients in strict sequence: dissolve MasterBlend first, then Epsom salt completely, and Calcium Nitrate last. Mixing them out of order triggers chemical precipitation, turning your nutrients into unusable milky sludge.
- Match Crop Demands to Jar Volume: A 32-ounce quart jar holds enough solution for one head of loose-leaf lettuce. Herbs that produce for months (like Genovese basil or mint) require a 64-ounce half-gallon jar to prevent rapid dry-out.
The Science of Mason Jar Hydroponics: Oxygen Roots vs. Water Roots
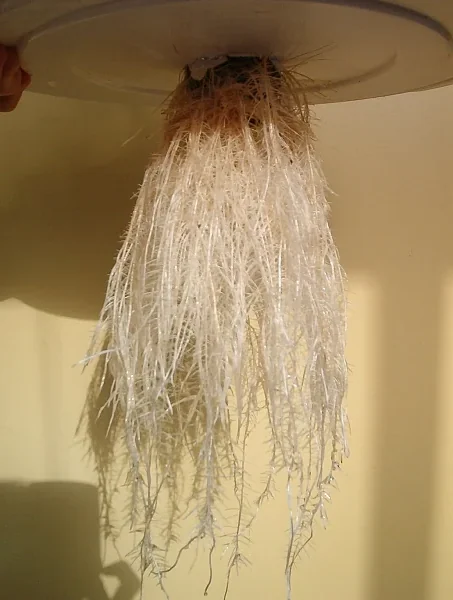
Most gardening blogs describe the Kratky method simply as ‘plants drinking water in a jar.’ That superficial description misses the elegant plant physiology that allows this system to function without an electric aquarium bubbler.
Dr. Bernard Kratky’s University of Hawaii Research
In traditional circulating hydroponic systems like Deep Water Culture (DWC) or Nutrient Film Technique (NFT), electric pumps continuously circulate water across roots or force dissolved oxygen into the liquid using air stones. If the power fails, dissolved oxygen drops to zero within hours, suffocating root cells.
In the late 1990s and early 2000s, Dr. Bernard Kratky published groundbreaking research at the University of Hawaii demonstrating (see Dr. Bernard Kratky’s landmark University of Hawaii CTAHR research publication) that horticultural crops could be cultivated to maturity in completely non-circulating, non-aerated nutrient solutions. The secret lies in the natural coordination between plant transpiration, root elongation, and atmospheric oxygen diffusion.
Morphological Differentiation: Two Specialized Root Zones
As a young seedling consumes the initial reservoir, the liquid level drops at a pace that mirrors the expansion of the root network. This dynamic creates two distinct, specialized anatomical root zones inside the jar: – Upper Oxygen Roots (Air Roots): The portion of the root system suspended in the humid, dark air space between the bottom of the net cup and the receding liquid surface. Exposed to high atmospheric oxygen concentrations (roughly 209,000 parts per million, compared to barely 8 parts per million of dissolved oxygen in standing water), these roots undergo morphological changes. They develop cortical aerenchyma tissue, open cellular lacunae, and specialized lenticel-like pores designed to absorb oxygen directly from the air and channel it downward into the root vascular core. – Lower Nutrient and Water Roots: The lower portion of the root system that remains submerged in the liquid reservoir. These roots possess dense root hairs optimized for ion exchange, absorbing water, nitrates, potassium, phosphorus, calcium, and trace minerals.
⚠️ HORTICULTURAL LAB WARNING: THE DEADLY REFILL MISTAKE
📌
📌
📌
Hardware Blueprint for Mason Jar Hydroponics: Jars, Net Cups, and Media
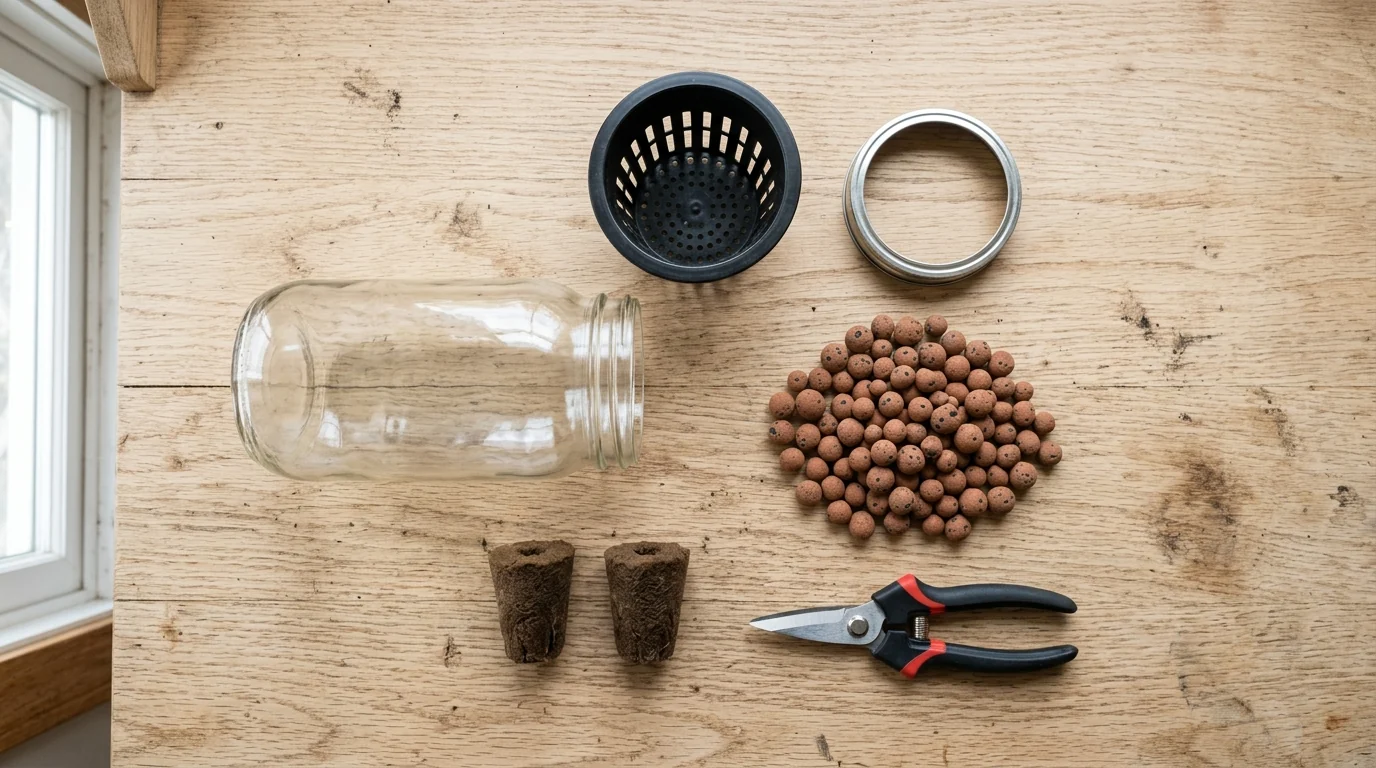
Assembling a high-yielding Kratky mason jar setup requires inexpensive parts, but using the correct dimensions makes the difference between a tidy kitchen harvest and a leaky, algae-choked mess.
Wide-Mouth vs. Regular-Mouth Glass Jars
Always choose wide-mouth mason jars (manufactured by Ball, Kerr, or Mason). Wide-mouth jars have a uniform 3-inch outer mouth diameter, which matches standard commercial 3-inch hydroponic net cups perfectly. Regular-mouth jars (2.375-inch mouth) require awkward 2-inch net cups that hold too little growing medium to stabilize mature crops. – 32-Ounce (1 Quart) Wide-Mouth Jar: The ideal container for loose-leaf lettuces (such as Butterhead, Black Seeded Simpson, or Little Gem). A 32-ounce volume holds roughly 850 milliliters of nutrient solution beneath the net cup, which precisely matches the transpiration demand of a single lettuce plant over its 35 to 45-day cycle. – 64-Ounce (Half-Gallon) Wide-Mouth Jar: The mandatory container for heavy-drinking, long-season crops like Genovese basil, bok choy, Swiss chard, and parsley. The 1,700-milliliter usable liquid volume provides enough thermal stability and nutrient reserve to support continuous cut-and-come-again harvesting for 8 to 12 weeks.
Net Cups and Lids
You have three options for seating the net cup into the jar neck: – The Threaded Metal Ring Technique: Take a standard 3-inch plastic hydroponic net cup, drop it into the mouth of the wide-mouth jar, and screw the threaded metal two-piece canning ring directly over the net cup flange. The ring clamps the cup securely in place without any cutting or adhesives. – Custom Hydroponic Mason Jar Lids: Injection-molded or 3D-printed opaque plastic lids featuring a central 2-inch or 3-inch recessed hole provide a permanent, rust-free, reusable seal. – DIY Hole-Cut Lids: Use a 3-inch hole saw to cut an opening in the solid metal canning lid disk, de-burr the sharp edges, and press the net cup through.
Growing Media Selection and Rockwool Conditioning
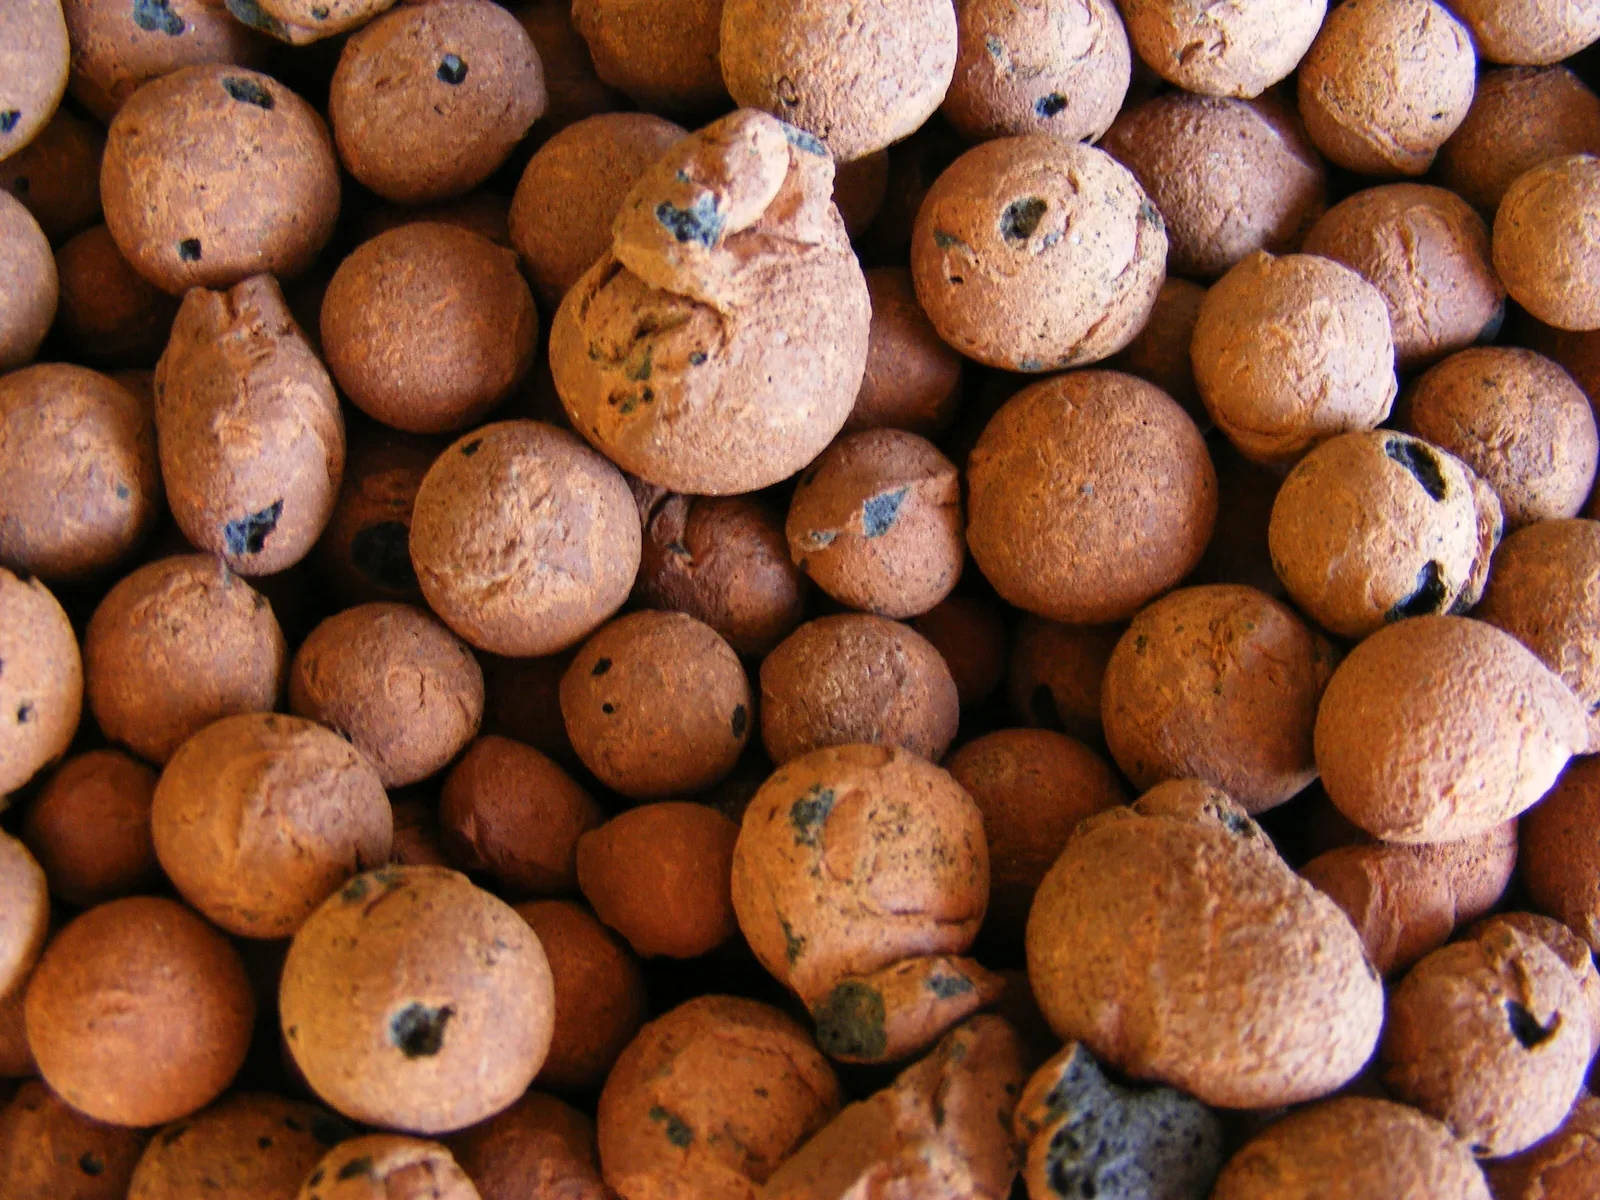
The growing medium anchors the seed or cutting inside the net cup and wicks initial moisture upward until roots penetrate the reservoir. – Rockwool Starter Plugs (1.5-inch): Manufactured by melting basalt rock and chalk into fine spun fibers. Rockwool holds 80 percent air and 20 percent water, offering an ideal oxygen-to-moisture ratio. However, fresh rockwool has a naturally alkaline pH (7.5 to 8.5) due to residual limestone. You must soak rockwool cubes in pH-adjusted water (pH 5.5) for 30 minutes before inserting seeds, or the alkaline salts will burn emerging radicles. – Expanded Clay Pebbles (LECA / Hydroton): Inert ceramic spheres kiln-fired from natural clay. LECA does not break down, provides outstanding drainage, and blocks light from penetrating through the net cup slots. Surrounding your rockwool plug with pre-washed LECA inside the net cup stabilizes the plant and prevents algae from colonizing the damp plug surface. – Rapid Rooters / Peat Plugs: Pre-formed organic sponge plugs made from composted tree bark and peat polymers. These have a naturally buffered pH (6.0 to 6.2) and require zero acid conditioning, making them an excellent alternative for beginners.
The Science of Light Blockout: Defeating Algae and Pythium
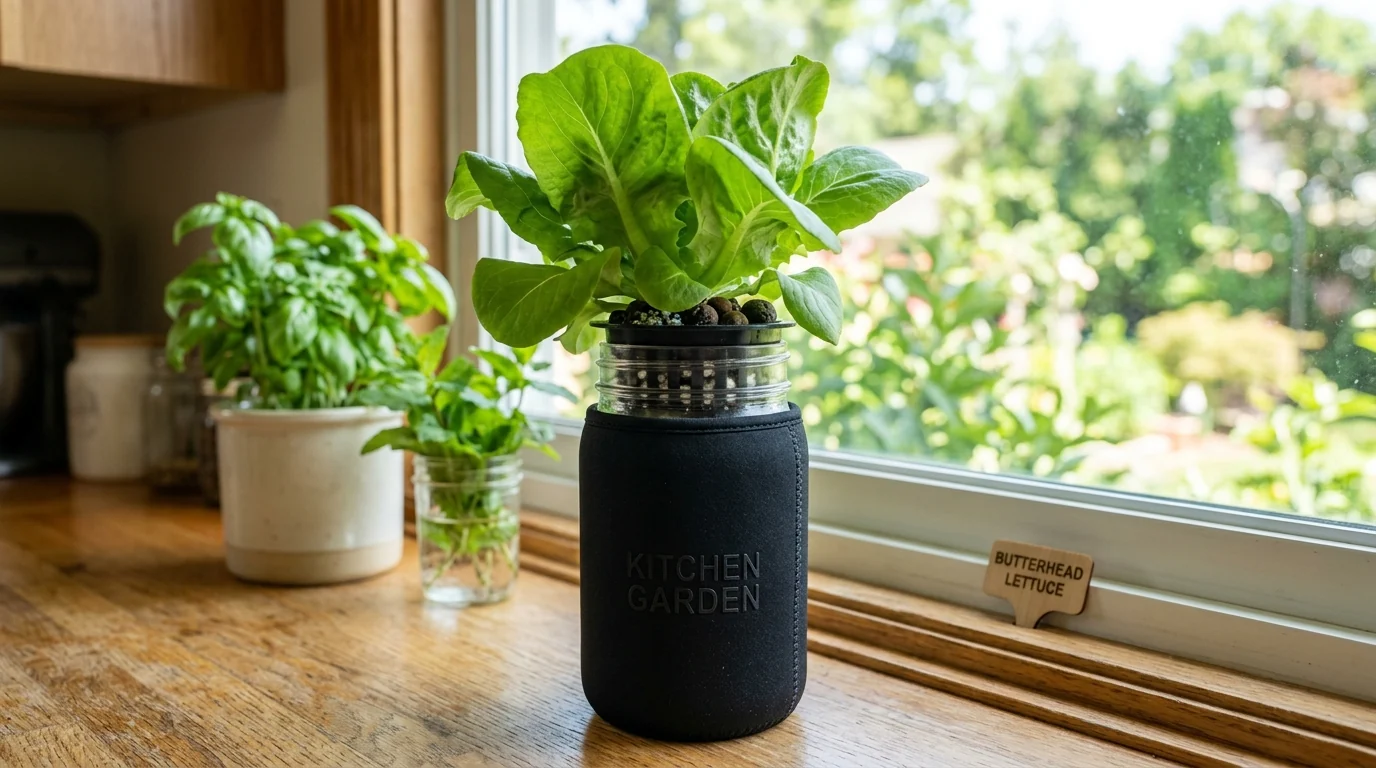
A clear glass jar filled with water, mineral salts, and placed in a sunny window creates a perfect biological incubator for single-celled green algae (Chlorophyta).
Why Algae Destroys Kratky Systems
Algae is not merely an aesthetic annoyance; it is a competitive photosynthetic organism. During daylight hours, algae absorbs dissolved nitrates, phosphorus, and iron, starving your vegetable crop. At night, algae shifts to respiration, consuming dissolved oxygen in the water and releasing carbon dioxide, which causes drastic pH swings.
As algae dies, decaying organic cellular debris settles to the bottom of the jar, creating an anaerobic sludge layer that breeds Pythium ultimum, the causal agent of catastrophic brown root rot. Total light exclusion is a mandatory biological requirement.
Evaluating Blackout Methods on the Workbench
In our Hydroponic Raise field trials, we tested five popular blackout methods for light permeability, durability, and aesthetics: – Custom Neoprene Blackout Sleeves: Crafted from 3mm dense closed-cell neoprene fabric with reinforced stitching. Neoprene blocks 100 percent of light wavelengths, insulates the water reservoir against rapid temperature swings on sunny windowsills, and slides off easily for root inspections. This is the gold standard for indoor growers. – Matte Black Spray Paint: Spray the exterior of clean glass jars with 2 coats of flat black primer, followed by a topcoat of decorative colored paint. This provides a permanent, scratch-resistant light barrier, but prevents you from inspecting water levels through the glass. – Heavy-Duty Aluminum Foil: Cheap and highly reflective, but tears easily, crinkles when handled, and looks industrial on a kitchen counter. If using foil, ensure you tape down all seams tightly. – Thick Black Athletic Socks: Commonly suggested on lifestyle blogs, but highly problematic. Knit cotton fabric stretches over glass, opening microscopic pores that leak up to 15 percent of ambient light, allowing stubborn algae films to colonize the glass walls.
Water Quality, Mineral Chemistry, and Mixing Protocols
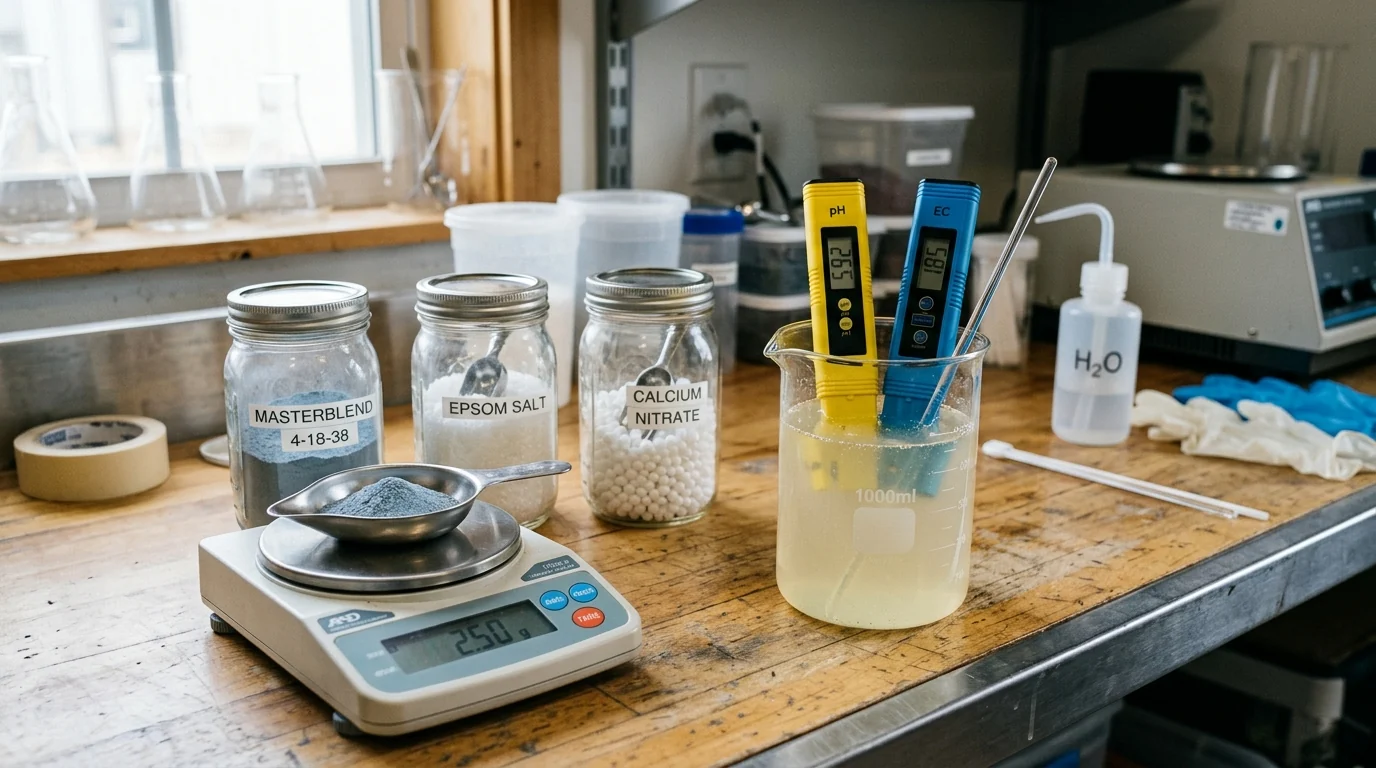
In non-circulating hydroponics, whatever you pour into the jar stays in the jar for weeks. Understanding water chemistry and nutrient ratios prevents fatal salt burn or nutrient lockout.
Municipal Tap Water vs. Reverse Osmosis (RO)
Start by evaluating your source water: – City Tap Water: Tap water with total dissolved solids (TDS) under 150 PPM (EC under 0.3 mS/cm) is generally acceptable. However, municipal water suppliers treat water with chlorine or chloramines to kill bacteria. While free chlorine dissipates into the air after 24 hours of standing in an open bucket, chloramines (chlorine bonded with ammonia) do not off-gas. You must treat chloramine-treated tap water with a few drops of aquarium water conditioner (sodium thiosulfate or ascorbic acid) to neutralize chloramines, which burn delicate root hairs. – Reverse Osmosis or Distilled Water: Filtered water stripped of all mineral salts (0 to 10 PPM) provides a completely clean slate. It eliminates carbonate alkalinity, stabilizes reservoir pH, and prevents unexpected mineral interactions.
The Commercial Standard: MasterBlend 3-Part Recipe
The most cost-effective and chemically balanced nutrient formulation for Kratky greens is the proven MasterBlend 4-18-38 powder formula, combined with Magnesium Sulfate and Calcium Nitrate.
🧪 PRECISION NUTRIENT PROTOCOL: THE MASTERBLEND FORMULA
📌
📌
📌
📌
📌
📌
Simple Liquid Alternatives for Beginners
If you prefer not to weigh dry powders with a gram scale, two pre-mixed liquid formulas deliver reliable results: – Dyna-Gro Foliage-Pro (9-3-6): A balanced 1-bottle complete liquid fertilizer with full micronutrients. Add 5 milliliters (1 teaspoon) per gallon of water for an instant, well-buffered leafy green solution. – General Hydroponics Flora Series: Use 5 ml FloraMicro, 5 ml FloraGro, and 2.5 ml FloraBloom per gallon of water, always adding Micro to the water first and stirring before adding Gro and Bloom.
Managing pH Drift in Closed Jars
In soil, organic humus buffers against pH changes. In a closed glass jar, the solution pH drifts over time as plant roots selectively absorb nutrient ions. When plants absorb negatively charged nitrate ions (NO3-), they release hydroxide (OH-) or bicarbonate ions into the water, driving the pH upward. If the pH climbs above 6.5, iron and zinc become insoluble, causing interveinal chlorosis (pale yellowing between green veins on new leaves).
Check your mixed nutrient solution with a calibrated digital pH pen before filling your jars. Adjust with a few drops of organic pH Down (phosphoric acid) until the liquid reads between 5.8 and 6.0.
Step-by-Step Mason Jar Hydroponics Build and Planting Walkthrough
Follow this verified bench protocol to set up your first Kratky mason jar in under 20 minutes.
Step 1: Sterilize Jars and Net Cups
Wash glass mason jars, net cups, and canning rings thoroughly in hot water with dish soap, or run them through a dishwasher sanitize cycle. Rinse with clean water. Sanitizing eliminates fungal spores and bacterial residues that cause seedling damping off.
Step 2: Condition and Seed the Rockwool Plugs
Submerge 1.5-inch rockwool starter cubes in water adjusted to pH 5.5 for 30 minutes. Gently shake out surplus water; never squeeze rockwool cubes with your hands, as squeezing crushes the delicate internal fiber matrix and reduces air porosity. Drop 2 to 3 seeds into the central hole (if you are new to starting seedlings, review our complete guide on how to start a vegetable garden from seed). Press the seed 1/4 inch deep and tear a tiny pinch of rockwool fiber from the corner to lightly cover the opening.
Step 3: Germinate Under a Humidity Dome
Place the seeded rockwool cubes in a shallow tray under a clear humidity dome in a warm room (70 to 75 degrees Fahrenheit). Keep the plugs moist with plain, pH-adjusted water. As soon as green cotyledons emerge (typically in 2 to 4 days for lettuce, or 5 to 7 days for basil), remove the humidity dome and position the seedlings under bright LED grow lights.
Step 4: Mix Nutrients and Fill the Jar
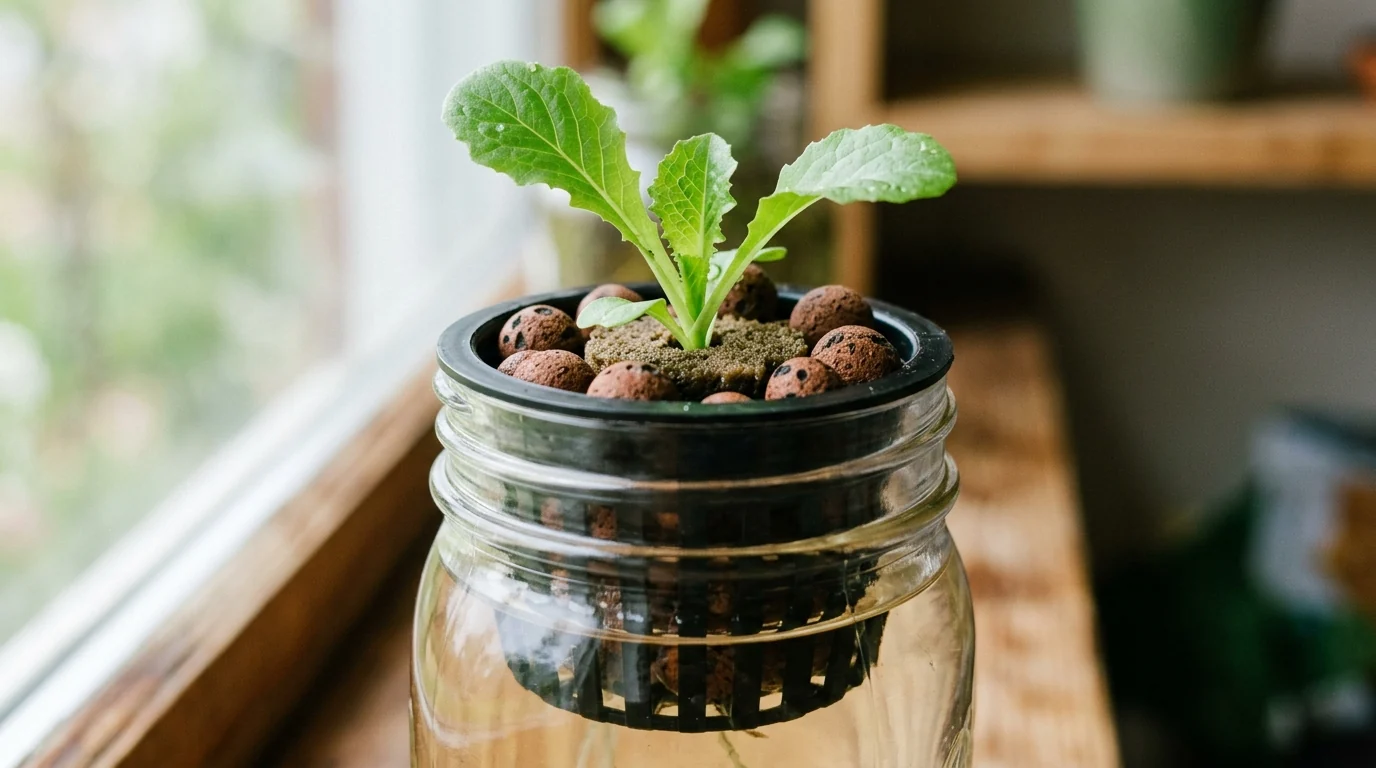
Mix your hydroponic nutrient solution according to the MasterBlend or liquid formula detailed above. Verify that the temperature of the water is between 65 and 70 degrees Fahrenheit (18 to 21 degrees Celsius). Fill the wide-mouth mason jar with solution until the liquid level reaches approximately 1/4 inch above the bottom mesh of your seated net cup.
Step 5: Assemble Net Cup, LECA, and Blackout Sleeve
Rinse a handful of expanded clay pebbles (LECA) under running tap water to remove clay dust. Place a single layer of LECA into the bottom of the 3-inch net cup. Seat the sprouted rockwool plug containing your strongest seedling in the center, and fill the surrounding space with clean LECA pebbles up to the rim. Slide the opaque neoprene sleeve over the exterior of the jar, screw the metal canning ring down over the net cup flange, and set the jar in its growing location.
Indoor Photobiology and Temperature Dynamics
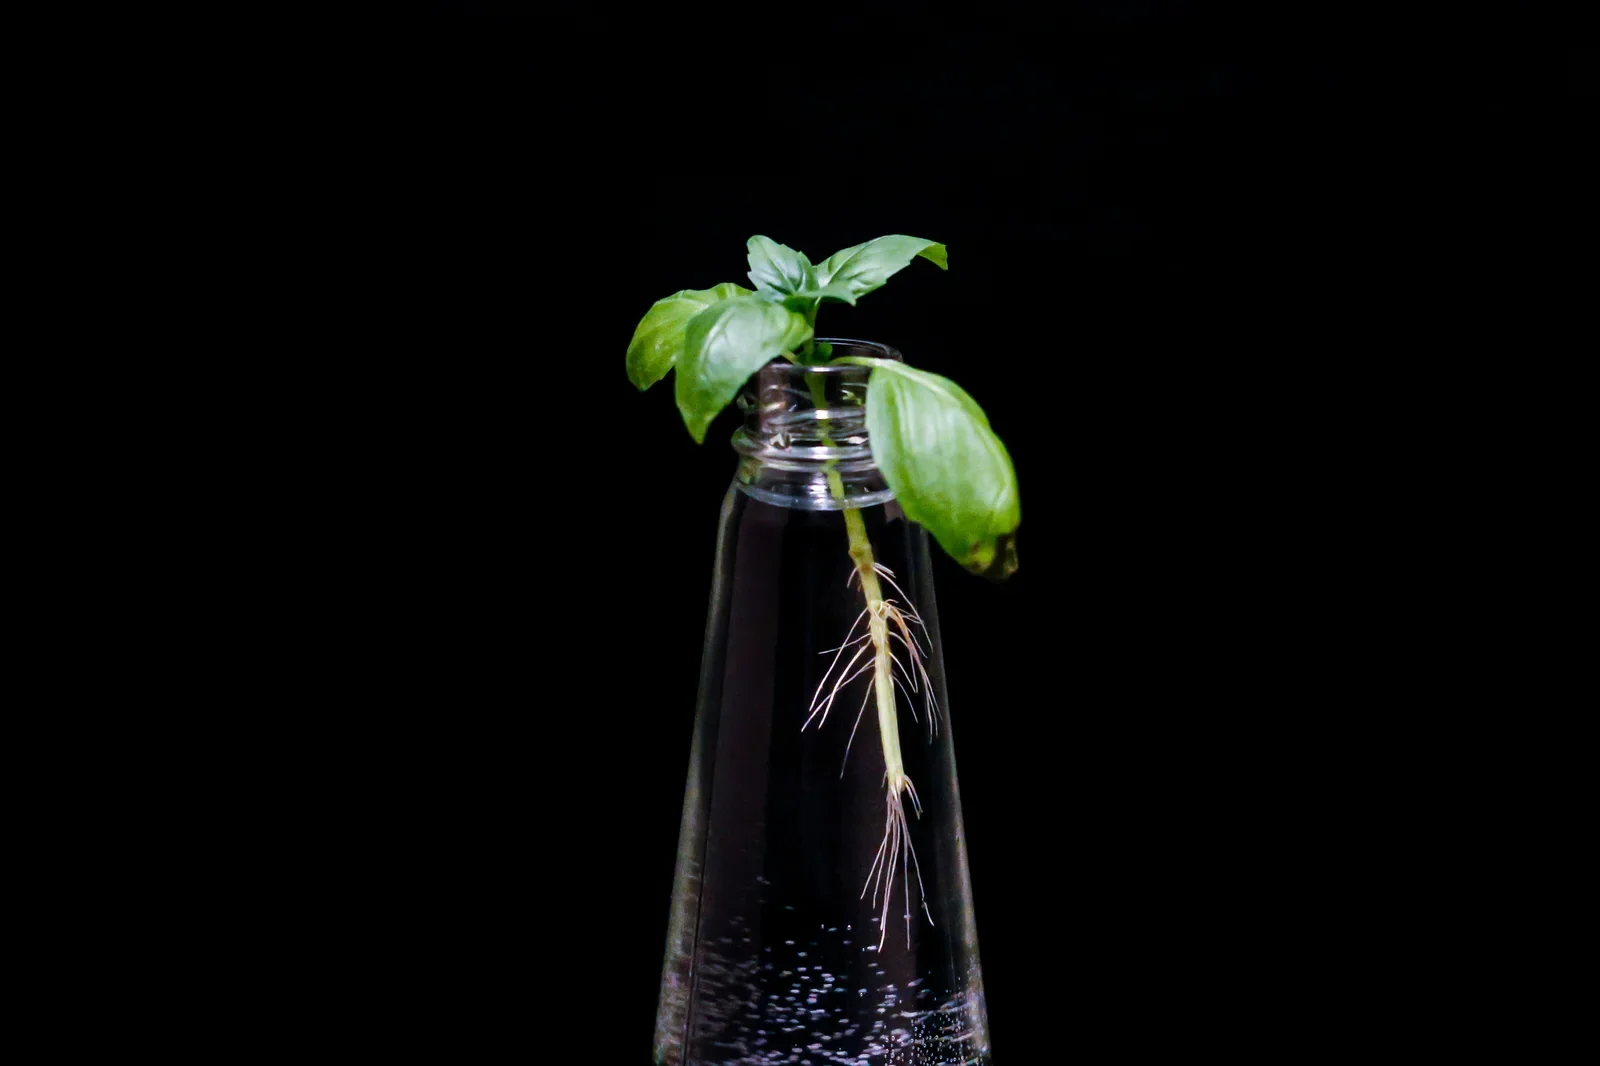
Because the Kratky method requires no electricity for water movement, the only environmental energy input you need to control is light and ambient temperature.
Windowsill Limitations vs. Full-Spectrum LEDs
Many beginner guides claim you can simply set a Kratky jar on any sunny windowsill. In practice, windowsills present three major horticultural obstacles: – Light Attenuation: Modern double-pane low-E glass windows reflect up to 70 percent of photosynthetic active radiation (PAR). Leafy greens grown on north- or east-facing windowsills become pale, leggy, and stretched, developing weak, floppy stems. – Thermal Swings: In winter, glass windows act as thermal sinks, chilling jar water down into the 40s. Cold reservoir water halts metabolic nutrient absorption. In summer, direct sunlight hitting glass jars turns the water into a 90-degree thermal bath, boiling roots and crashing dissolved oxygen. – The LED Solution: For consistent, restaurant-quality herbs and dense, crisp lettuce heads, place your jars under a full-spectrum LED grow light fixture. Provide a Daily Light Integral (DLI) of 14 to 17 mol/m²/day, operating on a 14 to 16-hour daily timer at a distance of 8 to 12 inches above the canopy.
Water Temperature Targets
Maintain the ambient room temperature between 68 and 75 degrees Fahrenheit (20 to 24 degrees Celsius), keeping the water reservoir inside the jar between 65 and 72 degrees Fahrenheit (18 to 22 degrees Celsius). If water temperatures climb past 75 degrees, dissolved oxygen plunges and opportunistic water molds thrive.
Best Crops for Mason Jar Hydroponics and Plants to Avoid
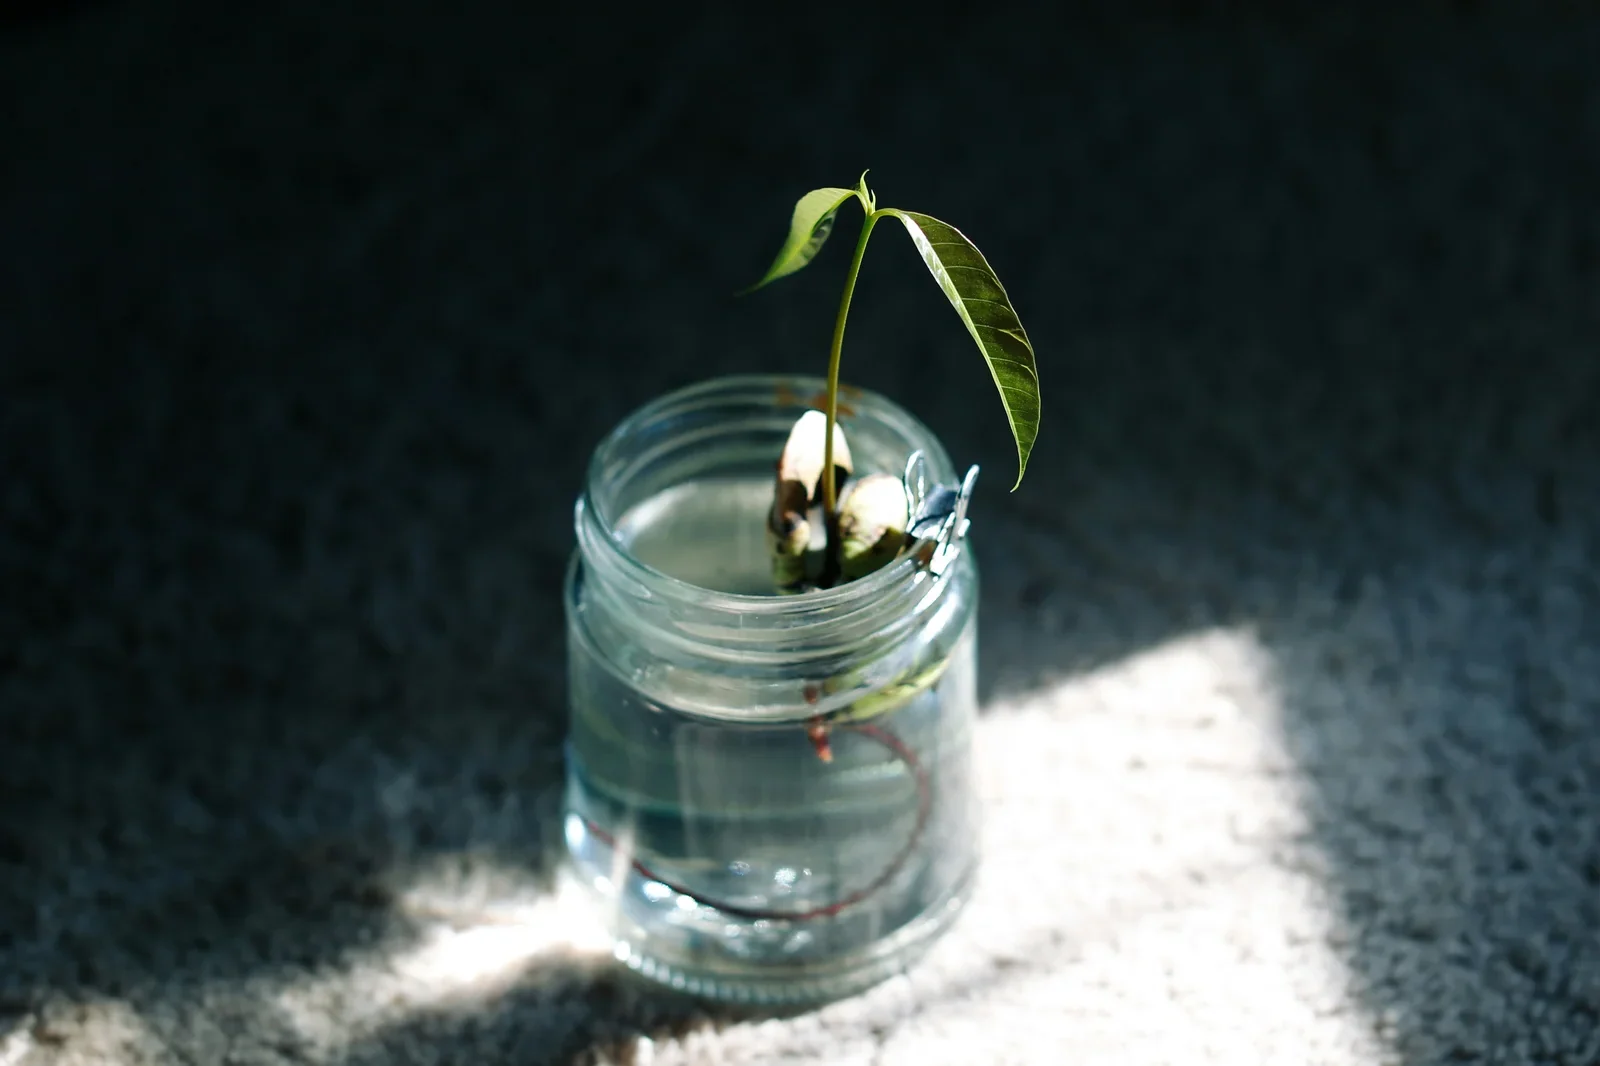
Not all vegetables can be grown in a 32-ounce glass container. Selecting plants that match the volumetric capacity of the jar is the key to effortless growing.
Top Tier: The Perfect Mason Jar Crops
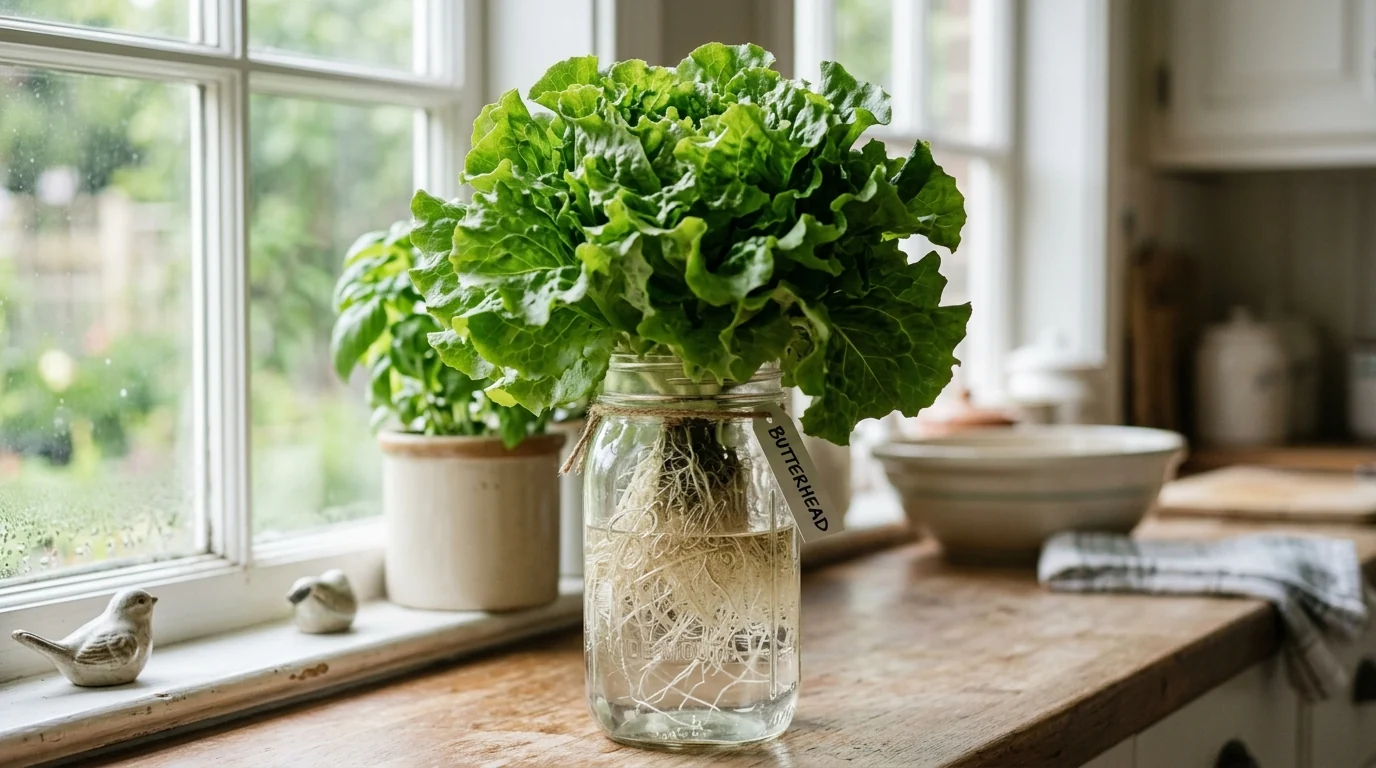
- Lettuce (Lactuca sativa): The undisputed champion of Kratky mason jars. Loose-leaf and butterhead varieties (such as Buttercrunch, Black Seeded Simpson, Red Sails, and Little Gem) consume roughly 700 to 900 ml of water during their lifecycle. The reservoir runs out right as the head reaches full culinary maturity at 35 to 45 days. You literally fill the jar once and harvest.
- Culinary Herbs (Basil, Mint, Oregano): Thrives in half-gallon (64-oz) jars. Genovese, Thai, and Lemon basil love constant root hydration. With cut-and-come-again harvesting of stem tips, a single half-gallon jar can produce fresh leaves for 3 to 4 months.
- Asian Greens (Bok Choy, Tatsoi): Dwarf pak choi, tatsoi, and chijimisai grow rapidly (see our complete chijimisai and mizuna growing guide for cold-hardy brassica protocols) in 32-oz jars, producing compact, nutrient-dense baby rosettes in 25 to 30 days with minimal nutrient consumption.
- Arugula: Compact arugula varieties deliver a sharp peppery crunch in 25 days, drinking very little solution before harvest.
The Problem Crops: What Never Belongs in a Mason Jar
Many beginner videos show people planting tomatoes, peppers, or cucumbers in quart mason jars. While a tomato seedling will grow for 3 weeks, mature fruiting nightshades transpire up to 1 gallon of water per day. In a quart mason jar, a tomato plant will drain the reservoir dry by 11:00 AM, topple the jar under its own weight, and wilt into dead straw before dinner. Fruiting crops require 5-gallon buckets or automated reservoir top-off systems; for full recommendations on fruiting plants, check out our honest guide on growing vegetables indoors.
Pest, Algae, and Disease Protocols for Mason Jar Hydroponics
Indoor hydroponics avoids soil-dwelling grubs and weeds, but sterile moisture can attract specific indoor greenhouse pests.
Fungus Gnats (Bradysia spp.)
Fungus gnats are tiny black flies that dart across the surface of the net cup. Their larvae feed on damp organic matter and tender young root hairs inside wet rockwool plugs.
🌱 ORGANIC GNAT CONTROL: THE BTI PROTOCOL
📌 Prevention:
📌 Biological Treatment:
Pythium Root Rot Rescue
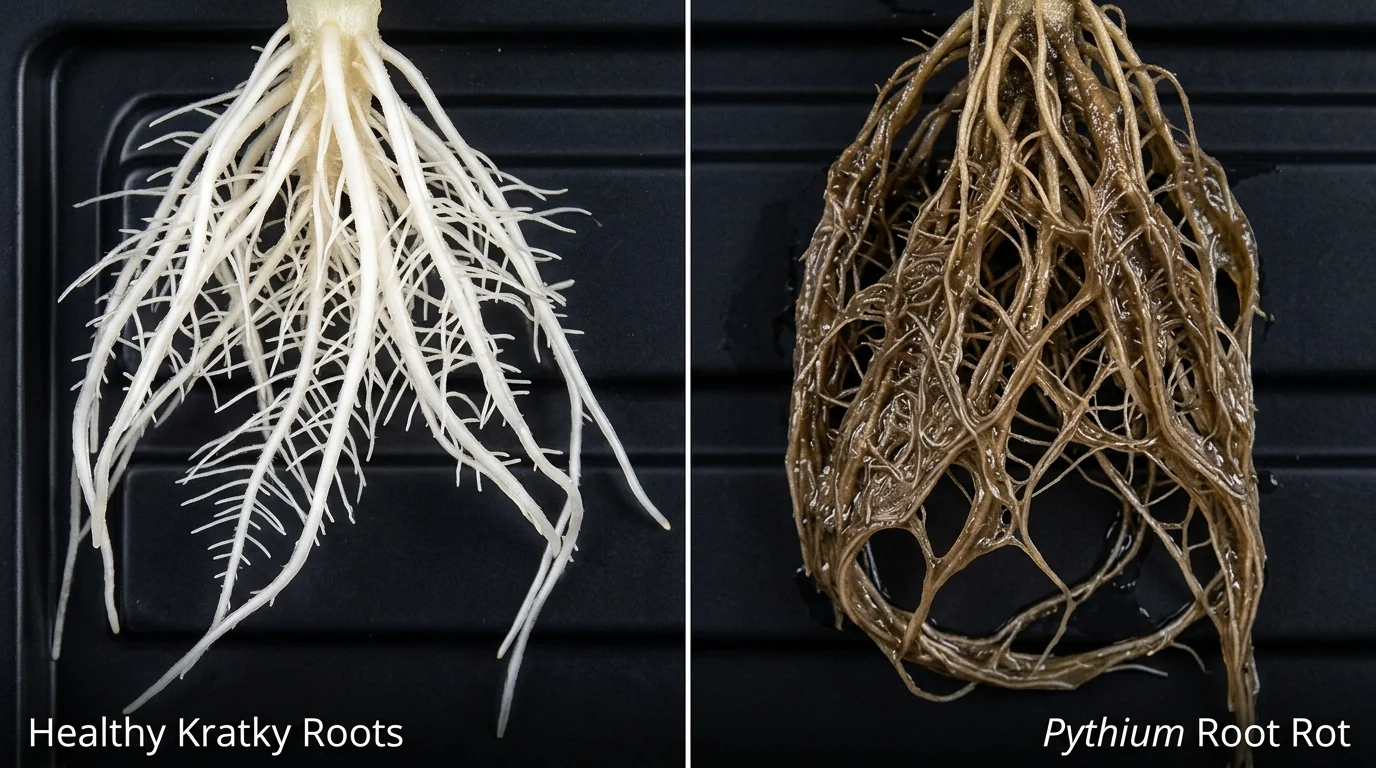
Healthy Kratky roots are pearlescent white, crisp, and smell like fresh spring rain. If you remove the net cup and see dark brown, slimy, stringy roots accompanied by a swampy, sour odor, Pythium root rot has colonized the reservoir.
Execute this emergency rescue protocol immediately: – Step 1: Mechanical Debridement: Lift the net cup out of the jar. Rinse the slimy roots gently under lukewarm running tap water, sliding your fingers down the root strands to strip away dead, decaying outer root sheaths until only firm inner vascular cores remain. – Step 2: Peroxide Sanitization: Submerge the rinsed roots in a clean glass containing a 3 percent food-grade hydrogen peroxide wash (diluted 1 tablespoon of peroxide per 1 quart of water) for 10 minutes. The peroxide fizzes on contact, oxidizing dead tissue and sterilizing anaerobic bacterial spores. – Step 3: Fresh Reservoir & Air Gap: Scrub the mason jar with hot soapy water and bleach. Refill with fresh, cool nutrient solution, remembering to observe the Halfway Air Gap Rule so you do not drown the surviving oxygen roots.
Master Comparison Matrices and Growth Roadmaps
Table 1: Kratky Mason Jar Crop Selection and Reservoir Sizing Matrix
| Crop Type | Recommended Cultivar | Minimum Jar Size | Harvest Cycle | Refill Needed? | Yield Expectation |
|---|---|---|---|---|---|
| Butterhead Lettuce | Buttercrunch, Little Gem | 32 oz (1 Quart) | 35 to 45 Days | No (100% True Kratky) | Single full 6 to 8 oz head |
| Loose-Leaf Lettuce | Black Seeded Simpson, Red Sails | 32 oz (1 Quart) | 30 to 40 Days | No (True Kratky) | 4 to 6 cut-and-come flushes |
| Genovese Basil | Sweet Italian, Emily Compact | 64 oz (Half-Gallon) | 60 to 90 Days | Yes (Top off at 1/2 mark) | Continuous weekly stem tips |
| Dwarf Bok Choy | Extra Dwarf Pak Choi | 32 oz (1 Quart) | 25 to 35 Days | No (True Kratky) | Crisp 4 to 5 oz rosette |
| Culinary Mint | Spearmint, Peppermint | 64 oz (Half-Gallon) | 60 to 120 Days | Yes (Bi-weekly top-off) | Aggressive ongoing harvests |
| Arugula | Astro, Rocket | 32 oz (1 Quart) | 25 to 30 Days | No (True Kratky) | Multiple peppery baby cuttings |
Table 2: Hydroponic Nutrient Formulation and Water Chemistry Guide
| Parameter | Target Range | Measurement Tool | Adjustment Method |
|---|---|---|---|
| pH Range | 5.8 to 6.2 (Acceptable 5.5 to 6.5) | Calibrated digital pH pen | Phosphoric acid (pH Down) / Potassium hydroxide (pH Up) |
| Electrical Conductivity | 1.0 to 1.4 mS/cm (500 to 700 PPM) | Digital EC / TDS meter | Dilute with pure water to lower; add nutrients to raise |
| Solution Temperature | 65°F to 72°F (18°C to 22°C) | Digital probe thermometer | Keep off hot windowsills; maintain room ambient at 70°F |
| Water Source | RO, Distilled, or Low-TDS Tap (<150 PPM) | TDS meter | Treat chloramines with sodium thiosulfate drops |
| Light Intensity (PPFD) | 200 to 300 µmol/m²/s (DLI 14-17) | Quantum PAR meter / Photone app | Adjust LED fixture height to 8 to 12 inches above canopy |
| Photoperiod | 14 to 16 Hours Daily | Digital 24-hour grounded timer | Set consistent day/night cycles to prevent premature bolting |
Table 3: Diagnostic Troubleshooting Matrix
| Observed Symptom | Likely Cause | Primary Root Cause | Corrective Action Protocol |
|---|---|---|---|
| Brown, slimy, foul-smelling roots | Pythium Root Rot | Warm water (>75°F) or refilling jar to top | Strip rotten roots; dip in 3% H2O2; observe Halfway Air Gap |
| Green film coating inside jar walls | Algae Bloom | Light leak through thin sock or jar collar | Install opaque neoprene sleeve; cover net cup rim with LECA |
| Stunted growth; purple lower leaves | Phosphorus Deficiency / Cold Water | Water temp 6.8) | Warm room to 72°F; calibrate solution pH down to 5.8 to 6.0 |
| New leaves yellow between veins | Iron Chlorosis | High pH (>6.5) locking out micro-iron | Lower solution pH to 5.8 using 2 drops of organic pH Down |
| Crispy brown leaf tips (tip burn) | Calcium Transpiration Deficit | Stagnant humid air around indoor canopy | Add a gentle oscillating fan; ensure 14-hour photoperiod |
| Plant wilts despite liquid in jar | Suffocated Air Roots | Jar was refilled to the top, drowning roots | Immediately dump 50% of water to expose air roots to oxygen |
Frequently Asked Questions: 25 Common Queries Answered
01
What is the Kratky method, and how does it work?
What is the Kratky method, and how does it work?
The Kratky method is a passive, non-circulating hydroponic growing system developed by Dr. Bernard Kratky. It requires no electricity, pumps, or aerators. A plant is suspended in a net cup over a nutrient solution reservoir. As the plant absorbs water, the liquid level recedes, creating a humid air gap where the plant develops specialized air roots to breathe oxygen directly from the atmosphere, while lower roots absorb water and nutrients.
02
Do you ever need to refill a Kratky mason jar?
Do you ever need to refill a Kratky mason jar?
For quick-growing crops like lettuce, you do not need to refill the jar; a 32-ounce jar holds enough solution to take the head to full harvest. For longer-season crops like basil, you will need to top off the reservoir, but you must strictly follow the Halfway Rule: never fill the jar more than 1/3 to 1/2 full, leaving the upper air roots exposed to oxygen to avoid drowning the plant.
03
Why did my plant die after I refilled the mason jar?
Why did my plant die after I refilled the mason jar?
Refilling the jar to the top submerges the plant’s specialized air roots. In a non-circulating Kratky system, the upper roots adapt to breathing atmospheric oxygen. Submerging them in standing, non-aerated water cuts off their oxygen supply, causing root asphyxiation, rapid tissue death, and fungal rot within 24 to 48 hours.
04
Can you use standard tap water for Kratky hydroponics?
Can you use standard tap water for Kratky hydroponics?
Yes, provided your tap water has total dissolved solids (TDS) below 150 PPM. However, municipal tap water containing chloramines must be treated with a water conditioner, as chloramines burn tender root tips. If your tap water is hard (over 200 PPM) with high mineral alkalinity, use reverse osmosis or distilled water to prevent nutrient lockout.
05
Why is green algae growing in my Kratky jar?
Why is green algae growing in my Kratky jar?
Algae growth occurs whenever light penetrates through the glass into nutrient-rich water. Algae competes with your plant for nitrogen and depletes dissolved oxygen at night. To stop algae, completely block all light by covering the jar with an opaque 3mm neoprene sleeve, matte black spray paint, or heavy-duty foil.
06
What is the best fertilizer to use for a Kratky mason jar?
What is the best fertilizer to use for a Kratky mason jar?
The premier choice is the MasterBlend 4-18-38 three-part dry powder recipe (MasterBlend, Epsom salt, and Calcium Nitrate). For a simpler 1-bottle liquid alternative, Dyna-Gro Foliage-Pro (9-3-6) mixed at 5 ml per gallon provides complete, well-buffered nutrition for leafy greens and herbs.
07
What size mason jar is best for hydroponics?
What size mason jar is best for hydroponics?
A 32-ounce (1-quart) wide-mouth jar is the ideal size for loose-leaf and butterhead lettuces, which drink the reservoir dry right as they mature. A 64-ounce (half-gallon) wide-mouth jar is best for long-lived, heavy-drinking herbs like basil, mint, and Swiss chard.
08
Do I need to adjust the pH of Kratky nutrient solution?
Do I need to adjust the pH of Kratky nutrient solution?
Yes. Plants absorb nutrients efficiently only when the solution pH sits between 5.5 and 6.5 (5.8 to 6.2 is ideal). If your pH drifts above 6.8, iron locks out, turning new leaves yellow. Use a digital pH pen and adjust with a few drops of phosphoric acid (pH Down).
09
Can you grow tomatoes or peppers in a Kratky mason jar?
Can you grow tomatoes or peppers in a Kratky mason jar?
No. While a tomato or pepper seedling will grow for the first few weeks, mature fruiting nightshades transpire up to a gallon of water per day. A quart mason jar will run completely dry in hours, causing the plant to collapse. Fruiting plants require 5-gallon buckets or automated top-off systems.
10
How long does it take to grow lettuce in a Kratky mason jar?
How long does it take to grow lettuce in a Kratky mason jar?
From seed germination, loose-leaf and butterhead lettuces typically reach full harvest maturity in 35 to 45 days. You can also begin harvesting outer baby leaves using the cut-and-come-again method around day 25.
11
Why are white crusty crystals forming on top of my clay pebbles?
Why are white crusty crystals forming on top of my clay pebbles?
White crust on LECA pebbles is normal mineral salt buildup. As the nutrient solution wicks upward through capillary action and evaporates from the surface, dissolved fertilizer salts precipitate out. It is harmless to mature plants, but can be rinsed off with fresh water if unsightly.
12
Do Kratky mason jars need an air pump or bubbler?
Do Kratky mason jars need an air pump or bubbler?
No. That is the fundamental advantage of the Kratky method. The dropping water level opens a natural air zone where roots absorb oxygen directly from the air, completely eliminating the need for noisy air pumps, cords, or electricity.
13
How much light does a Kratky mason jar need each day?
How much light does a Kratky mason jar need each day?
Leafy greens and herbs require 14 to 16 hours of light per day from a full-spectrum LED grow light positioned 8 to 12 inches above the canopy, or 6 hours of unobstructed, direct sunlight on a bright south-facing windowsill.
14
Can you reuse mason jars and net cups for the next crop?
Can you reuse mason jars and net cups for the next crop?
Yes. Wash glass jars, net cups, and clay pebbles thoroughly in hot soapy water and sanitize with a 10 percent bleach solution or boiling water between crops to eliminate fungal spores and bacterial pathogens.
15
What causes tiny black gnats flying around my hydroponic jar?
What causes tiny black gnats flying around my hydroponic jar?
These are fungus gnats (Bradysia spp.) breeding in damp, exposed rockwool plugs. Prevent them by covering the rockwool completely with dry LECA pebbles, or dissolve a small piece of a BTI mosquito dunk into your water to eliminate larvae organically.
16
Why are the roots in my Kratky jar turning brown?
Why are the roots in my Kratky jar turning brown?
Healthy roots are bright white. Brown roots indicate either organic staining from brown fertilizer liquids (which is harmless) or Pythium root rot (which is slimy and smells sour). If roots are mushy, trim dead tissue, dip in 3 percent hydrogen peroxide, and refresh the reservoir.
17
Can I start seeds directly in the mason jar net cup?
Can I start seeds directly in the mason jar net cup?
It is much better to sprout seeds in rockwool plugs or rapid rooters in a warm seedling tray under a dome first. Once the seedling has emerged and developed its first true leaves, transfer the plug into the net cup and place it into the jar.
18
What happens if a Kratky mason jar runs completely dry?
What happens if a Kratky mason jar runs completely dry?
If the reservoir empties completely, lower water roots will desiccate and die within 12 to 24 hours, causing the plant to wilt severely. Check jars weekly, especially during late-stage growth when mature canopies drink rapidly.
19
Can you grow strawberries in a Kratky mason jar?
Can you grow strawberries in a Kratky mason jar?
Strawberries can be grown in half-gallon mason jars, but they require careful management. Their crowns must stay completely dry above the net cup to prevent crown rot, and you must pollinate flowers manually indoors with a small artist brush.
20
Why do the leaf tips of my Kratky lettuce turn brown and crispy?
Why do the leaf tips of my Kratky lettuce turn brown and crispy?
Brown leaf margins indicate physiological tip burn, caused by localized calcium deficiency in rapidly expanding inner leaves. This occurs in stagnant, humid air where transpiration stalls. Position a small, gentle USB oscillating fan near your jars to circulate air.
21
Can you grow Kratky jars outdoors on a patio or deck?
Can you grow Kratky jars outdoors on a patio or deck?
You can, but outdoor jars are vulnerable to rain flooding the reservoir (which drowns air roots) and summer sun overheating the water past 85 degrees Fahrenheit. Outdoor jars must be shielded from rain and shaded from direct solar heating on the glass.
22
What is the difference between Kratky and Deep Water Culture (DWC)?
What is the difference between Kratky and Deep Water Culture (DWC)?
DWC uses an electric air pump and air stone to continuously saturate the water with dissolved oxygen, keeping the reservoir full. Kratky is completely passive, using zero electricity and relying on a receding water level to expose upper roots to air.
23
Can I use regular potting soil in the net cup instead of rockwool?
Can I use regular potting soil in the net cup instead of rockwool?
No. Potting soil will wash through the net cup slots into the water, turning the reservoir into a muddy, anaerobic sludge that rots roots and breeds bacteria. Always use sterile, inert hydroponic media like rockwool, coco plugs, or LECA.
24
How do I harvest basil from a Kratky mason jar for ongoing growth?
How do I harvest basil from a Kratky mason jar for ongoing growth?
Snip stem tips just above a set of healthy leaf nodes using clean shears, leaving at least 2 to 3 sets of lower leaves on the plant. Two new branches will sprout from each cut stem, transforming your plant into a bushy, high-yielding herb factory.
25
Are Kratky mason jar vegetables as nutritious as soil-grown vegetables?
Are Kratky mason jar vegetables as nutritious as soil-grown vegetables?
Yes. Peer-reviewed horticultural studies show that hydroponically grown leafy greens contain identical or superior levels of vitamin C, beta-carotene, iron, and antioxidants compared to soil-grown crops because plants receive optimal, balanced mineral nutrition without drought stress.