⚡ Quick Answer
Peppers thrive indoors under LED grow lights, producing full harvests 10–14 weeks after transplanting. They need 14–16 hours of light daily, temperatures of 70–85°F, and slightly acidic conditions (pH 6.0–6.5 in soil, 5.8–6.2 in hydroponics). Consistent watering and calcium-rich nutrients prevent blossom end rot and dropped flowers.
Your pepper plant is not being dramatic. It is telling you, in the only language it has, that it needs more light.
Almost every indoor gardener experiences the exact same heartbreak in their first season. You plant a pepper seed, nurture it on an apartment windowsill, and watch with pride as it produces a dozen delicate white blossoms. Two weeks later, every single flower turns yellow at the base, snaps off the stem, and falls onto the windowsill. The plant sits barren. You assume you failed, blame your soil or water, and dump the pot in the compost.
That failure was not a mystery, and it was not a lack of innate gardening ability. It happened because fruiting plants operate on rigid biological energy budgets. Indoors, without outdoor wind to vibrate pollen loose or strong photosynthetic photons to manufacture sugars, a pepper plant drops its flowers as an act of self-preservation.
Indoor pepper growing is not a temporary waiting room for spring seedlings destined for an outdoor garden bed. When you understand the plant’s true botanical nature, your home becomes a permanent, climate-controlled growing space where peppers thrive as productive, woody perennials that yield fresh harvests twelve months a year.
✓ Key Takeaways for Indoor Pepper Growers
- Peppers are perennials, not annuals: In frost-free native environments, Capsicum species live and fruit for years. An indoor pepper given stable warmth and light can produce continuous crops across multiple seasons.
- Variety choice governs success: Compact varieties like Thai chilies, Shishitos, and Habanadas thrive in small pots under modest lights. Full-sized bell peppers require massive root volumes and commercial-grade light intensity.
- Light is the limiting indoor factor: Window glass filters out critical photosynthetic light. Most indoor blossom drop traces directly to low photon volume rather than watering or fertilizer mistakes.
- Hand pollination takes thirty seconds: Because indoor rooms lack outdoor air turbulence and pollinating insects, flowers require gentle mechanical vibration to shed pollen and set pods.
- Pruning keeps plants compact and productive: Strategic cuts control height, stimulate dense multi-branching, improve air circulation, and channel carbohydrates into ripening fruit.
Why Grow Peppers Indoors: Environmental Control vs. Outdoor Variables
According to cultivation guidelines from the New Mexico State University Chile Pepper Institute, Capsicum cultivars require stable root zone temperatures and consistent high-intensity lighting (PPFD 450+ µmol/m²/s) to set abundant blossoms indoors without premature flower drop.
The primary advantage of indoor pepper growing boils down to one word: control.
Outdoor pepper growers are constantly at the mercy of unpredictable weather events. Late spring frosts kill young transplants in May. Scorching midsummer heatwaves above 90°F turn pollen sterile and cause blossom drop. Autumn storms break heavy branches, and an early freeze in October destroys unripened pods. In cool, short-season northern climates, long-season tropical peppers like Ghost Peppers or Scotch Bonnets rarely ripen before winter sets in.
Indoors, you eliminate these variables entirely. You dictate the temperature, you manage the photoperiod with an automated light timer, and you prevent outdoor soil-borne pathogens from invading your root zone. You can germinate tropical seeds in November, harvest sweet or spicy peppers throughout January, and keep rare cultivars alive for years.
The Botanical Reality: Peppers Are Tender Perennials
Most commercial seed packets label peppers as “annuals.” That classification is an agricultural convenience, not a botanical fact. According to botanical data from the University of Georgia Extension and the Royal Horticultural Society, all cultivated Capsicum species are tender woody perennials native to tropical South and Central America (hardiness zones 10 through 12).
Outdoor plants die each winter solely because freezing frost ruptures their cell walls. When protected from temperatures below 55°F (13°C) and provided with steady light, a pepper plant continues growing, developing a woody, bonsai-like trunk and producing heavy harvests for three to five consecutive years.
There is an honest trade-off to acknowledge: an indoor pepper grown in a two-gallon container will produce smaller individual pods and a lighter total harvest weight than an identical plant growing in full outdoor ground sun with unrestricted root space. However, an indoor plant yields steadily across all twelve months of the year, transforming a single seed into a multi-year household staple.
Understanding Pepper Plants: Anatomy, Growth Stages, and Physiology
Understanding your plant’s basic botanical structure ensures you make informed decisions about pruning, watering, and feeding rather than guessing.
Peppers belong to the nightshade family (Solanaceae), sharing kinship with tomatoes, eggplants, and potatoes. A pepper plant grows from a primary central stem, producing alternating leaves. Once the seedling reaches eight to twelve inches tall, the main stem terminates into a natural “Y” fork. That fork marks the reproductive transition: the plant begins developing side branches and pushing flower buds at every subsequent node.
If you are growing unmarked seedlings or want to identify species by leaf shape, growth habit, and calyx margins, read our guide on identifying pepper plants.
The Four Growth Stages of an Indoor Pepper
- Stage 1: Germination and Cotyledon (Days 1 to 21): The seed absorbs warmth and moisture, pushing out a primary taproot and two smooth, non-serrated embryonic leaves (cotyledons). The plant relies entirely on seed energy reserves.
- Stage 2: Vegetative Canopy Development (Weeks 3 to 8): True leaves expand, main stem thickens, and root systems colonize the container. High nitrogen demand fuels chlorophyll synthesis and leafy branch formation.
- Stage 3: Flowering and Pollen Shed (Weeks 8 to 14): The plant develops perfect, self-fertile flowers containing both male anthers and female stigmas. Demand for nitrogen drops while requirements for phosphorus and potassium surge.
- Stage 4: Fruit Set, Swell, and Ripening (Weeks 14 to 22+): Pollinated ovaries swell into pods. The plant transports starches and minerals into fruit walls. Pods reach mature size green, then undergo enzymatic changes to convert starches into sugars and synthesize mature color pigments.
Choosing the Right Pepper Variety for Your Indoor Space
For an updated 2026 grower manual featuring multi-tier LED shelving, automated drip systems, and phased organic liquid nutrients, explore our complete master guide on growing peppers indoors. You can also explore specialized cultivars in our guides on the fiery Thai pepper plant and heatless Habanada pepper.
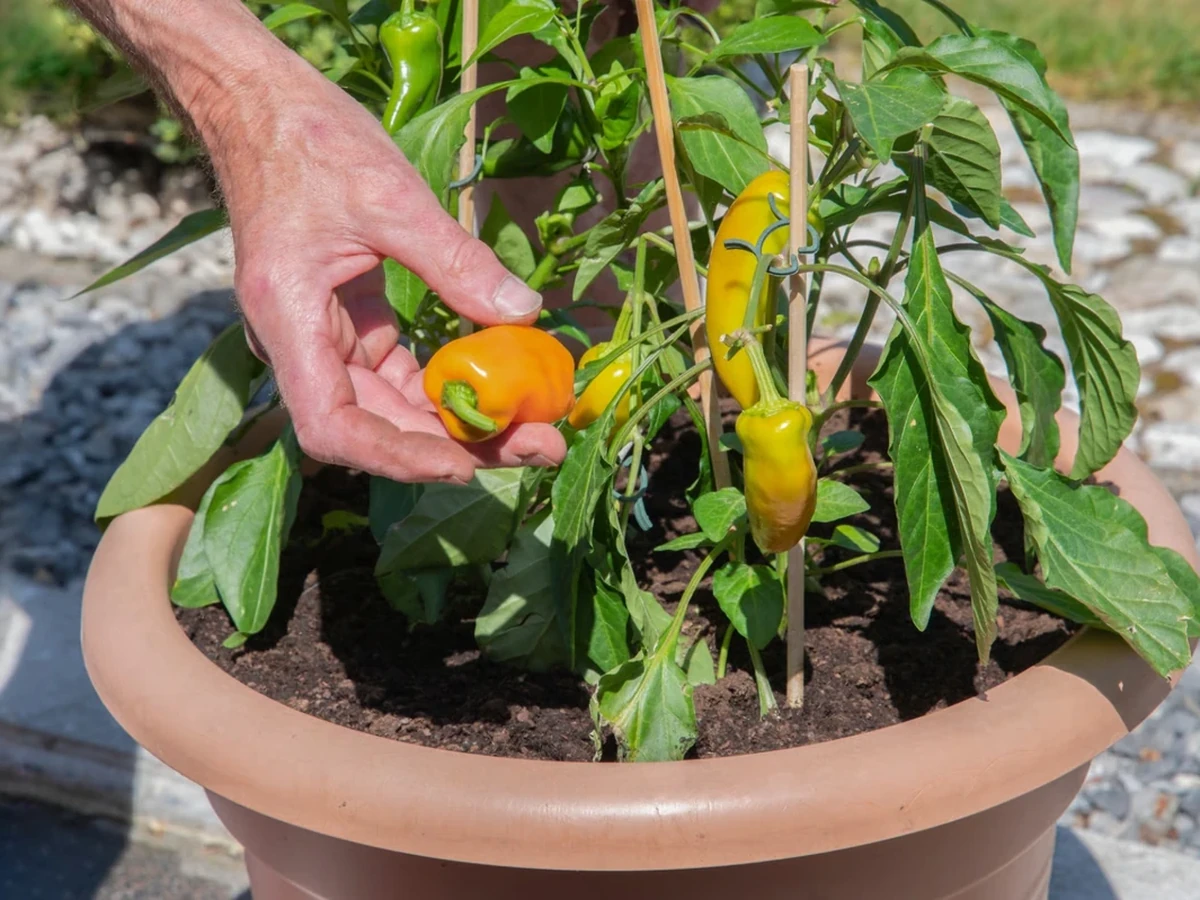
Variety selection is the single decision that makes or breaks an indoor grow. Attempting to grow a massive, late-season California Wonder bell pepper on an apartment desk under a weak desk lamp leads directly to disappointment. Bell peppers demand huge root systems (five gallons minimum) and massive amounts of light energy to fill out thick fruit walls.
Conversely, compact cultivars bred for smaller container volumes fruit heavily under modest light setups. Evaluate your variety choice across three concrete physical parameters:
- Vertical and horizontal clearance: Compact varieties stay under 18 inches tall and 14 inches wide. Large cultivars easily sprawl past 36 inches.
- Light infrastructure: If growing on a bright windowsill, choose early-maturing, lower-DLI varieties. If running a 150-watt LED panel, you have the light capacity for any variety.
- Kitchen consumption: Prioritize varieties you will actually eat. High-yield hot varieties produce hundreds of pods; sweet or heatless types provide daily snacking.
For detailed variety profiles, check our deep-dive guides on habanada peppers for zero-heat tropical growing, growing Thai chili peppers indoors for high-density windowsill production, and our review of ornamental pepper plants for compact, decorative specimens.
Setting Up Your Indoor Growing Environment
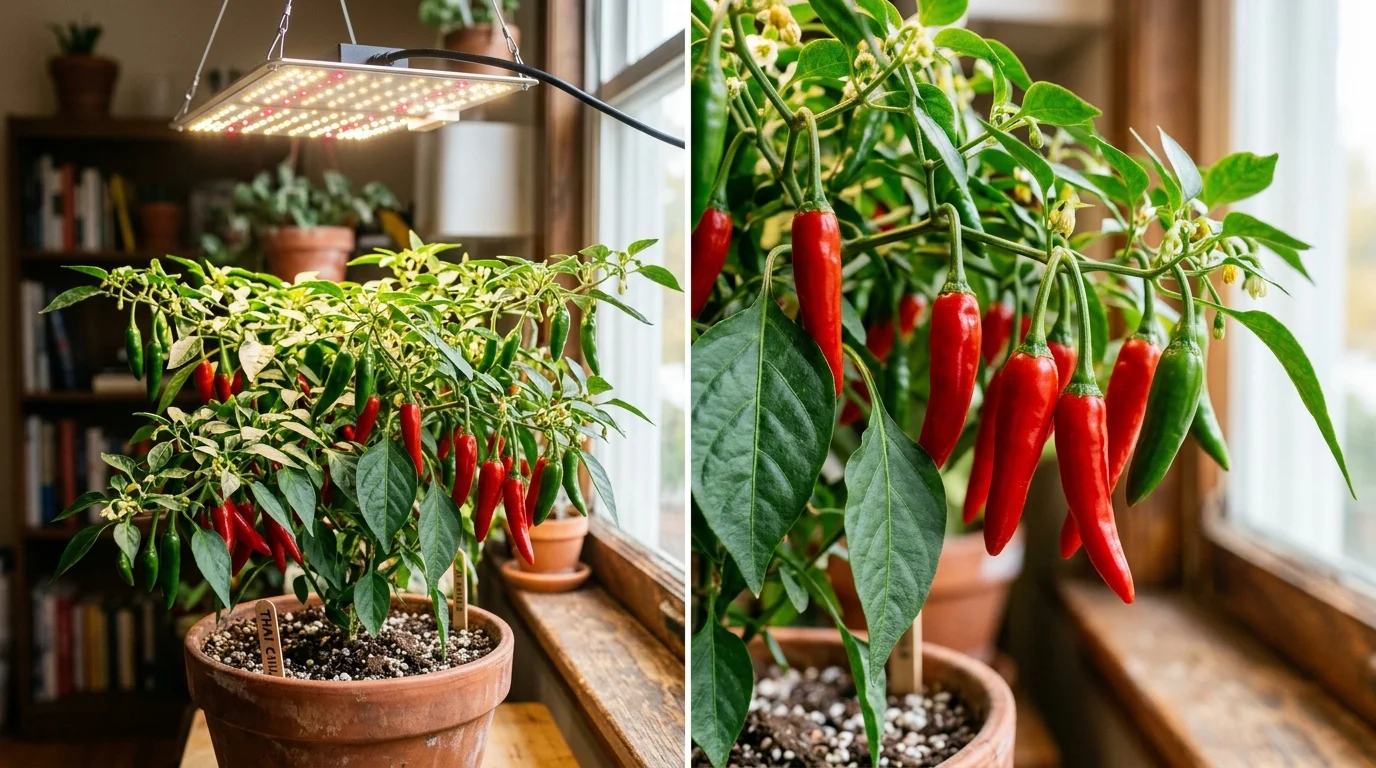
An indoor growing setup operates as an integrated biological system. If your light is brilliant but your room sits at 58°F, the plant stalls. If your warmth is ideal but your container lacks drainage, roots drown. Balance the four environmental pillars to guarantee success.
For a detailed breakdown of equipment options and shelf setups, read our complete guide on growing peppers indoors.
Indoor Setup Audit: Pass / Fail Thresholds
- Photoperiod & Intensity: Minimum 14 to 16 hours of daily light. Pass: A full-spectrum LED panel delivering 400–600 µmol/m²/s PPFD at canopy level. Fail: An unshaded windowsill in winter or a low-wattage desk bulb.
- Temperature Range: Daytime 72°F to 82°F (22°C to 28°C); Nighttime 62°F to 68°F (17°C to 20°C). Pass: Steady indoor warmth without drafts. Fail: Night temperatures dropping below 58°F or heat spikes over 92°F.
- Container Volume & Drainage: 2 to 3 gallons for compact types, 5 gallons for large plants. Pass: Plastic nursery pots or fabric pots with open drainage holes. Fail: Sealed decorative ceramic planters without bottom holes.
- Relative Humidity: Ideal range between 45% and 65%. Pass: Moderate indoor humidity with a small pebble tray or room humidifier in winter. Fail: Ultra-dry radiator heat below 25% causing leaf curl.
- Canopy Airflow: Pass: A small oscillating clip fan set on low to circulate air, prevent edema, and strengthen main stems. Fail: Stagnant, dead closet air encouraging fungal spores.
Starting Peppers from Seed: Step-by-Step
Custom Milestone Timeline: Indoor Growing Cycle Planner
Track week-by-week milestones from germination to harvest with custom lighting hours, pruning dates, and nutrient schedules for your specific crops.
Pepper seeds have dense seed coats that require consistent moisture and high soil temperature to soften and initiate embryo growth.
- Soil Preparation: Use a fine, soilless seed-starting mix composed of finely milled peat moss or coco coir blended with fine perlite. Pre-moisten the mix with warm water until damp to the touch without dripping.
- Sowing: Plant seeds 1/8 to 1/4 inch deep. Gently tamp the surface to eliminate air pockets around the seed coat. Mist the surface with room-temperature water.
- The Bottom-Heat Advantage: Set your seed flat directly onto a seedling heat mat calibrated between 80°F and 85°F (27°C to 29°C) and cover with a clear humidity dome. Expert Benchmark: At 85°F, standard pepper seeds sprout in 7 to 9 days. On an unheated 68°F windowsill, the exact same seeds require 20 to 25 days or rot in cold substrate.
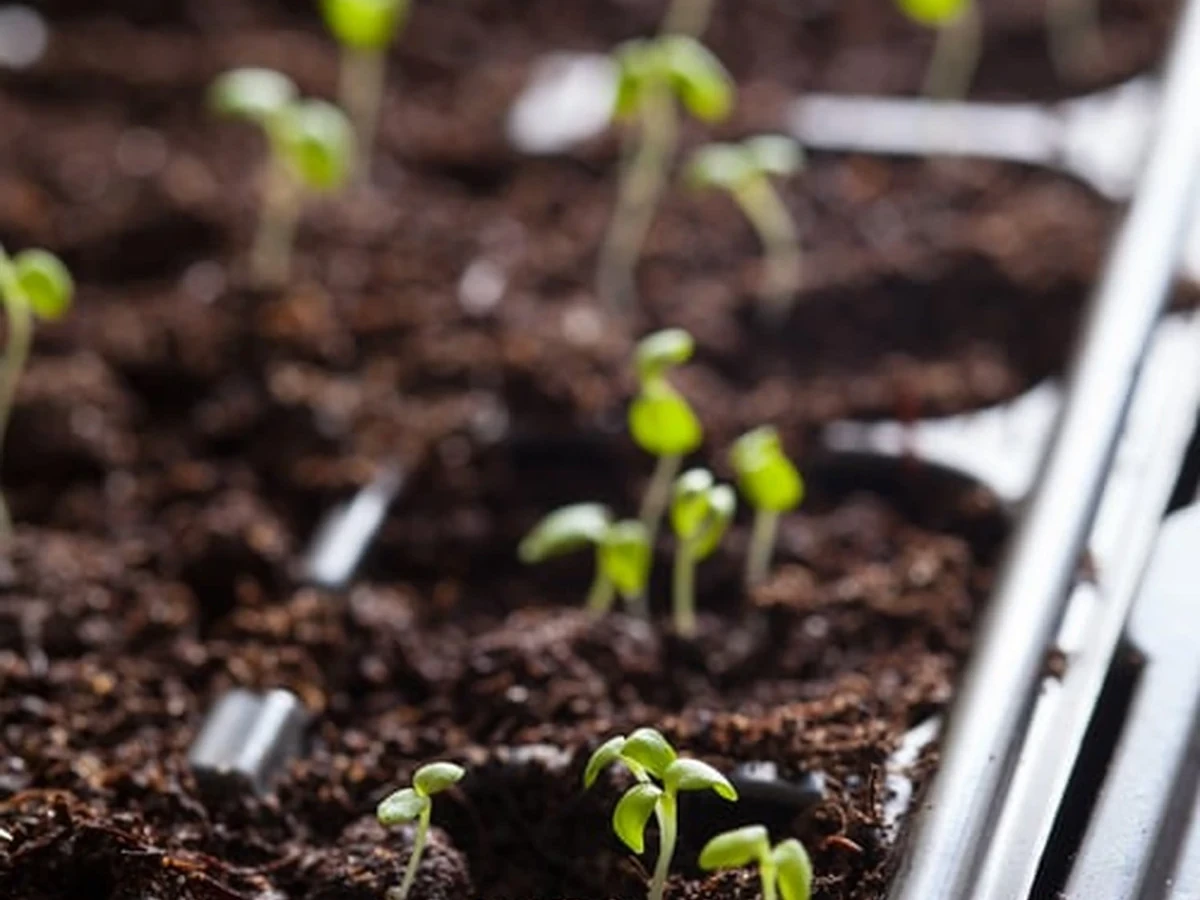
- Dome Removal & Immediate Light: Check the tray twice daily. The second the first green seedling hook breaks the surface, remove the humidity dome immediately and turn on your grow light. Running the light prevents fungal damping-off and stops stem stretching.
- Thinning and Up-Potting: Snip off weaker duplicate seedlings with small scissors rather than pulling them, protecting neighboring roots. When seedlings develop two to three pairs of true leaves and roots show through bottom drainage slots, move them into intermediate 3- to 4-inch pots.
Soil, Watering, and Fertilizing: Feeding Without Overdoing It
Container soil dynamics differ fundamentally from outdoor garden soil. In a closed pot, mineral salts accumulate, soil microbiomes are limited, and overwatering quickly displaces all available oxygen.
Potting Mix Formula
Never dig up backyard garden dirt for indoor containers. Topsoil contains fine clay particles that compress into a solid block, suffocating roots and inviting fungus gnats. Use a sterile container mix formulated with 60% peat or coconut coir, 25% to 30% coarse horticultural perlite for rapid drainage, and 10% screened worm castings for organic trace minerals.
The Two-Inch Watering Rule
Overwatering is the single most common cause of yellowing leaves, stalled growth, and root rot indoors. Water according to physical soil checks rather than a calendar day. Insert your index finger two inches into the potting mix. If your fingertip feels cool moisture, leave the watering can alone. If the mix feels dusty, dry, and warm, soak the pot deeply until water streams from bottom drainage holes. Empty the runoff tray after twenty minutes to prevent roots from sitting in standing water.
Nutritional Stages: The Nitrogen-Phosphorus Shift
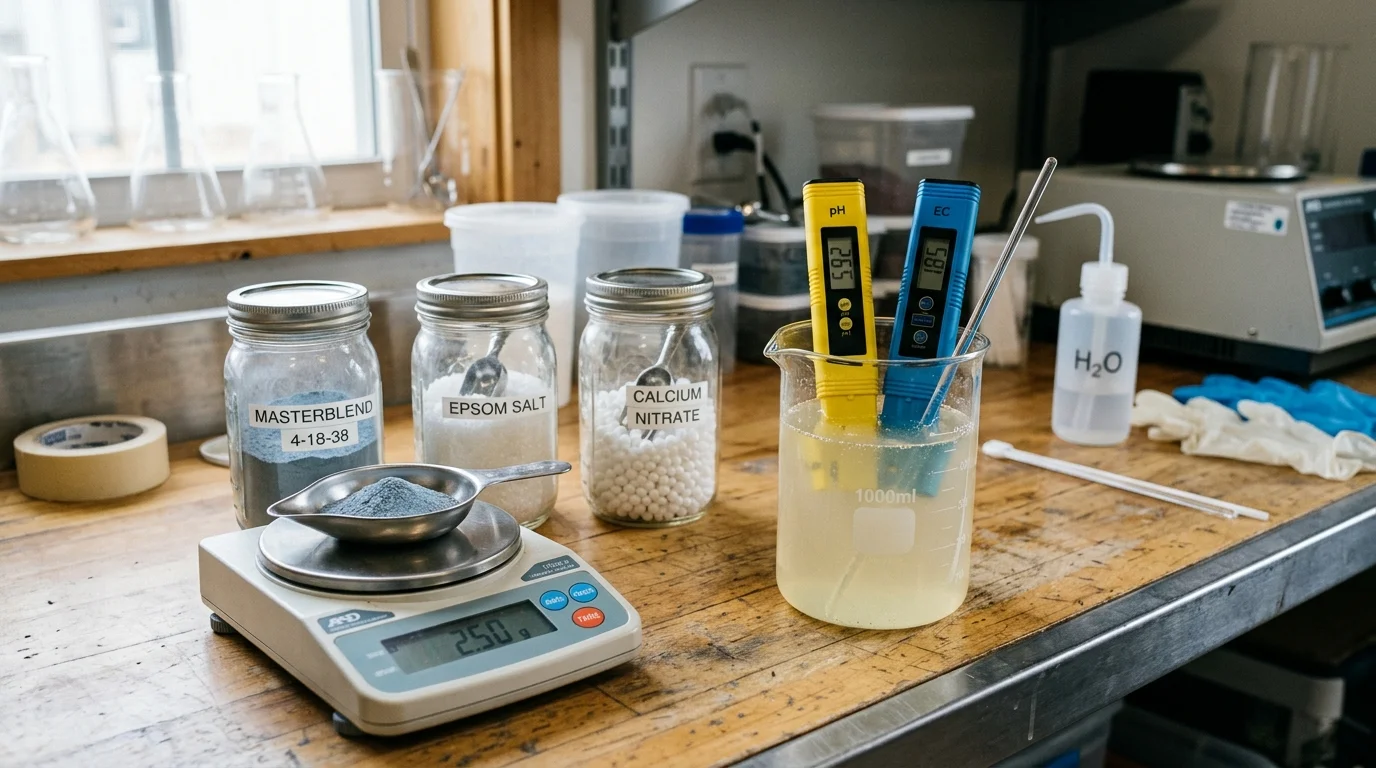
Peppers require different nutrient ratios as they transition from structural leafy growth to fruit production:
- Vegetative Stage (Seedling to First Flower Buds): Apply a balanced organic liquid feed—such as FoxFarm Grow Big (6-4-4) or Espoma Organic Indoor Plant Food (2-2-2)—diluted to half strength every 10 to 14 days. Nitrogen fuels sturdy stem cell walls and broad, dark green leaves.
- Flowering and Fruiting Stage (First Buds to Harvest): When flower buds appear at branch forks, switch to a low-nitrogen, high-phosphorus, high-potassium formula—such as FoxFarm Tiger Bloom (2-8-4) or an organic tomato formulation. High phosphorus stimulates blossom retention, while potassium drives carbohydrate transport and thick pod walls. Continuing high nitrogen at this stage produces giant green foliage while the plant drops its flowers.
- Calcium Supplementation: Add a half-strength dose of liquid Coco Cal (calcium/magnesium) once monthly to prevent blossom-end rot on developing pods.
Interactive Tool: Hydroponic Nutrient & pH Calculator
Calculate exact nutrient dosage (in mL or grams) and dial in your target EC, PPM, and pH thresholds for every growth stage.
Light: The Make-or-Break Factor for Indoor Peppers
Light is where the vast majority of indoor pepper attempts succeed or collapse.
Peppers are tropical plants requiring a minimum Daily Light Integral (DLI) of 25 to 30 mol/m²/day for heavy fruiting. A south-facing window with spotless glass rarely provides more than 10 to 14 mol/m²/day on clear summer days, and drops below 5 mol/m²/day during overcast winter months. Under windowsill conditions, a pepper plant will survive as a decorative houseplant, but it will drop its blossoms rather than spending scarce energy on fruit.
Modern LED grow lights solve this completely, operating efficiently with minimal electrical draw and negligible heat production.
Managing Light Distance and Schedule: Hang your LED panel 12 to 18 inches above the top foliage canopy and set your timer for 14 to 16 hours daily. If seedlings stretch, develop thin stems, and show pale green coloration, your light is too weak or positioned too far away. Lower the light by three inches and observe new growth over the next five days.
Hand Pollination Indoors: Setting Fruit in 30 Seconds
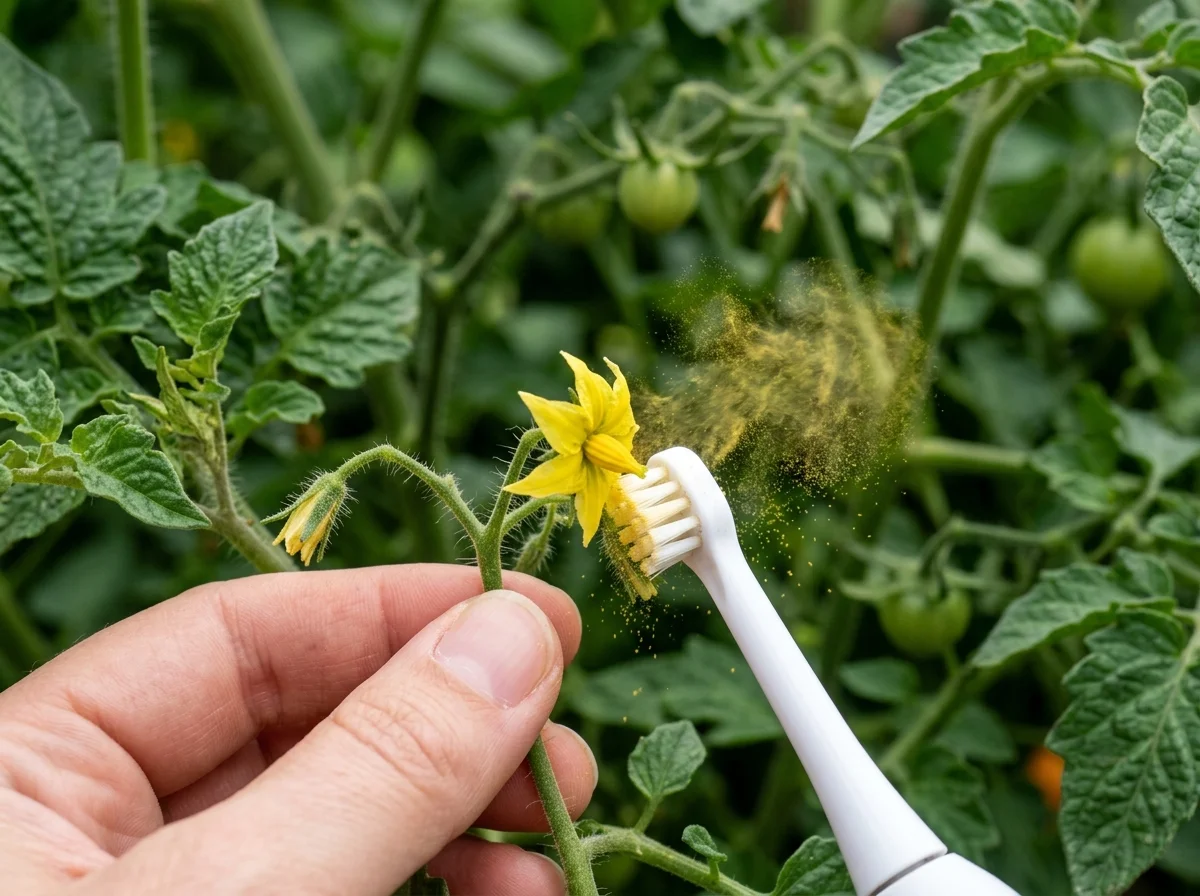
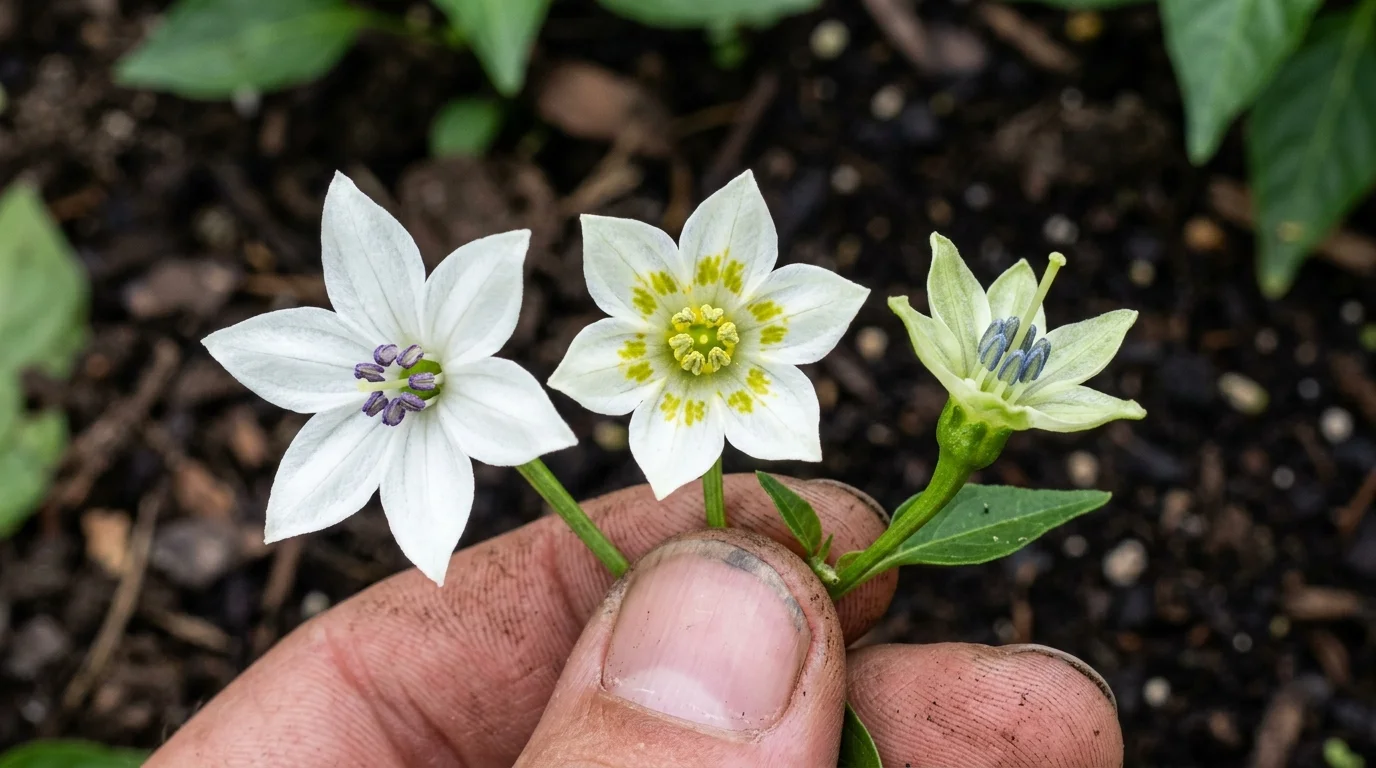
Peppers produce perfect flowers, meaning every blossom contains both male pollen-producing anthers and female pollen-receiving stigmas. In an outdoor garden, summer breezes vibrate the blossom, dislodging dry pollen grains onto the stigma. Foraging honeybees and bumblebees further ensure fertilization.
In a still indoor room with closed windows, that natural mechanical vibration does not exist. Pollen remains stuck in the anthers, the flower stays unfertilized, and within 48 to 72 hours the flower stem yellows and drops off.
Taking over pollination yourself requires less than a minute every other morning:
- The Stem Shake: Gently grasp the main stem or secondary branches and vibrate the plant back and forth for five seconds. You will see a faint cloud of white pollen fall through the light.
- The Artist Brush Technique: Swirl a soft, small artist paintbrush or cotton swab into the center of each open flower. Move from flower to flower to distribute pollen evenly.
- The Electric Toothbrush Shortcut: Touch the back of a running electric toothbrush head to the stem just behind an open flower for one second. The rapid high-frequency sonic vibration instantly releases pollen onto the stigma, achieving near-100% pollination success.
Pruning and Training for Continuous Indoor Harvests
Left unpruned, an indoor pepper plant naturally stretches toward the light, producing tall, leggy stems that topple easily in small pots and shadow lower branches. Pruning keeps your plant compact, maintains open airflow, and redirects carbohydrates directly into fruit swelling.
For complete cutting diagrams and seasonal schedules, read our full guide on pruning pepper plants.
The Three Pruning Phases for Indoor Growers
- Early Topping (6 Inches Tall): When a seedling has 4 to 5 sets of true leaves, snip off the central growing tip with sharp, sanitized shears. This breaks apical dominance, forcing the plant to awaken dormant lower nodes and transform into a bushy, four-branch shrub. Do this for Thai chilies, Shishitos, Jalapeños, and Habanadas. Skip this for large bell peppers.
- Bottom Clearing (Under-Canopy Airflow): Strip away all leaves and weak suckers from the bottom 3 inches of the stem near the soil line. In still indoor air, wet leaves touching soil invite fungal gnats and botrytis blight.
- Canopy Maintenance & Ripening Prune: Remove inward-pointing shoots that crowd the center of the bush. Once a heavy crop of pods is set, pinch off new, tiny flower buds so the plant channels all sugar production into ripening existing fruit.
Common Indoor Pepper Problems and How to Fix Them
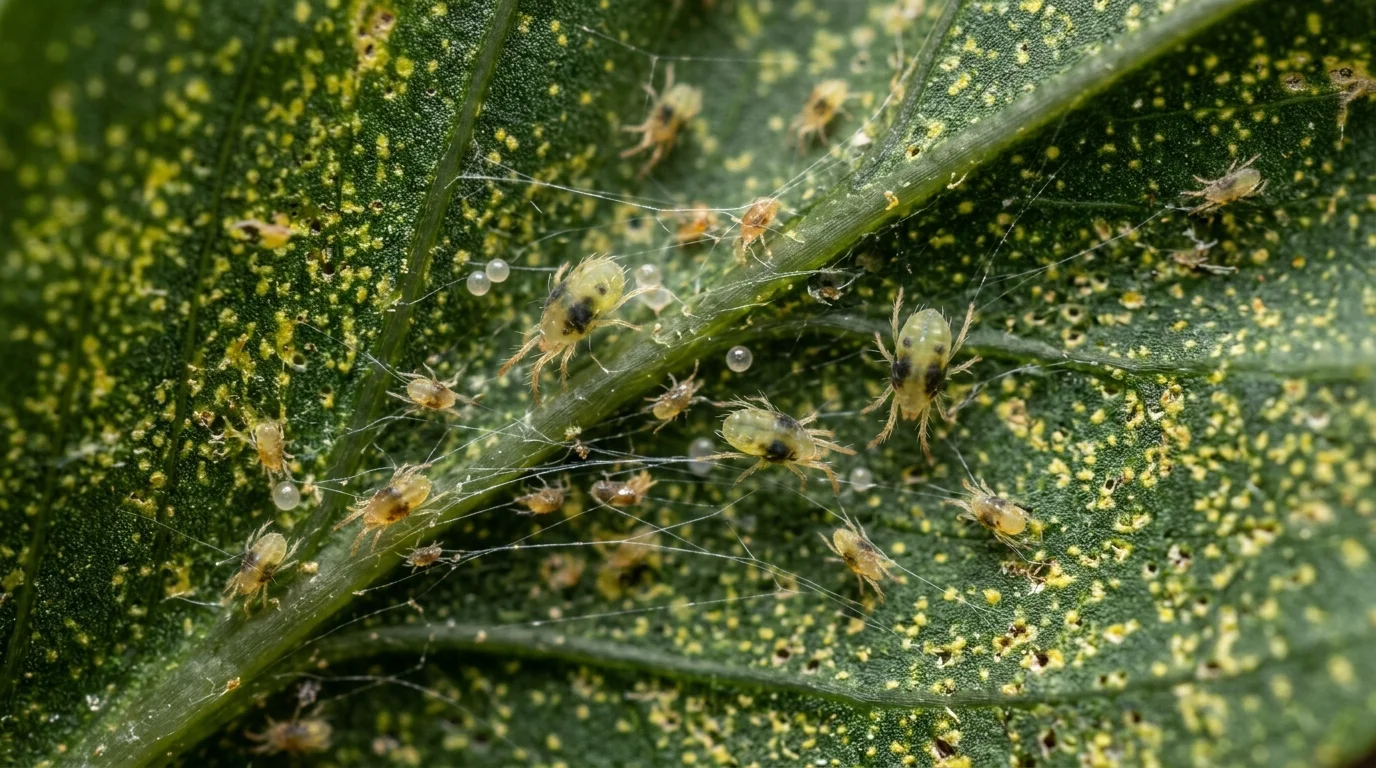
When an indoor pepper experiences environmental stress, it displays clear physical signals. Use this diagnostic matrix to match the visible symptom to its cause and apply the correct fix:
Harvesting and Storing Your Peppers
Every pepper cultivar starts green. As the pod matures on the branch, enzymes break down chlorophyll and synthesize carotenoids, turning the pepper bright red, orange, golden yellow, or chocolate brown. Ripening on the vine increases natural sugar content and deepens flavor complexity.
- Harvest Technique: Never pull or twist a pepper off the plant. Pepper wood is brittle, and pulling often tears off secondary branches loaded with immature fruit. Always use clean, sharp shears to snip the pedicel (stem) half an inch above the green calyx cap.
- Stimulating Continuous Production: Picking mature peppers promptly triggers the plant to channel energy into developing subsequent flower flushes. Regular harvesting maintains a continuous, rhythmic yield cycle.
- Storage and Preservation: Keep fresh peppers unwashed in a loose paper towel inside your refrigerator crisper for up to two weeks. For long-term preservation, thin-walled peppers (Thai chilies, Cayenne) air-dry easily on a wire rack into crushed chili flakes. Thick-walled varieties (Jalapeño, Habanada) freeze whole in freezer bags without blanching—slice them directly into hot cooking skillets.
Frequently Asked Questions: 6 Common Queries Answered
01
How much light do pepper plants need indoors?
How much light do pepper plants need indoors?
Indoor peppers require 14 to 16 hours of bright light daily, delivering a Daily Light Integral (DLI) of roughly 25 to 30 mol/m²/day. While an unshaded south-facing window can sustain vegetative growth in midsummer, window glass filters out substantial usable light. A dedicated full-spectrum LED grow light panel positioned 12 to 18 inches above the canopy ensures the plant maintains tight nodal spacing, retains blossoms, and matures fruit year-round.
02
Do I need to hand pollinate indoor pepper plants?
Do I need to hand pollinate indoor pepper plants?
Yes. In an outdoor garden, wind currents and foraging insects constantly shake pepper blossoms, releasing pollen onto the central stigma. Indoor rooms lack natural air turbulence, meaning pollen remains trapped inside the anthers and unfertilized flowers drop off. Gently vibrating the plant’s branches, swirling a small artist brush inside open blossoms, or touching an electric toothbrush head to the flower stem for one second ensures reliable fruit set.
03
How long do pepper plants live indoors?
How long do pepper plants live indoors?
Peppers are tender perennials, not annuals. In frost-free native habitats, they develop thick woody trunks and survive for years. Kept indoors with consistent room warmth, adequate LED lighting, and regular light pruning, a single potted pepper plant comfortably lives and produces harvests for three to five years or more.
04
Why are my pepper plant’s leaves turning yellow?
Why are my pepper plant’s leaves turning yellow?
Yellowing lower leaves are most frequently caused by overwatering. When potting mix stays continuously waterlogged, roots suffocate, die from oxygen deprivation, and stop absorbing moisture and nutrients. Allow the top two inches of soil to dry completely before watering again. If soil moisture is well managed, yellowing of older leaves signals a nitrogen deficiency, easily solved with a balanced organic liquid fertilizer.
05
Can I grow peppers indoors year-round?
Can I grow peppers indoors year-round?
Yes, absolutely. Because you control the temperature and photoperiod indoors, outdoor seasons and frost dates become irrelevant. Running a full-spectrum LED panel on a 14-hour timer in a room maintained between 70°F and 80°F allows you to germinate, flower, and harvest peppers in the dead of winter just as easily as in mid-July.
06
How often should I water indoor pepper plants?
How often should I water indoor pepper plants?
Never water on a rigid calendar schedule. Watering frequency varies according to pot size, indoor humidity, ambient room temperature, and plant stage. Check the soil with your finger: insert your index finger two inches straight down. Water deeply only when your fingertip detects warm, dry soil, and always ensure standing runoff drains completely from the saucer.
Indoor Capsicum Hydroponic & Environmental Specification Table
Stage-by-stage lighting intensity (PPFD/DLI), nutrient electrical conductivity, and humidity targets for indoor hot & sweet peppers.
| Phenological Stage | Target pH | Target EC (mS/cm) | Target PPM (500) | Target PPFD (µmol/m²/s) | DLI (mol/m²/d) | Day / Night Temp | Target RH% |
|---|---|---|---|---|---|---|---|
| Radicle & Cotyledons | 5.8 – 6.0 | 0.6 – 0.8 | 300 – 400 | 150 – 200 | 10 – 12 | 80°F / 72°F | 65% – 75% |
| Vegetative Branching | 5.8 – 6.2 | 1.4 – 1.8 | 700 – 900 | 350 – 450 | 20 – 25 | 75°F / 68°F | 55% – 65% |
| Flower Bud Induction | 5.8 – 6.2 | 1.8 – 2.2 | 900 – 1100 | 450 – 550 | 25 – 30 | 74°F / 66°F | 50% – 60% |
| Fruit Set & Pod Swell | 6.0 – 6.4 | 2.2 – 2.8 | 1100 – 1400 | 550 – 700 | 30 – 35 | 76°F / 68°F | 45% – 55% |
| Final Color Ripening | 6.0 – 6.3 | 1.6 – 2.0 | 800 – 1000 | 400 – 500 | 22 – 26 | 72°F / 65°F | 40% – 50% |