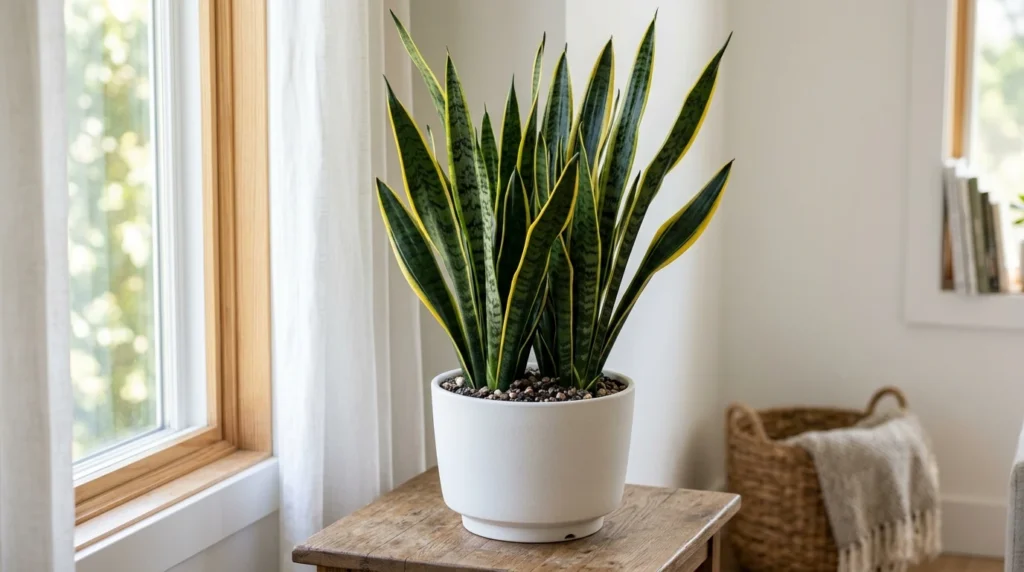
⚡ Quick Answer: The Fastest Way to Propagate
If you want an established, rooted snake plant right away while keeping the beautiful yellow edges of variegated cultivars like ‘Laurentii’, rhizome division is your best option. It takes ten minutes, has virtually a zero failure rate, and leaves the parent plant intact. If you want to multiply your plant into dozens of new starts, leaf cuttings in water or soil work exceptionally well, provided you let the cut edges dry and callous for 2 to 5 days before exposing them to moisture.
Horticulturist Reality Check: Leaf cuttings from yellow-bordered variegated cultivars will always produce solid green offspring because the yellow mutation lives only in the outermost cell layer. If you want to keep those gold margins, divide the rhizomes instead.
🔬 Field Lab Disclosure & Hands-On Testing Notes
Every protocol in this guide comes directly from hands-on propagation trials on my workbench and in my indoor growing space. I have rooted hundreds of Sansevieria and Dracaena trifasciata cuttings across glass water vessels, coarse perlite, LECA clay pebbles, and gritty cactus soil mixes. I accept zero paid sponsorships, and these recommendations reflect what actually prevents rot and triggers root growth in real home environments.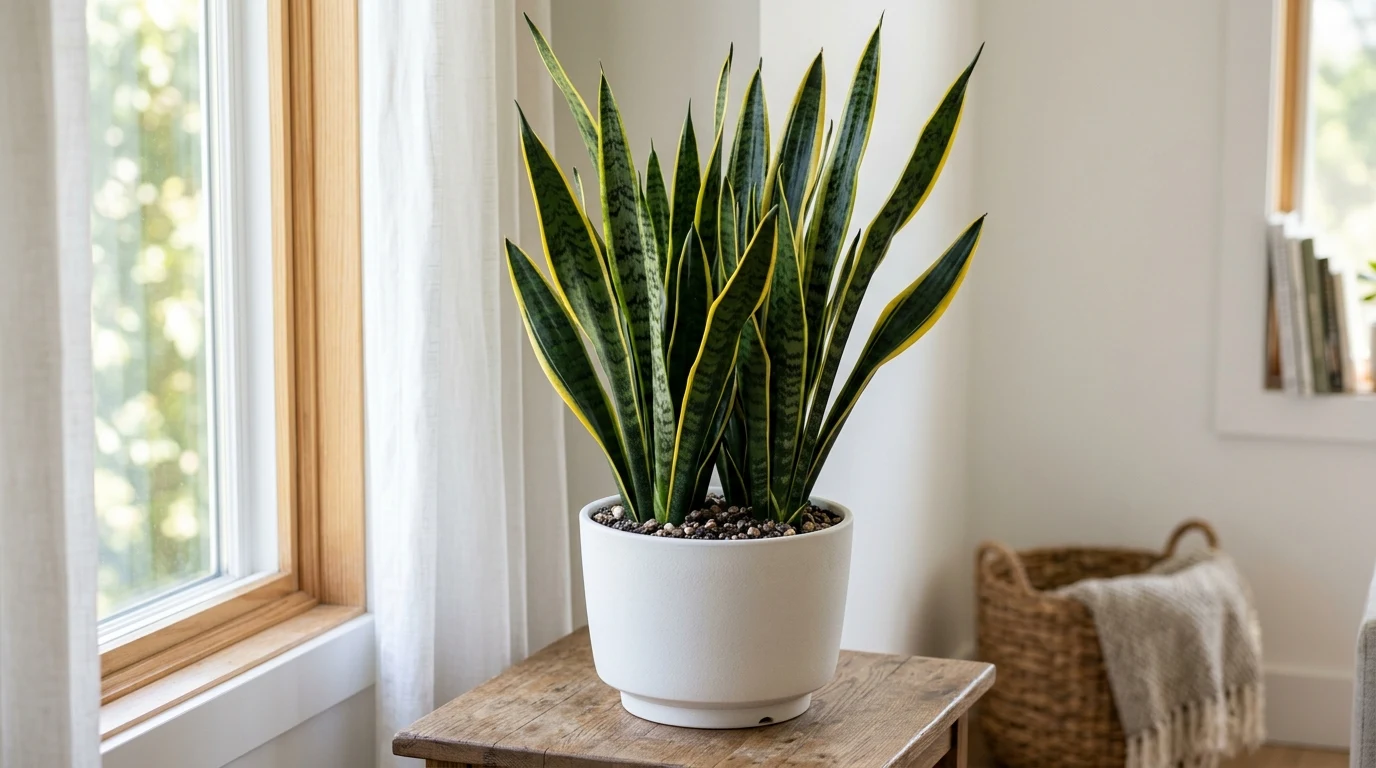
Core Rules for Propagation Success
- Genetics Determine Your Method: Division is the only propagation method that preserves the exact yellow banding of variegated snake plants. Leaf cuttings will always revert to solid green wild-type growth.
- Callusing Is Not Optional: Fresh leaf cuts must sit on a dry paper towel for 2 to 5 days to form a leathery, suberized callous before touching water or soil. Skipping this cure causes 90 percent of cutting rot.
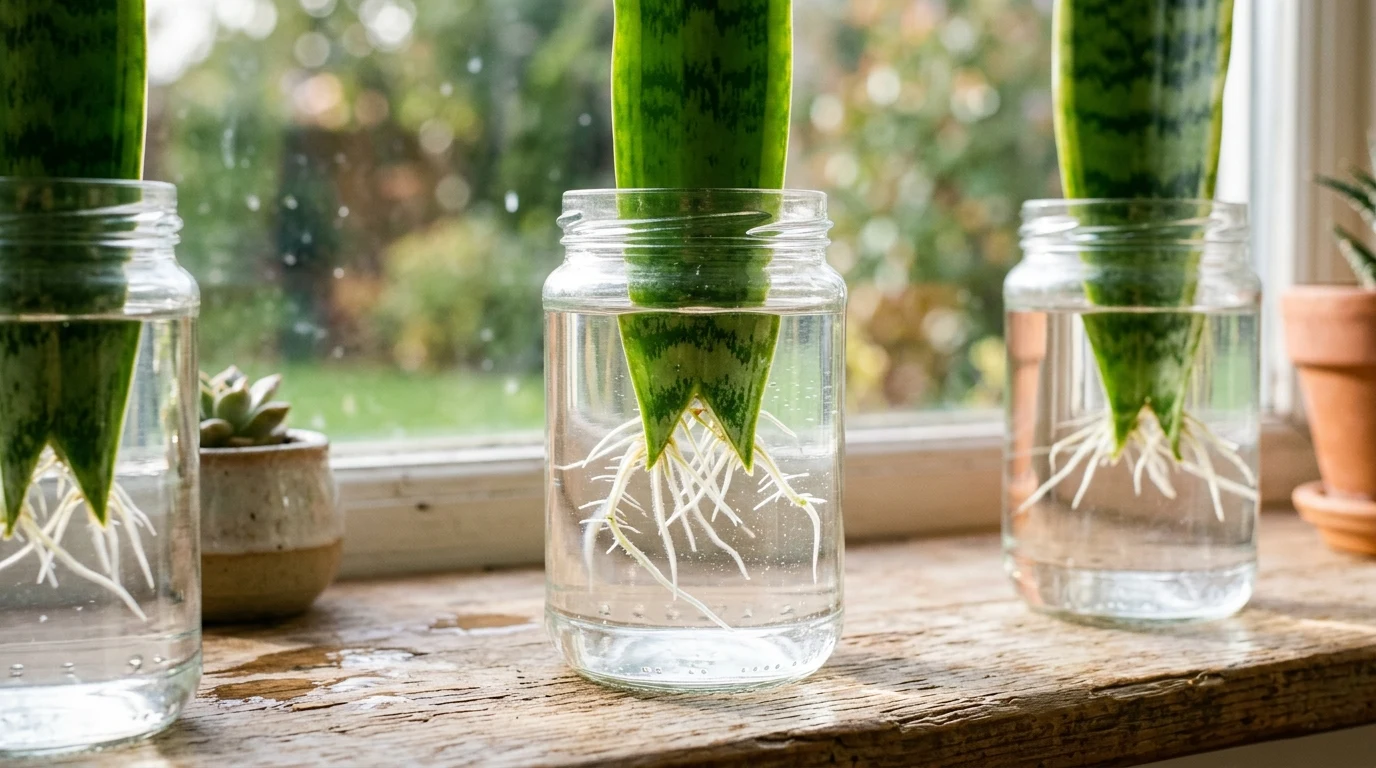
- Use the Inverted Chevron Cut: Cutting an inverted ‘V’ chevron notch into the base of water cuttings suspends the central tissue off the bottom of the glass, improves oxygen flow, and expands the rooting perimeter.
- Keep Water Levels Shallow: Submerge only 15 to 25 millimeters (about 0.5 to 1 inch) of the cutting. Drowning half the leaf cuts off oxygen and accelerates cellular collapse.
- Expect a Slow-Motion Process: Snake plant leaf propagation requires patience. Water roots emerge in 4 to 8 weeks, soil roots take 6 to 12 weeks, and new above-ground pups appear in 3 to 6 months. Warmth speeds up this entire timeline.
Botanical Foundations: Why Snake Plants Behave Differently
I often see plant owners treat snake plant propagation exactly like rooting a pothos or a philodendron. They snip a leaf, toss it into a deep jar of tap water, and wonder why the base turns into brown, foul-smelling mush two weeks later. The reason comes down to plant biology.
Snake plants were historically classified under the genus Sansevieria, but taxonomists have reclassified them into Dracaena (specifically Dracaena trifasciata). They are native to dry, arid regions of West Africa, spanning from Nigeria to the Congo. Because they evolved to survive months without rain in rocky, unforgiving terrain, their physiology is fundamentally different from tropical aroids.
- Crassulacean Acid Metabolism (CAM): Snake plants conserve moisture through Crassulacean Acid Metabolism. They keep their leaf pores (stomata) tightly sealed during hot daylight hours to prevent water loss. At night, they open their stomata to capture carbon dioxide, converting it into malic acid for daytime photosynthesis. This mechanism packs their leaves with dense, fibrous, water-storing parenchyma tissue. These water-logged tissues cannot handle sitting in stagnant, airless water without rotting unless we take specific steps to protect the cut surface.
- Subterranean Rhizome Anatomy: What most people think of as the snake plant ‘stem’ is actually an underground rhizome. These thick, starch-heavy subterranean runners creep horizontally beneath the soil, storing energy and sending up vertical clusters of foliage called pups. Because rhizomes are specialized storage structures with pre-formed nodes, dividing them requires very little recovery time compared to regrowing an entire plant from a severed leaf blade.
- Polar Auxin Transport: Plant hormones, particularly auxin, move through plant tissue via polar transport. In snake plant leaves, auxin flows strictly downward from the leaf tip toward the biological base. If you accidentally plant a leaf segment upside down, auxin pools at the top cut, and roots will never form at the base. Keeping track of leaf orientation is essential.
The Science of Variegation: Why Cuttings Revert to Solid Green
One of the most common questions growers ask me is why their prized Dracaena trifasciata ‘Laurentii’ (the classic snake plant with vibrant golden-yellow margins) produced plain green, zebra-striped babies after being propagated from leaf cuttings. Many assume they did something wrong with lighting or fertilizer. In reality, you are seeing a fascinating principle of plant genetics.
🔬 Horticultural Lab Note: Periclinal Chimera Dynamics
Variegated snake plants are periclinal chimeras. A chimera is a single plant composed of two genetically distinct layers of tissue growing side by side. In ‘Laurentii’, the outer layer of cells (the L1 epidermal layer) contains a genetic mutation that prevents chlorophyll production, creating bright yellow borders. The inner core of cells (the L2 subepidermal layer) contains normal, wild-type green chloroplasts.
When you divide an established pup, you are transplanting an intact growing tip that already contains both the mutated L1 layer and the green L2 layer. The yellow stripe continues undisturbed.
When you propagate from a leaf cutting, the leaf has to build a brand-new growing tip from scratch through adventitious cellular division. These new buds generate exclusively from the internal L2 layer cells around the vascular bundles. Because the L2 layer carries normal green genetics, the new pup grows with 100 percent solid green foliage, known as Sansevieria zeylanica.
If you want to keep the yellow borders on cultivars like ‘Laurentii’, ‘Black Gold’, or ‘Golden Flame’, you must propagate by rhizome division. If you do not mind solid green foliage, or if your starting plant is already a solid green cultivar like ‘Zeylanica’ or ‘Black Coral’, leaf cuttings in water or soil are an incredible way to produce lots of new plants. For broader foundational concepts on household flora, explore our guide on how to grow flowers and plants at home.
Tools, Supplies, and Bench Sanitation
Whenever you cut plant tissue, you create an open doorway for pathogenic fungi like Fusarium and bacteria like Pectobacterium carotovorum, which causes watery soft rot. Before making any cuts on my workbench, I set up clean, sterilized supplies.
- Sanitized Cutting Tools: Use bypass pruning shears, a heavy craft knife, or a single-edge razor blade. Avoid anvil-style pruners at all costs; anvil blades pinch and crush plant capillaries against a flat metal base, bruising the edges and dramatically increasing the odds of rot.
- Medical-Grade Disinfectant: Wipe blades thoroughly with 70 percent isopropyl alcohol or a 10 percent bleach solution before your first cut and between different mother plants.
- Rooting Containers: Clear glass jars let you check root health without touching the plant, while amber glass vessels reduce green algae growth by filtering light wavelengths.
- Mechanical Support: Clean pea gravel, LECA (expanded clay pebbles), or glass floral marbles placed in the bottom of your jars support top-heavy leaves and keep them standing upright.
- Soil Medium Formula: Mix 50 percent quality succulent potting mix with 25 percent perlite and 25 percent coarse horticultural pumice or grit. This fast-draining blend provides immediate aeration around developing roots.
- Antifungals and Rooting Hormone: Ground cinnamon or sulfur powder serves as an excellent natural topical fungicide for rhizome cuts. Rooting hormone powder containing Indole-3-butyric acid (IBA) helps accelerate cell division in soil cuttings.
Method 1: Rhizome Division (The Fastest, 100% Reliable Method)
Whenever a grower asks me for the quickest and most foolproof way to propagate a snake plant, my answer is always rhizome division. You bypass the fragile rooting stage entirely, maintain complete genetic purity on variegated cultivars, and walk away with fully established plants in under fifteen minutes.
Step 1: Unpot and Inspect the Root System
Hold off on watering your mother plant for 7 to 10 days before dividing. When the soil is completely dry, it slides off the roots easily without snapping delicate feeder roots. Lay the pot gently on its side on your workbench. Squeeze the sides of plastic containers, or slide a clean, flat spatula around the inside edge of ceramic pots to loosen the root ball. Slide the plant out smoothly. Never pull or yank on the leaves, which can tear the foliage rosette directly out of the crown.
Step 2: Trace the Underground Rhizome Connections
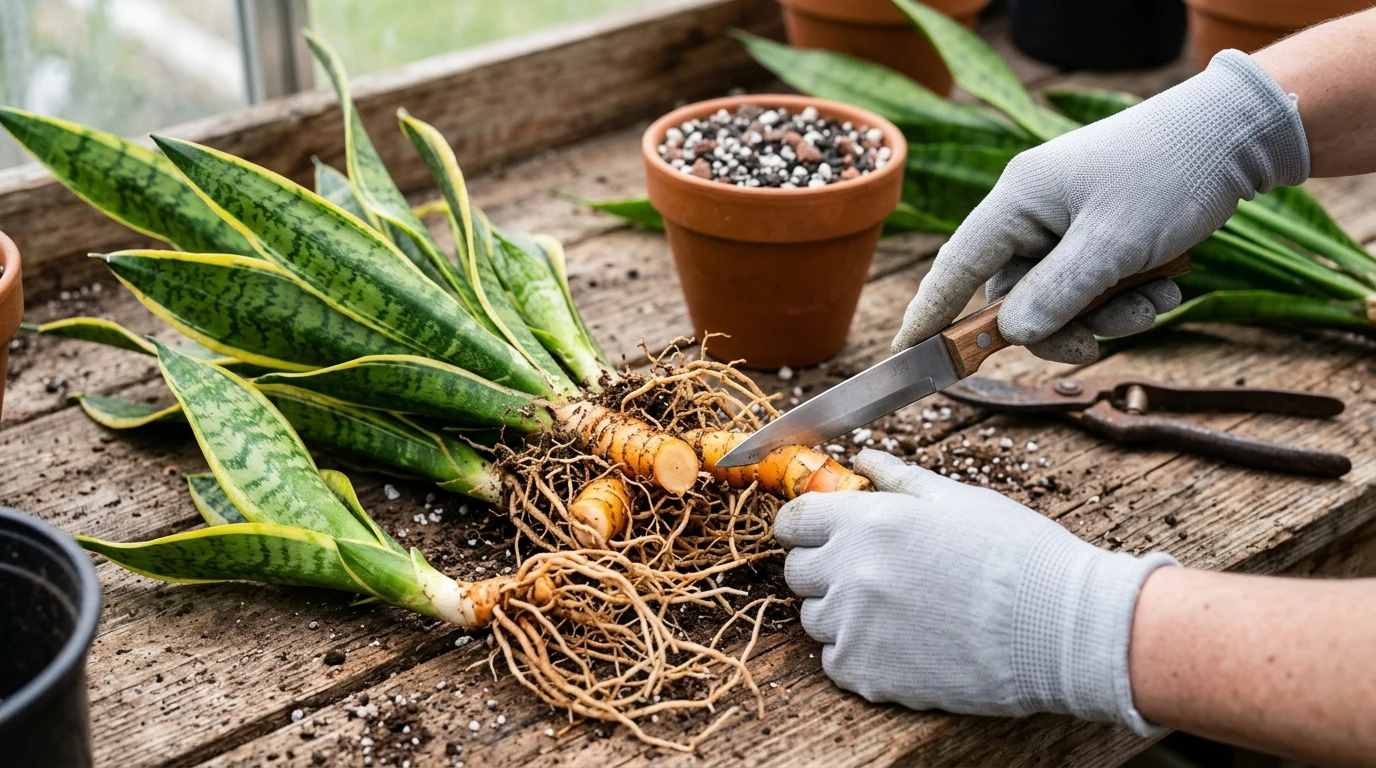
Use your fingers or a soft brush to gently tease away excess soil from the base of the root ball. You will clearly see thick, woody, light-colored underground runners connecting the main parent crown to smaller offshoots (pups). Inspect the system carefully. A division is ready for separation when it has at least one healthy foliage cluster, a firm rhizome section measuring 1.5 to 2 inches, and its own cluster of fibrous subterranean feeder roots.
Step 3: Make a Clean Rhizome Severing Cut
Position your sanitized bypass shears or knife roughly halfway between the mother plant and the pup. Make a swift, decisive cut straight across the rhizome. Do not saw back and forth or leave ragged, frayed edges, as smooth, clean wounds heal much faster and resist microbial infection.
Step 4: Dust and Air-Cure the Cut Surfaces
Dust the freshly cut rhizome tissue on both the mother plant and the pup with a light coating of sulfur powder or ground cinnamon. Let the divided plants rest on your workbench in a warm, shaded spot for 12 to 24 hours. This resting period allows the raw cut to seal over before it comes into contact with potting soil.
Step 5: Pot into Unglazed Terracotta and Hold Water
Plant each division into an unglazed terracotta pot that is roughly 1 to 2 inches larger than its root system. Terracotta allows moisture to evaporate through its porous clay walls, which protects snake plant rhizomes from moisture build-up. Settle the division into your 50/50 gritty succulent mix at the exact same depth it was growing previously. Do not bury the green foliage too deeply. Wait 7 to 10 full days before giving the newly potted division its first thorough drink of water.
Method 2: Leaf Cuttings in Water
Water propagation is hands-down the most rewarding method for indoor gardeners because you get to watch the root development process unfold right through the glass. When you follow the right prep protocol, it is clean, highly successful, and easy to maintain.
Step 1: Select and Sever Healthy Mature Leaves
Choose thick, firm, fully mature leaves from the outside of the mother plant. Avoid young, tender center leaves that have not built up sufficient carbohydrate reserves, as well as scarred or yellowing leaves. Slice the leaf cleanly right at the soil line using your sanitized razor blade.
Step 2: The Inverted Chevron V-Cut Technique
If you make a flat horizontal cut across the base of a leaf and place it in a flat-bottomed jar, the cut tissue rests directly against the glass. This cuts off oxygen circulation and traps bacterial films against the wound. To solve this problem, I always cut an inverted ‘V’ (chevron notch) into the base of the leaf cutting, slicing inward and upward about 1 inch from each outer margin to the center.
This simple chevron geometry gives you three major benefits on your propagation bench:
- Keeps Wound Tissue Suspended: The two outer points of the leaf rest firmly on the bottom of your container, holding the central cut tissue suspended 1 inch above settled sediment and bacterial buildup.
- Expands Rooting Perimeter: The triangular cut increases the perimeter of exposed vascular tissue by roughly 40 percent compared to a flat cut, providing far more surface area for root initials to break through.
- Prevents Polarity Reversal: The upward-pointing notch permanently marks the top of your cutting, making it impossible to accidentally flip the leaf upside down.
Step 3: Cure and Callus for 2 to 4 Days
This is the step where most beginners stumble: never put a freshly cut snake plant leaf straight into water. Set the cutting on a dry paper towel in a warm, shaded room for 48 to 96 hours. As it dries, the cut surface undergoes suberization, forming a leathery, pale brown scab. This callous is your cutting’s primary defense against water molds and bacterial soft rot.
Step 4: Jar Setup with Clean Pebbles and Water Depth
Add a 1-inch layer of clean, washed river pebbles or LECA clay balls to the bottom of a heavy glass jar. Rest the callused leaf between the pebbles to hold it upright without pinching the tissue. Pour in room-temperature filtered water until only the bottom 15 to 25 millimeters (about 0.5 to 1 inch) of the cutting is submerged. Submerging several inches of leaf tissue provides zero rooting benefit and dramatically increases the risk of rot.
Step 5: Temperature, Light, and Maintenance Cycles
Place your propagation jar in bright, indirect light. An east-facing windowsill that gets gentle morning sun works wonderfully. Keep the room temperature between 72 and 78 degrees Fahrenheit. Cold water stalls cell growth, while warm temperatures encourage rapid root formation. Empty and refresh the water every 3 to 5 days to keep dissolved oxygen levels high.
🚨 Emergency Protocol: Rescuing Soft or Rotting Cuttings
If you notice the base of your leaf feeling slimy, turning brownish-black, or giving off a foul smell, act immediately. Pull the cutting out of the water. Take a sanitized blade and cut away all damaged tissue, making your fresh cut at least 1 inch into firm, clean green flesh. Soak the cut edge in a mild 3 percent hydrogen peroxide solution (1 part peroxide mixed with 3 parts clean water) for 10 minutes to eliminate bacterial spores. Rinse the leaf, let it air-dry on your bench for 3 days to build a fresh callous, and restart in a sterilized jar with clean water.Method 3: Leaf Cuttings in Soil
When I need to produce dozens of new snake plants at once for greenhouse staging or sharing with friends, soil propagation is my go-to choice. While you cannot see the roots developing beneath the dirt, soil-rooted cuttings develop hardy root systems adapted directly to terrestrial mix, eliminating transplant shock.
Step 1: Slice into Sections and Notch for Polarity
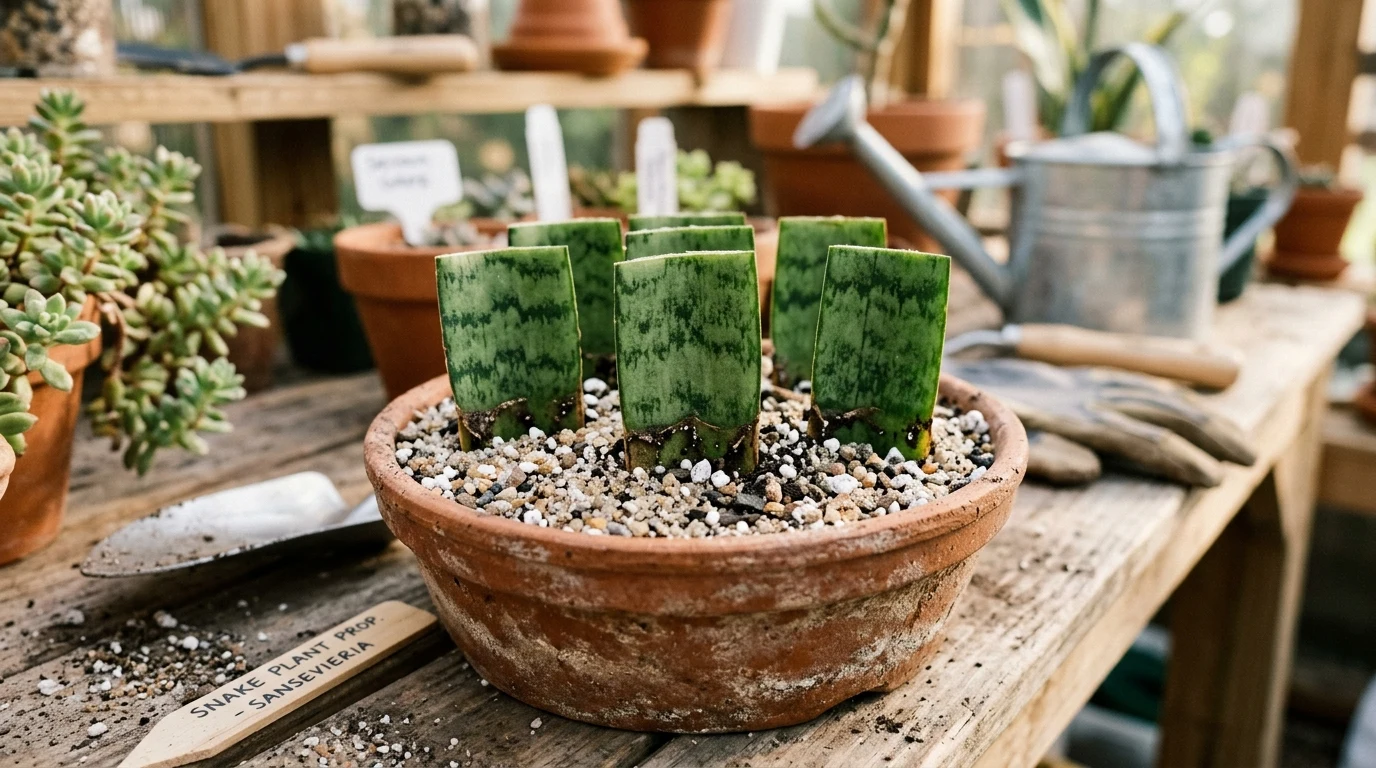
Lay a long, healthy mature leaf flat on a clean cutting board. Slice the leaf horizontally into 3 to 4-inch segments using your sanitized blade. Immediately cut a small triangular notch into the top edge of each segment. Because a 3-inch section of snake plant leaf looks identical on both ends, notching the top guarantees you will always plant the segment right-side up.
Step 2: Complete the Suberization Cure
Spread the segments out on a wire cooling rack or dry paper towels in a warm, dry room out of direct sunlight. Let them air-cure for 3 to 5 full days until the cut edges feel firm, leathery, and dry to the touch. Once callused, lightly dip the bottom edge into rooting hormone powder (IBA) or sulfur powder, gently tapping off any excess.
Step 3: Planting and Container Selection
Select a shallow terracotta container with wide drainage holes. Fill it with your 50/50 mix of succulent soil and perlite or pumice. Insert each callused segment bottom-end down into the substrate, burying it only 1 to 1.5 inches deep. Gently press the mix around the base so the leaf segment stands upright. You can place several cuttings in the same pot, spacing them roughly 2 inches apart.
Step 4: Cautious Watering and the Tug Test
Do not soak the soil immediately after planting. Without established roots, the cuttings cannot take up water, and damp potting mix will rot your freshly callused edges. Instead, wait a week before lightly watering around the base or bottom-watering with a small amount of moisture every 10 to 14 days. Keep the pot in bright indirect light at 70 to 80 degrees Fahrenheit. Between week 6 and 8, gently tug upward on the top of the cutting. When you feel firm resistance, you know a healthy root network has anchored into the mix.
Alternative Rooting Media: LECA, Perlite, and Sphagnum Moss
In my indoor growing trials, I frequently experiment with alternative rooting media to find the sweet spot between oxygen flow and moisture retention. If you are passionate about soil-free hydroponic cultivation, explore our primer on indoor hydroponics for beginners.
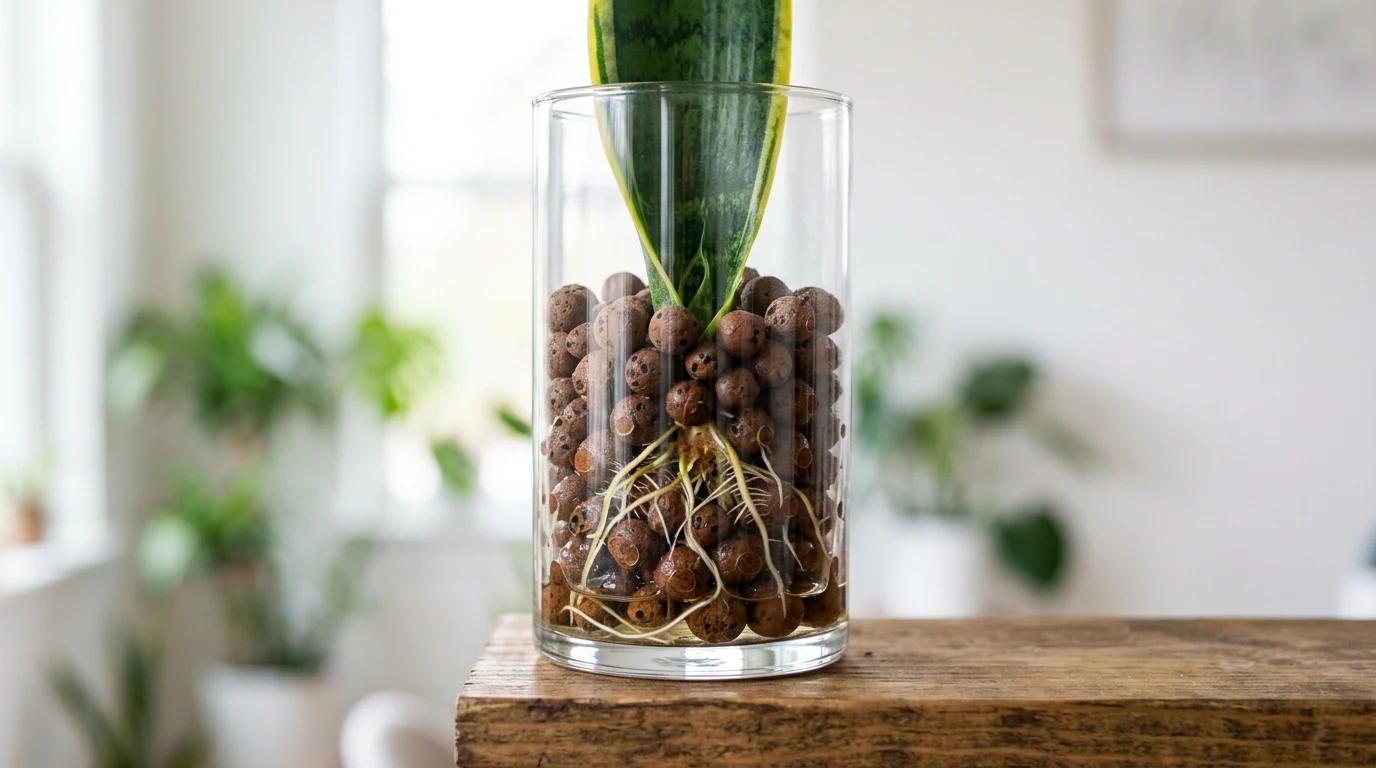
- 100 Percent Coarse Perlite: Horticultural perlite is one of my favorite rooting substrates. Fill a clear plastic cup with pre-moistened coarse perlite and insert your callused leaf cuttings. Add about 0.5 inches of water to the bottom of the cup. The perlite wicks moisture upward through capillary action while keeping the root zone surrounded by 50 percent air porosity, virtually eliminating rot.
- LECA (Semi-Hydroponics): Lightweight Expanded Clay Aggregate pebbles offer outstanding physical stability for tall, top-heavy leaves. The clay spheres hold moisture while leaving large air channels between pebbles, making LECA a fantastic semi-hydroponic medium for snake plants.
- Sphagnum Moss (High Rot Risk): I do not recommend sphagnum moss for snake plant propagation. While moss works miracles on tropical monsteras and philodendrons, it holds far too much moisture around succulent leaf tissue, leading to high rot rates in standard home settings.
The Water-to-Soil Transition Protocol: Acclimating Aquatic Roots
One of the most frustrating moments for indoor gardeners is taking a beautifully rooted water cutting, potting it into soil, and watching it collapse within two weeks. This happens because aquatic roots and terrestrial soil roots are anatomically distinct.
Roots formed in water develop thin cell walls adapted to absorbing dissolved oxygen directly from liquid. They lack the tough, lignified root caps and fine root hairs needed to navigate gritty soil particles and draw bound water out of potting mix. If you drop a water cutting directly into bone-dry soil, those delicate aquatic roots dry out and die within 48 hours, forcing the plant to restart the rooting process under stress.
🌿 Sophia’s 3-Week Water-to-Soil Weaning Protocol
Phase 1 (Week 1): Transition your cutting into soil when water roots reach 1.5 to 2 inches in length. Pot it into a 3-inch terracotta pot using equal parts succulent potting mix and perlite. Water thoroughly until moisture drains freely, and keep the soil lightly moist (never soggy) during this first week to keep the aquatic roots hydrated.
Phase 2 (Week 2): Allow the top 1 inch of soil to dry out between gentle waterings. This slight dry period stimulates the cutting to grow tough, secondary terrestrial roots complete with root hairs.
Phase 3 (Week 3 and Beyond): Shift completely to standard snake plant care. Allow the entire pot of soil to dry completely from top to bottom before watering again.
Comprehensive Propagation Comparison and Roadmaps
Use these field-tested comparison charts to pick the best method for your space, timeline, and plant variety.
Frequently Asked Questions: 12 Propagation Queries Answered
01
What is the fastest way to propagate a snake plant?
What is the fastest way to propagate a snake plant?
Rhizome division is by far the fastest method. While leaf cuttings take months to develop roots and push up new pups, dividing an established pup gives you an independent, fully rooted plant in a single afternoon with zero downtime.
02
Why are my snake plant cuttings turning mushy in water?
Why are my snake plant cuttings turning mushy in water?
Mushy, foul-smelling tissue is caused by bacterial soft rot. This happens when a cutting is placed into water without a 2 to 5 day callusing period, or when too much of the leaf is submerged. Submerge only the bottom 0.5 to 1 inch of callused leaf material and change the water every 3 to 5 days.
03
Can you propagate a snake plant from a broken leaf?
Can you propagate a snake plant from a broken leaf?
Yes. If a healthy leaf snaps, trim the broken edge clean with a sanitized razor blade, cut an inverted V-notch into the base, let it air-dry for 3 to 5 days until a firm callous forms, and root it in water or gritty soil. Even pieces as short as 2 inches can produce roots.
04
Do snake plant cuttings need rooting hormone powder?
Do snake plant cuttings need rooting hormone powder?
Rooting hormone containing Indole-3-butyric acid (IBA) is helpful for soil cuttings because it accelerates cell division and root emergence. For water propagation, rooting powder is unnecessary because it washes off immediately and clouds your water reservoir.
05
Should I propagate my snake plant in water or soil?
Should I propagate my snake plant in water or soil?
Water propagation is ideal for beginners who want to monitor root growth and verify progress visually. Soil propagation is superior for high-volume batch production because developing roots acclimate directly to potting mix, eliminating the need for an aquatic weaning phase.
06
How long does it take for a snake plant cutting to produce babies?
How long does it take for a snake plant cutting to produce babies?
Expect to wait between 3 and 6 months for baby shoots (pups) to emerge from leaf cuttings. Snake plants are slow-growing succulents that prioritize building an underground root network and storage rhizome before expending energy on above-ground foliage.
07
Why did my yellow-edged snake plant turn all green after propagating?
Why did my yellow-edged snake plant turn all green after propagating?
Variegated snake plants like ‘Laurentii’ are periclinal chimeras, meaning the yellow mutation exists only in the outermost epidermal cell layer. Adventitious buds that sprout from leaf cuts develop solely from internal, non-mutated cells, reverting the pup to wild-type solid green. Only division preserves variegation.
08
Can you root snake plant cuttings in LECA or perlite?
Can you root snake plant cuttings in LECA or perlite?
Yes, coarse perlite and LECA expanded clay pebbles are exceptional alternative rooting media. They maintain high oxygen levels around the cut surface while wicking constant moisture from a shallow bottom reservoir, dramatically reducing the risk of rot.
09
What time of year is best for propagating snake plants?
What time of year is best for propagating snake plants?
Spring and early summer are the ideal seasons for propagation. Active metabolic growth driven by longer daylight hours and warmer temperatures accelerates cell division. While you can propagate in winter, rooting times double unless you supplement with a seedling heat mat and grow lights.
10
How deep should I plant snake plant cuttings in soil?
How deep should I plant snake plant cuttings in soil?
Bury leaf segments no deeper than 1 to 1.5 inches into well-draining potting mix. Planting too deeply restricts oxygen exchange and exposes greater leaf surface area to soil-borne moisture, significantly increasing the likelihood of stem rot.
11
How often should I change the water for snake plant cuttings?
How often should I change the water for snake plant cuttings?
Replace the water every 3 to 5 days with fresh, room-temperature filtered water. Regular water changes prevent bacterial buildup and replenish dissolved oxygen levels necessary for healthy root respiration.
12
Can I leave a snake plant in water permanently?
Can I leave a snake plant in water permanently?
While a snake plant cutting can survive in water for a year or more with diluted liquid fertilizer, it will eventually decline. Snake plants are adapted to arid soils; prolonged water culture leads to nutrient imbalances, algae proliferation, and eventual basal decay.