
⚡ Quick Answer
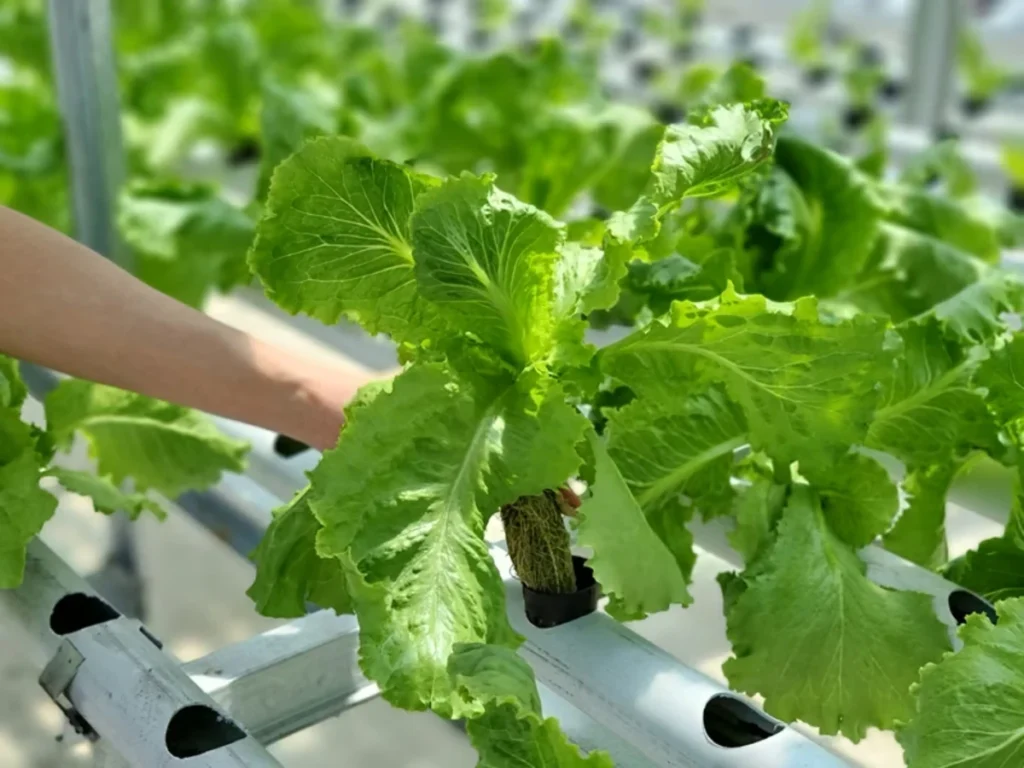
Indoor hydroponic gardening eliminates the need for soil, using nutrient-enriched water to feed plants directly at the roots. Systems range from simple mason jar setups to automated multi-tier vertical farms. Most vegetables grow 30–50% faster hydroponically than in soil, and you can grow year-round regardless of climate.
Every winter, thousands of well-intentioned home growers run into the exact same frustration. You buy a potted supermarket basil plant in mid-January, place it carefully on your kitchen windowsill, and water it diligently every morning. Within two weeks, the stems stretch into limp, pale threads, the lower foliage turns an unpleasant translucent yellow, and gnats start hovering above the soggy potting soil. By February, the plant is dead in the compost bin, leaving you convinced that growing fresh food inside a normal apartment requires an expensive agricultural degree or an automated greenhouse.
The failure had nothing to do with your personal ability. Windowsill potting soil in winter is an inhospitable trap for tender culinary greens. The natural photoperiod is too short, cold window panes chill delicate root zones, and stagnant peat moss suffocates roots while breeding moisture pests. Hydroponics strips away every single one of those variables. By removing dirt completely and delivering dissolved mineral ions directly to bare roots in an oxygenated water reservoir, you gain total control over your indoor harvest cycle.
This comprehensive guide eliminates the noise and marketing hype surrounding indoor food production. You will discover how to evaluate your real physical square footage, compare the six primary hydroponic methods against commercial plug-and-play units, assemble a reliable indoor setup without wasting money on gimmicks, and maintain stable nutrient chemistry. Whether your goal is a single mason jar of fresh mint on a bookcase or a productive multi-shelf lettuce rack in a spare closet, the practical framework below will guide your first harvest from seed to plate.
✓ Key Takeaways for Indoor Hydroponic Success
According to Controlled Environment Agriculture standards published by Cornell University CEA, maintaining proper electrical conductivity and solution aeration prevents root zone pathogens and accelerates growth rates by up to 35% over traditional methods.
- Match the system to your reality: Indoor hydroponics spans a spectrum from passive $5 Kratky jars to $900 automated vertical towers. Your available square footage, budget, and daily dietary habits must dictate the hardware, not glossy social media ads.
- Master the three silent killers: Over ninety percent of first-time hydroponic failures stem from inadequate artificial lighting, unchecked reservoir pH, or irregular water top-ups, rather than the mechanical quality of the basin.
- Weigh convenience against long-term control: Commercial smart gardens trade high upfront costs and proprietary seed pods for push-button simplicity; DIY builds trade initial assembly time for cheap generic nutrients and off-the-shelf repairability.
- Start with immediate wins: Launching a single wide-mouth mason jar with looseleaf lettuce or Genovese basil under a modest 30-watt LED proves core biology in three weeks before you invest in high-capacity pumps or plumbing.
- Prevent pests through environmental discipline: Eliminating potting dirt dramatically reduces insect pressure, and weekly inspections paired with yellow sticky monitoring cards resolve minor airborne pest arrivals in under ten minutes.
What Is Indoor Hydroponics (and Why It Works)
Hydroponics is the practice of growing plants without soil by suspending their roots in an oxygenated water solution balanced with bioavailable mineral nutrients. While traditional agriculture relies on earth to support plant stalks and hold moisture, soil itself is not biologically required for plant life. To understand the mechanics of root absorption, read our beginner’s primer on indoor hydroponics to explore how dissolved ionic minerals travel through cell walls.
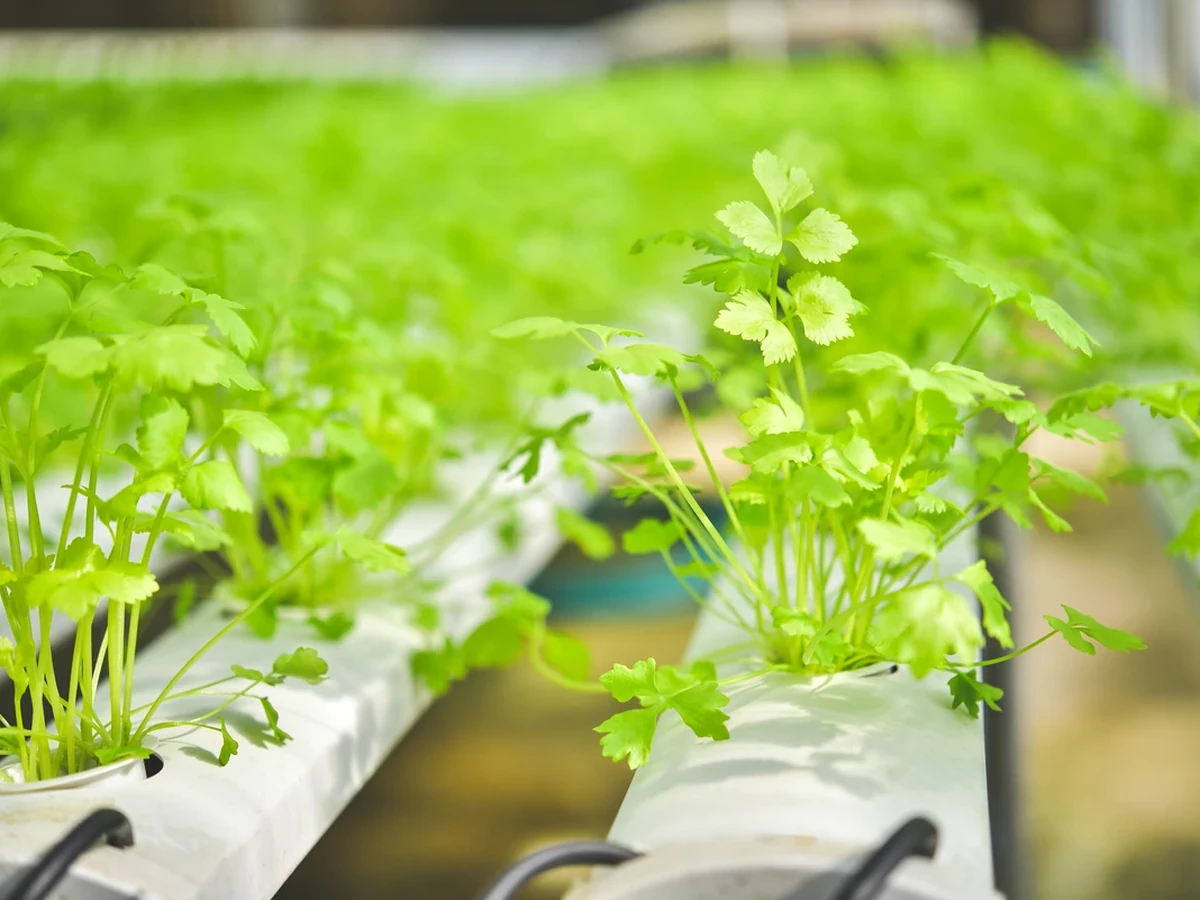
In nature, dirt acts merely as an anchor and an imperfect reservoir. Plant roots must expend massive amounts of metabolic energy growing extensive subterranean networks through compact earth just to forage for microscopic pockets of nitrogen, phosphorus, potassium, and trace minerals. When you dissolve those precise mineral ions into water and circulate oxygen directly against the root mass, the plant shifts its energy from root expansion straight into explosive vegetative growth.
Controlled comparative agronomic studies, including published controlled-environment agriculture trials from the University of Arizona and NASA life-support research, demonstrate that leafy green vegetables cultivated in balanced hydroponic systems grow between 25% and 40% faster than identical cultivars grown in high-quality outdoor loam. Under consistent artificial light and constant mineral availability, crops produce larger, crisper foliage without experiencing water stress or root compaction.
The Operator Responsibility Principle
Removing soil removes nature’s safety cushion. Soil contains organic humus, beneficial mycorrhizal fungi, and clay particles that buffer against temperature swings, water evaporation, and chemical shocks. In a hydroponic reservoir, you are the entire ecosystem. If your reservoir runs out of water, your air pump disconnects, or your nutrient solution swings into severe acidity, your plants have no protective buffer. They will show stress within twelve hours. Hydroponics demands consistent routine over sporadic effort.
Hydroponics vs. Soil: An Honest Comparison
Many indoor gardening resources present hydroponics as an unquestionable upgrade over traditional soil in every scenario. That claim is dishonest. Hydroponics excels at rapid vegetative turnover, water conservation, and clean indoor operation, but soil remains vastly superior for specific plant categories and lifestyle patterns. Understanding the operational trade-offs ensures you choose the right growing medium for your specific living space and schedule.
Where Soil Still Holds the Advantage
Do not convert your entire living space to water basins without considering specific botanical limitations. Soil remains the superior medium in three distinct scenarios:
- Subterranean Root Vegetables: Carrots, radishes, beets, turnips, and potatoes need continuous, uniform mechanical resistance to form straight, fleshy taproots. In net cups and hydroponic media, root vegetables branch out into tangled, deformed hairballs that produce unpalatable yields.
- Low-Maintenance Ornamental Houseplants: Species such as Sansevieria (snake plant), Zamioculcas zamiifolia (ZZ plant), and mature monsteras thrive on dry cycles and neglect. Setting up electrical water pumps for low-consumption foliage creates unnecessary mechanical risk.
- Frequent Travelers and Hands-Off Gardeners: If your career keeps you away from home for two or three weeks at a stretch, an active hydroponic reservoir can suffer pump clogs, air stone failures, or power trips that leave roots desiccated within twenty-four hours. A deep container of organic potting mix mulched with bark can easily coast through an extended absence untouched.
The Six Main System Types (and Where You Fit)
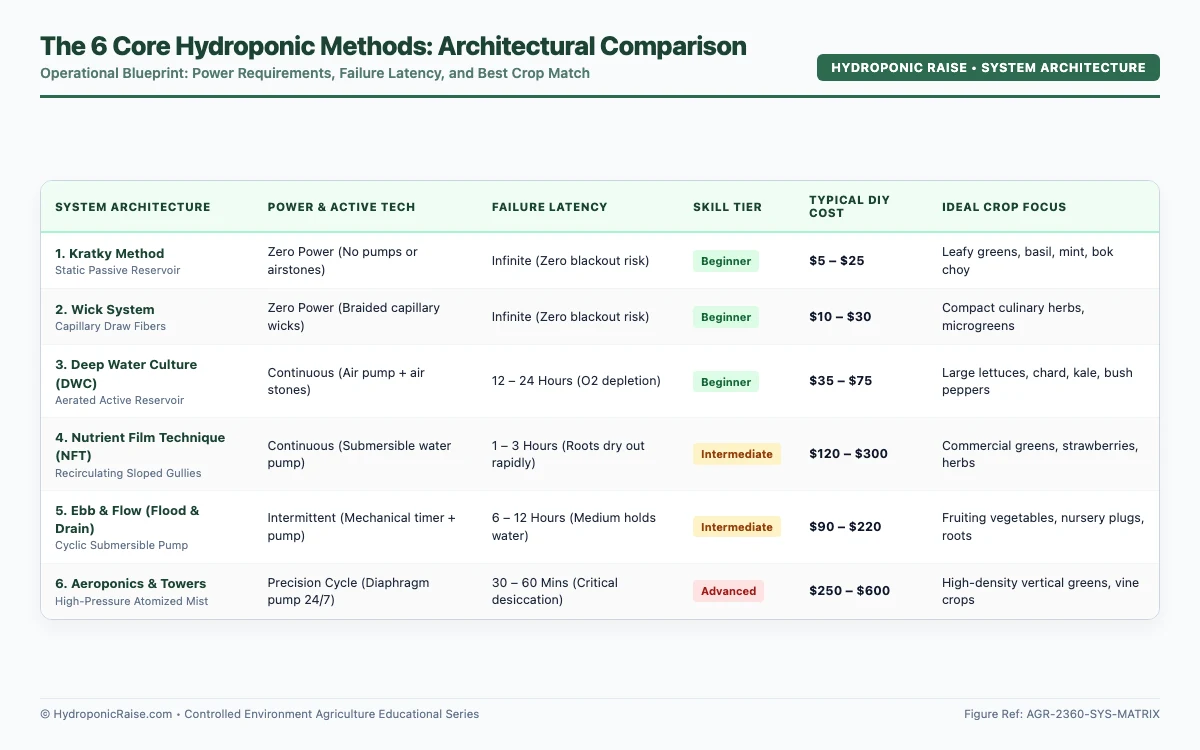
Hydroponics is not a single rigid methodology. It represents six proven engineering configurations designed around fluid dynamics, air exchange, and root oxygenation. Every commercial appliance or DIY bucket you encounter operates on one of these six physical principles.
1. The Kratky Method (Zero-Power Simplicity)
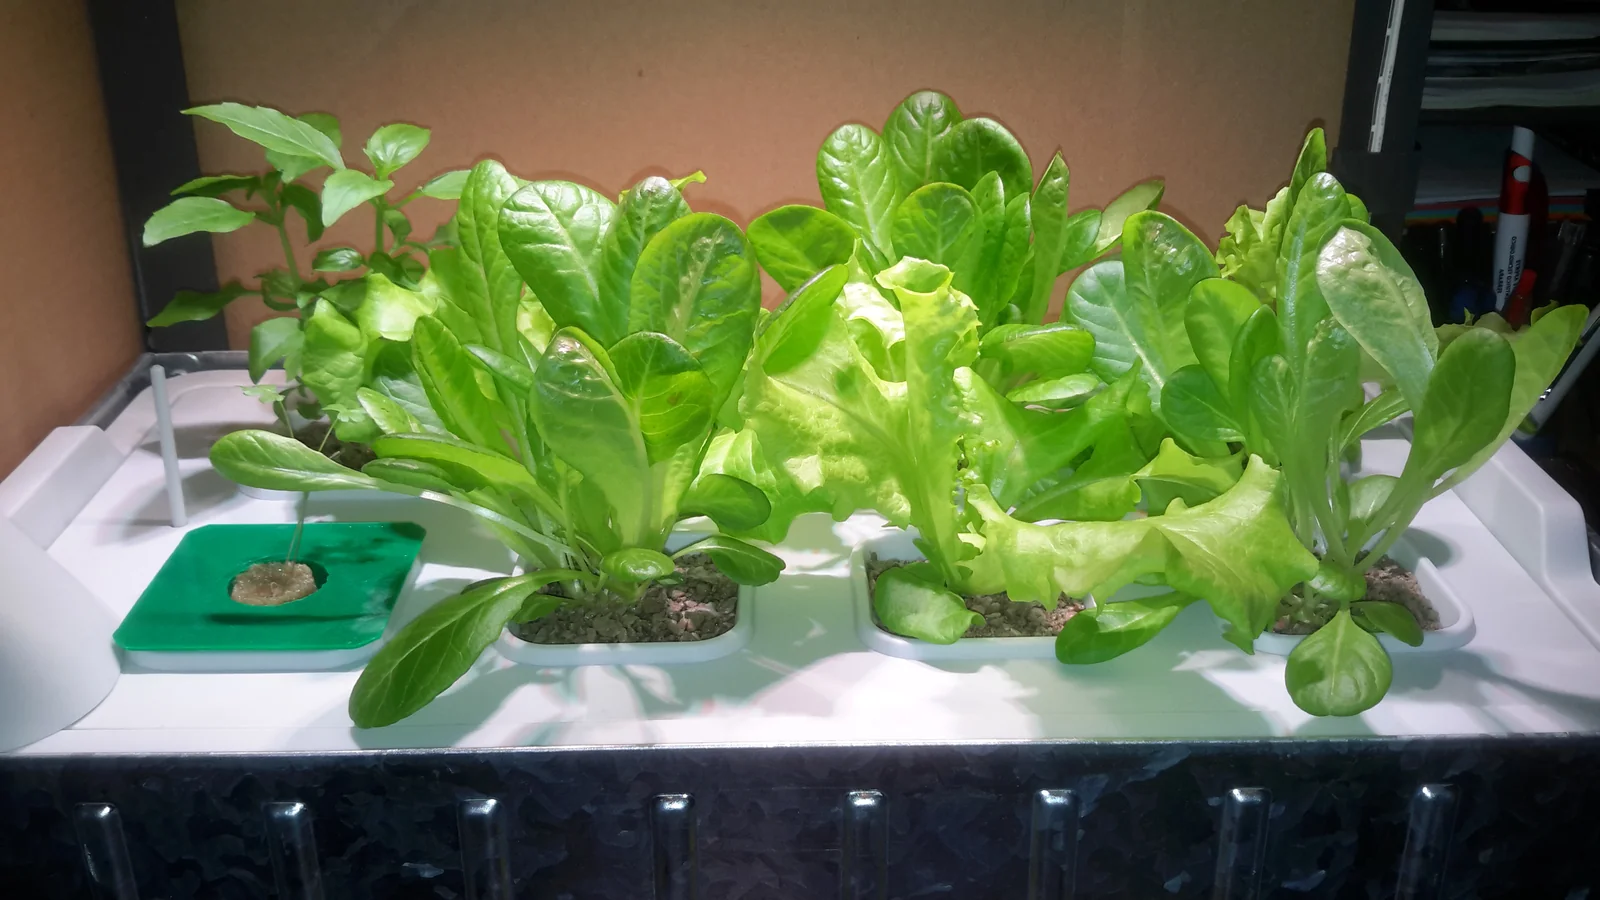
Invented by Dr. Bernard Kratky at the University of Hawaii, this passive technique suspends a seedling in a net cup filled with hydroton clay pebbles over an uncirculated nutrient reservoir. As the plant absorbs water, the fluid level steadily recedes, leaving an expanding air pocket between the net cup and the water surface. The upper roots adapt into “air roots” that inhale ambient oxygen, while the lower taproots draw water and dissolved minerals from the bottom. For a quick desktop build, review our beginner’s primer on indoor hydroponics.
2. The Wick System (Passive Capillary Draw)
A wick system uses braided nylon or fibrous felt cords extending from an unpressurized bottom reservoir up through drainage holes into an inert growing medium like perlite or vermiculite. Capillary action draws the nutrient solution upward against gravity directly into the root zone as the medium dries. It requires no moving parts or electrical wall plugs, making it completely silent.
3. Deep Water Culture (DWC)
Deep Water Culture is the gold standard for beginner-friendly, high-yield indoor production. Plants sit in net cups mounted into the lid of an opaque basin (such as a standard 5-gallon food-grade bucket or a shallow storage tote). The roots hang completely submerged in the nutrient bath twenty-four hours a day. To prevent root suffocation, an external aquarium air pump forces ambient room air through flexible silicone tubing into a porous submerged air stone, filling the entire reservoir with millions of oxygen bubbles.
4. Nutrient Film Technique (NFT)
NFT channels excel for high-oxygen crops that cannot tolerate water immersion. To see commercial-style NFT engineering applied to fruit production at home, read our complete guide on hydroponic strawberries.
In an NFT system, plants rest in net cups along slightly sloped rigid PVC channels or gullies. A submersible water pump in a lower reservoir constantly pushes a thin, shallow stream (a “film”) of nutrient solution down the interior floor of each channel. The tips of the hanging root masses dip into the flowing stream to drink minerals, while the upper portions of the root system remain exposed to the open, humid air inside the channel for oxygen intake.
5. Ebb and Flow (Flood and Drain)
Ebb and Flow setups utilize a top grow bed filled with expanded clay pebbles (LECA) positioned directly above a lower nutrient tank. A submerged water pump connected to a mechanical timer floods the upper bed with nutrient solution three to six times per day, soaking the root network. When the pump shuts off, gravity siphons the water back down through an overflow valve into the holding tank, pulling fresh room oxygen deep into the pebble bed behind it.
6. Aeroponics and Vertical Towers
Aeroponics represents the highest tier of root oxygenation and fluid efficiency. Plant roots hang suspended inside a sealed, dark vertical column or misting chamber without any standing water. A high-pressure diaphragm pump forces nutrient solution through micro-misting nozzles, coating the bare roots in a fine, atomized aerosol fog every three to five minutes.
7. Commercial Smart Countertop Appliances
Integrated consumer appliances combine a miniature water reservoir, automated low-voltage pump, full-spectrum LED light hood, and programmed reminder sensors into a single sleek shell. Units from entry-level countertop brands run between $100 and $250, while premium vertical furniture units (such as the Gardyn Home 4.0 or Rise Gardens Family Garden) range between $449 and $899 in current 2026 market pricing. Compare popular smart countertop appliances and vertical towers in our 3-year testing review of 7 indoor garden systems.
Choosing Your System: A Practical Decision Framework
Most beginners start backward by picking a flashy piece of hardware online before analyzing their real physical living conditions. Choosing the wrong configuration leads directly to abandoned gear and dead plants. Apply this straightforward four-part self-audit to identify your logical starting point:
The Four-Question Self-Audit
- Physical Footprint and Available Space:
- Countertop / Bookshelf: Choose a passive Kratky wide-mouth jar or a compact 3-pod to 6-pod countertop smart appliance.
- Unused Room Corner (2×2 ft floor space): Choose a single 5-gallon DWC bucket or a compact vertical tower.
- Dedicated Closet, Utility Room, or Basement Rack (2×4 ft+): Choose a multi-channel NFT rail system or a modular multi-bucket DWC loop.
- Real Upfront Budget Allocation:
- Under $25: Build a DIY mason jar Kratky setup using recycled glass, a 3-inch net cup, and generic dry mineral salts.
- $30 to $80: Assemble a complete 5-gallon DWC bucket kit with an adjustable aquarium air pump and clip-on LED panel.
- $100 to $250: Purchase a countertop smart garden or build a multi-head DIY NFT bench.
- $450 to $900: Invest in a multi-tier vertical smart tower appliance for high-density living room food production.
- Weekly Time Commitment:
- 5 minutes every two weeks: Run passive Kratky jars. Mix the water once, set it under a light timer, and snip herbs as needed.
- 15 minutes once a week: Run DWC buckets or a countertop smart unit. Top up evaporated water, check pH, and inspect roots.
- 45 to 60 minutes weekly: Run active multi-plant NFT or Ebb and Flow systems requiring pump maintenance, reservoir scrubbing, and filter clearing.
- Dietary Intent and Crop Preference:
- Fresh Culinary Herbs (Basil, Mint, Cilantro, Parsley): Any system succeeds; Kratky and small desktop units are optimal.
- Daily Crisp Salad Bowls (Butterhead, Romaine, Arugula): DWC buckets or multi-channel NFT rails provide rapid leaf volume.
- Fresh Fruiting Vegetables (Cherry Tomatoes, Chili Peppers): Requires 5-gallon DWC reservoirs or Ebb and Flow pebble beds with heavy trellising.
Plug-and-Play vs. DIY: The Real Financial Trade-Off
New growers frequently agonize over buying an out-of-the-box commercial appliance versus assembling a custom system from hardware store parts. Both approaches work, but they present radically different long-term cost structures and failure points.
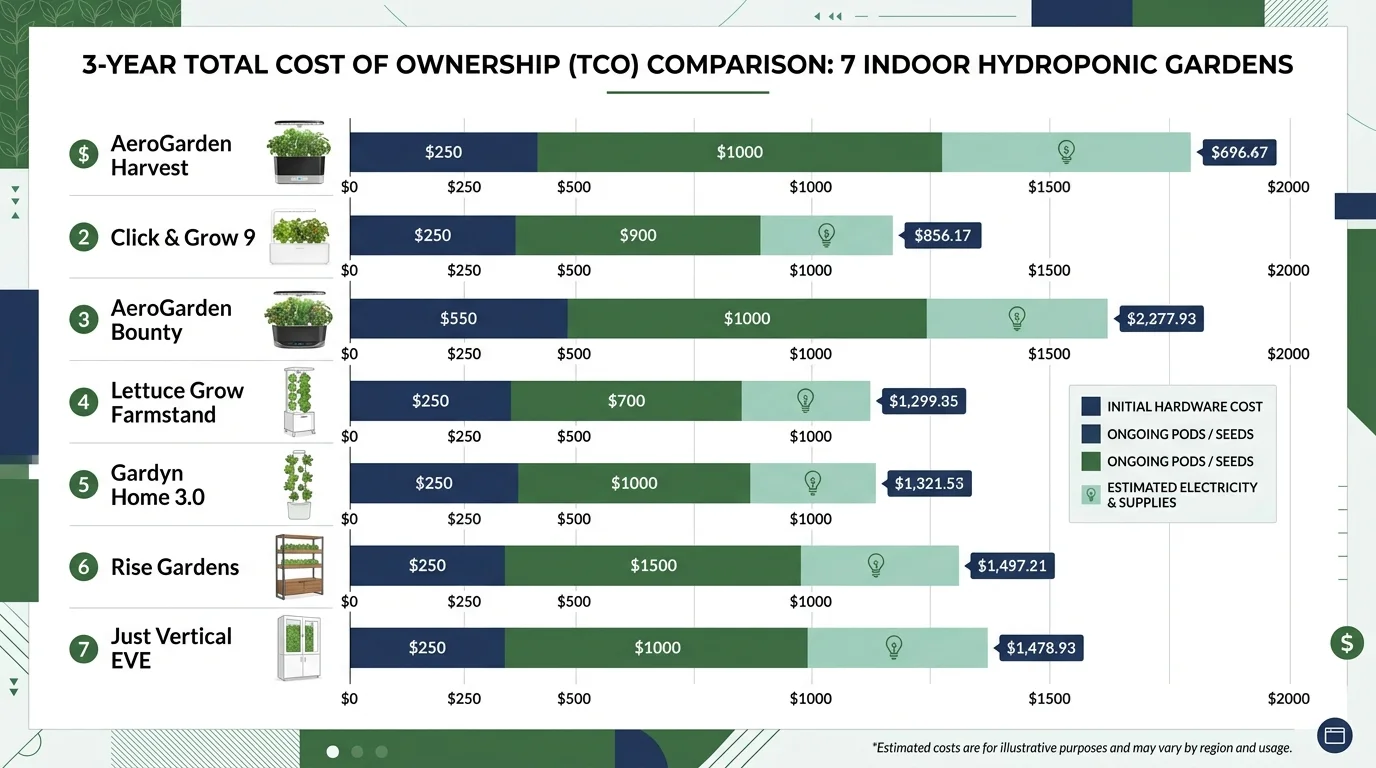
To evaluate commercial smart hardware against DIY builds, read our 3-year testing evaluation of 7 indoor garden systems.
Custom Milestone Timeline: Indoor Growing Cycle Planner
Track week-by-week milestones from germination to harvest with custom lighting hours, pruning dates, and nutrient schedules for your specific crops.
Matching Crops to Systems (Crop-First Logic)
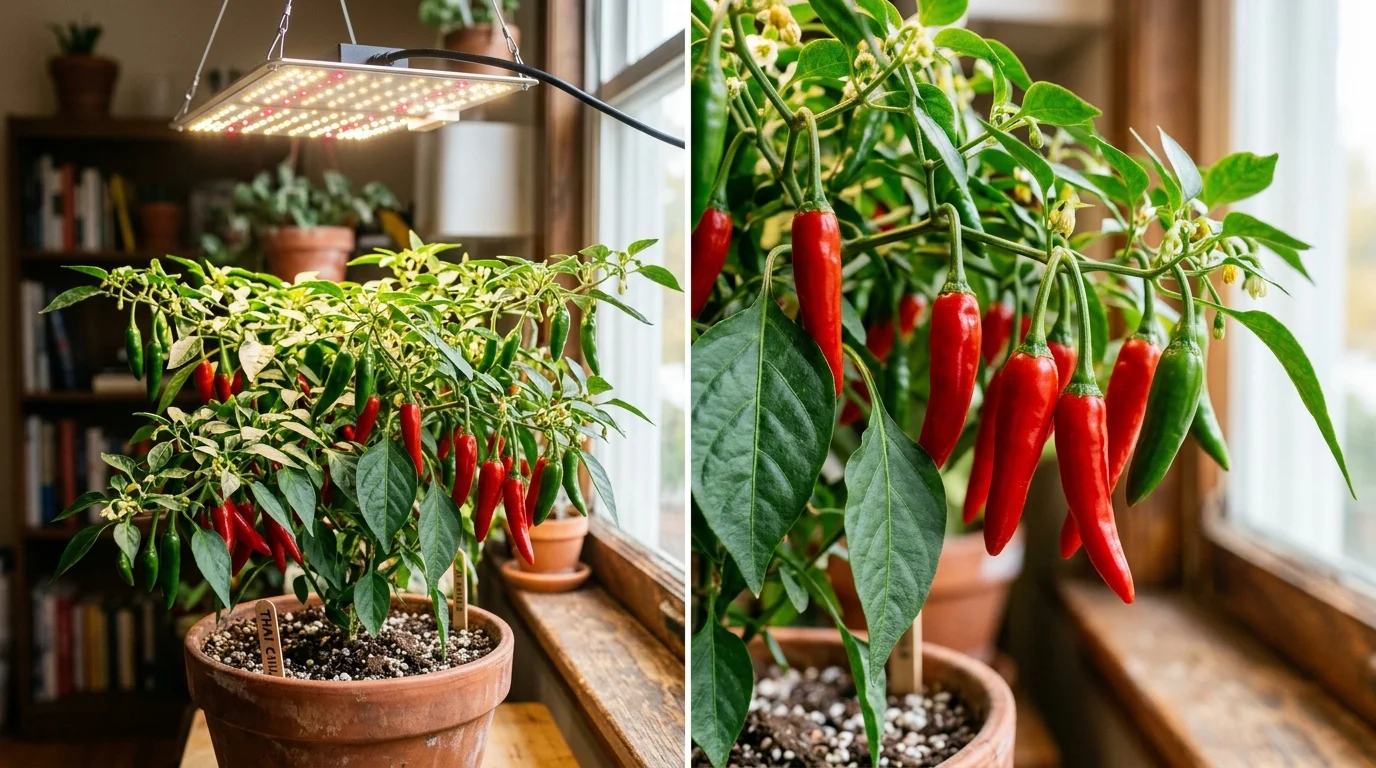
Before buying hardware, match your crop physiology to the right hydroponic or container setup. Fruiting nightshades like peppers demand intense lighting and high root oxygen; see our complete blueprint for growing peppers indoors.
The single most common mistake new hydroponic growers make is selecting a mechanical system before deciding what plants they intend to eat. The biological needs of the crop must dictate the hardware, never the reverse.
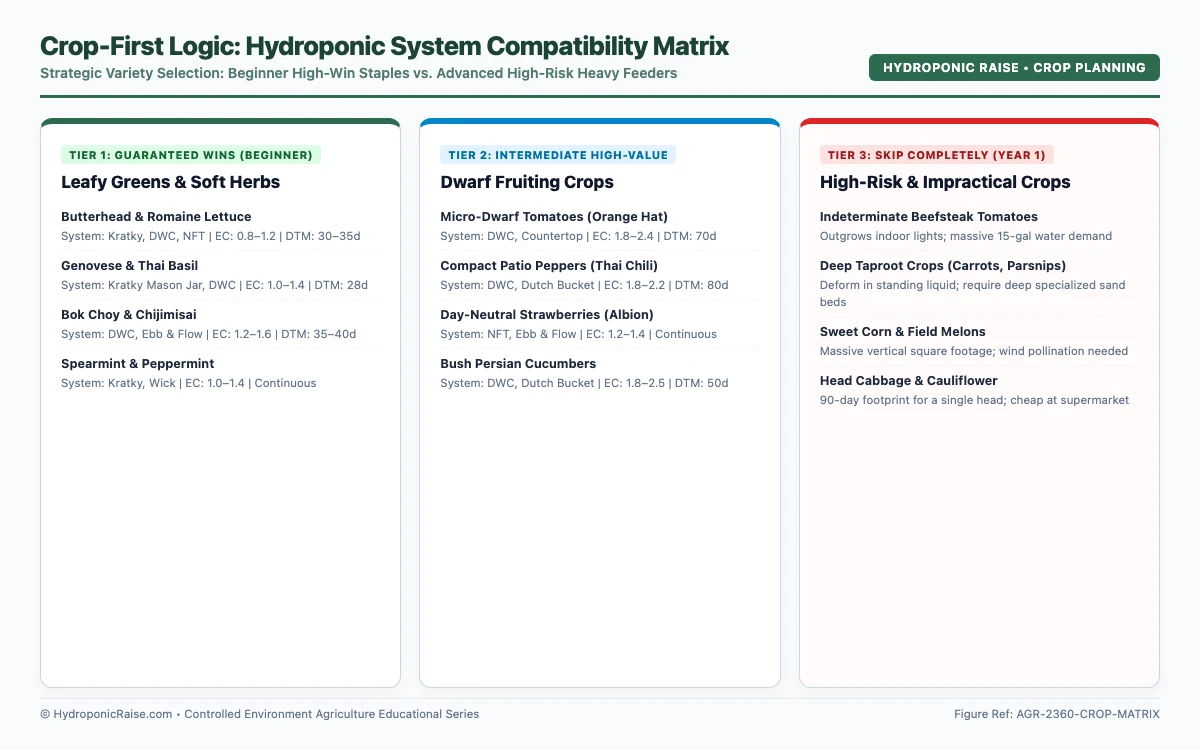
For lighting targets on strawberries and dwarf tomatoes, review our guide to growing fruit indoors.
The Two-Crop Supermarket Rule
For your initial cycle, select exactly two edible crops that you already buy every single week at the grocery store. If you buy clamshells of sweet basil and heads of romaine every Tuesday, plant those two. Growing greens that immediately replace recurring grocery store expenses creates an instant sense of momentum.
What to Skip Completely in Year One
Keep your initial cycles focused on vegetative stability. Skip large vining winter squash, standard slicing field tomatoes, sweet corn, melons, and root crops. Vining crops demand massive vertical space, exhaust multi-gallon reservoirs within forty-eight hours, and quickly overwhelm indoor light fixtures, leading to pest outbreaks and gardener burnout.
Setting Up Your Indoor Garden: The Step-by-Step Reality
Assembling a reliable indoor growing station requires executing tasks in a logical sequence. Follow this four-phase assembly sequence:
- Select Location First: Place your system within ten feet of a domestic water source and an electrical outlet protected by a ground-fault circuit interrupter (GFCI). Keep the basin away from forced-air heating vents, drafty window glass, and direct south-facing sunlight that overheats the nutrient reservoir.
- Mount and Distance the Lighting: Secure your artificial grow light fixture to a stable wire shelving rack, ceiling hook, or adjustable stand before introducing water. Verify that your fixture can be adjusted vertically as the plant canopy expands upward.
- Prepare Water and Mineral Solution: Fill your reservoir with dechlorinated water. Add concentrated hydroponic mineral nutrients, stir thoroughly, and check your chemical values before inserting plants.
- Seat Net Cups and Start Circulation: Place germinated seed plugs into net cups lined with expanded clay pebbles. Plug in your air pump or cyclic water timer, verify smooth water flow without leaks, and start your lighting timer.
Light: The Make-or-Break Factor
Natural winter window light is almost never sufficient for indoor hydroponics. Even an unobstructed, south-facing kitchen window in January delivers fewer than 100 μmol/m²/s of Photosynthetic Photon Flux Density (PPFD) over an abbreviated four-to-six-hour arc. Under those dark conditions, vegetable seedlings stretch toward the glass, developing weak, stringy, translucent stems that collapse under their own weight. Fast-growing leafy greens and herbs require a consistent photoperiod of 14 to 16 hours of light daily delivering between 200 and 300 μmol/m²/s PPFD.
Budget Light Recommendation ($25 – $50)
You do not need an industrial $400 commercial grow fixture for a counter or shelf. For a single mason jar or desktop DWC bucket, a Sansi 36-watt full-spectrum LED bulb mounted in a basic clamp fixture provides intense, balanced daylight spectrum for under $35. Position the LED bars 6 to 10 inches directly above the top leaves and plug them into a simple $8 mechanical outlet timer set for 15 hours on and 9 hours off.
Water, Nutrients, and pH Demystified
Managing hydroponic water chemistry does not require an advanced degree in chemical engineering. You only need to balance three fundamental metrics: water purity, mineral concentration, and solution pH.
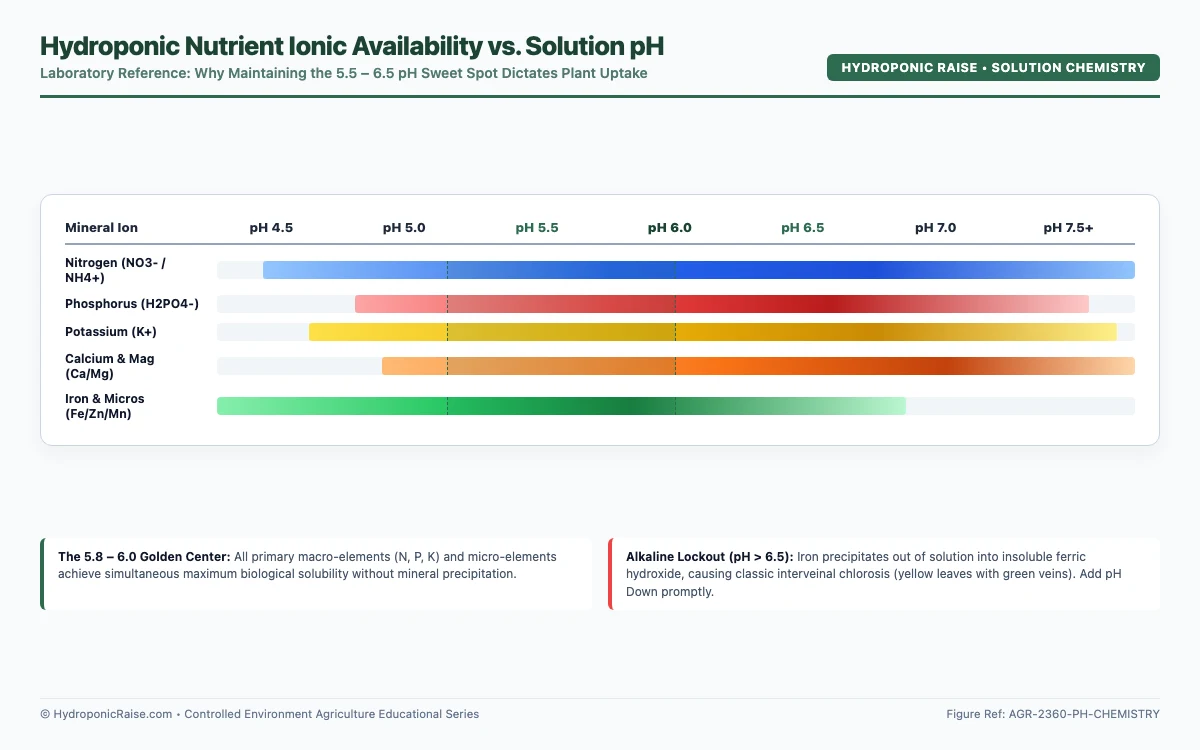
- Starting Water: Standard municipal tap water is completely adequate in most regions provided the baseline electrical conductivity (EC) is below 250 ppm.
- Nutrient Mineral Concentrates: Avoid standard garden dirt fertilizers like Miracle-Gro, which rely on urea. Use mineral fertilizers formulated specifically for hydroponics (such as General Hydroponics Flora Series liquid concentrates or dry Masterblend 4-18-38 powder).
- The Critical pH Window (5.5 – 6.5): Maintain your reservoir strictly between 5.5 and 6.5 (with 5.8 to 6.0 representing the sweet spot for lettuce and basil).
The Golden Reservoir Routine: Top Up, Then Drain
During the week, top up the reservoir with plain, pH-adjusted water throughout the week as the water level drops. Do not keep adding more fertilizer. Then, perform a complete 100% water and nutrient drain every fourteen days. Dumping the old solution and mixing fresh minerals flushes accumulated mineral salts and resets your pH baseline cleanly.
Five Common Setup Mistakes to Avoid
- Placing lights too far away: Mount your LEDs 6 to 10 inches above the foliage; hanging a weak light near the ceiling causes pale, leggy stems.
- Guessing reservoir pH blindly: Purchase a $10 liquid indicator drop kit and test every fresh batch of nutrient water before introducing root systems.
- Overdosing juvenile seedlings with fertilizer: Mix your nutrient solution at 50% package strength for the first two weeks of vegetative growth.
- Exposing nutrient water to direct room light: Use opaque, dark containers; translucent plastic tubs allow light to penetrate the water, sparking explosive green algae blooms.
- Positioning reservoirs directly on freezing tile: Elevate buckets or trays onto wood slats or foam boards to keep cold winter floor temperatures from chilling root zones below 65°F.
Starting Seeds and Your First Crops
Starting seeds for hydroponics requires sterile, soil-free propagation plugs that hold high moisture while allowing air penetration to the germinating taproot. To master seed germination and seedling care, follow our guide to starting a garden from seed.
Selecting the Right Propagation Substrate
- Rockwool (Stonewool) Starter Cubes: Spun basalt rock fibers holding outstanding moisture and air ratios. Pre-soak cubes in pH 5.5 adjusted water for thirty minutes before sowing seeds.
- Pre-Formed Peat or Polymer Grow Sponges: Compressed organic plugs (such as Rapid Rooter or generic smart garden sponges) requiring zero chemical soaking.
- Coco Coir Plugs: Shredded coconut husk fiber pellets. Highly renewable and chemically neutral.
The Germination and Transplant Protocol
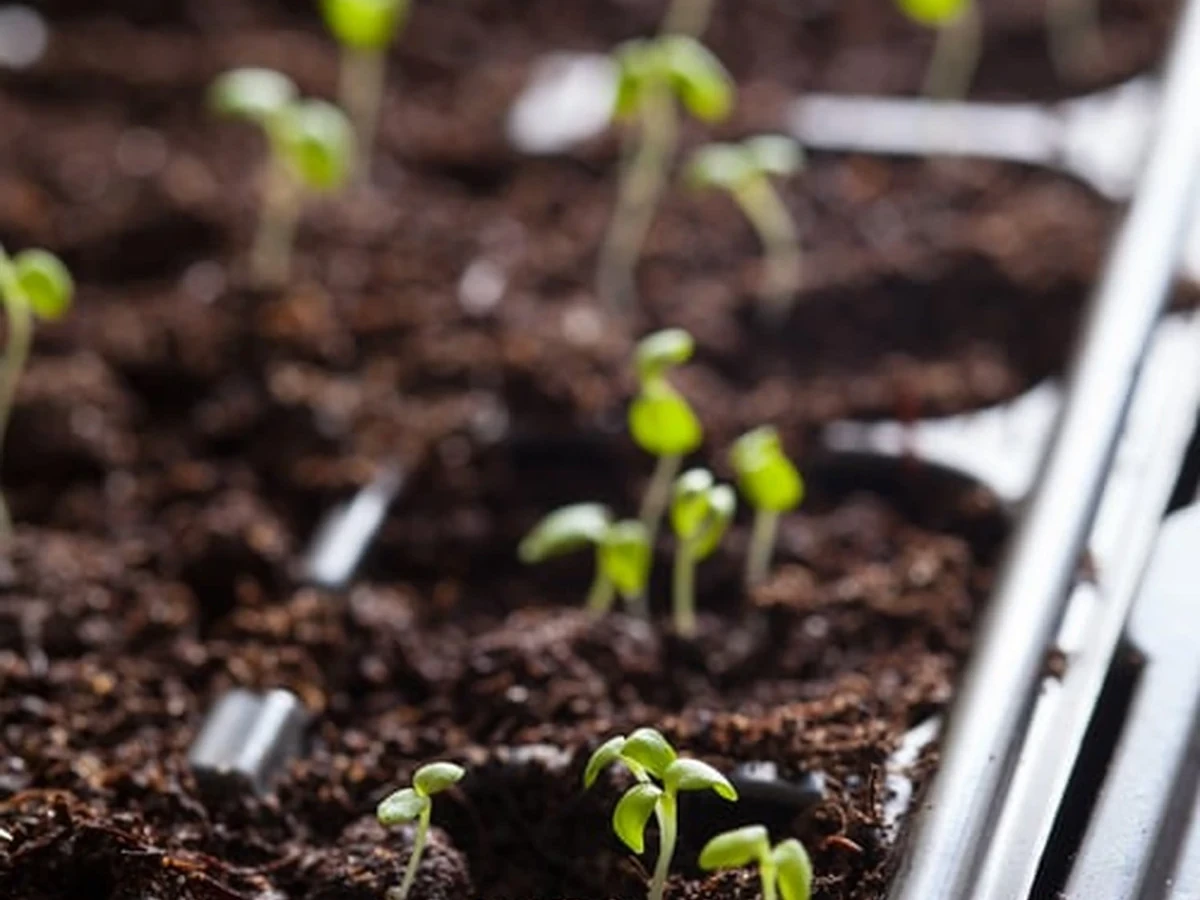
Drop two to three seeds into the center cavity of each moistened plug. Cover with a plastic dome at 70°F to 75°F (21°C to 24°C). As soon as sprouts emerge (day 3 to 6), remove the dome and place LEDs 4 to 6 inches above foliage. When true leaves and white root strands emerge (day 10 to 14), thin to the single strongest stalk and transplant into your net cup.
Interactive Tool: Hydroponic Nutrient & pH Calculator
Calculate exact nutrient dosage (in mL or grams) and dial in your target EC, PPM, and pH thresholds for every growth stage.
Keeping It Alive: Maintenance, Pests, and Troubleshooting
The 5-Minute Sunday Maintenance Routine
- Check water volume: Top up with plain, room-temperature dechlorinated water as needed.
- Verify pH: Confirm pH rests between 5.5 and 6.5 using test drops.
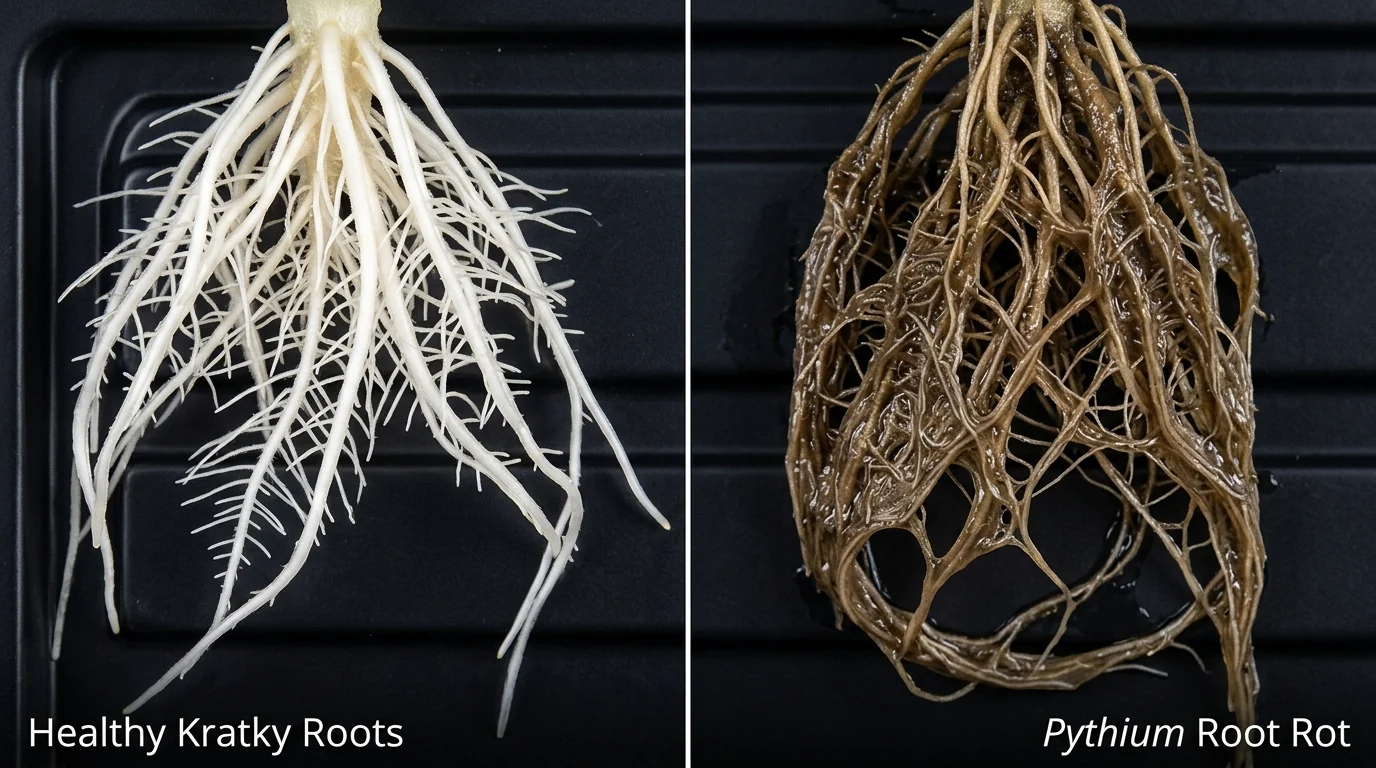
- Inspect root health: Lift one net cup; healthy roots are crisp, firm, and pearly white.
- Prune lower foliage: Snip away yellowing base leaves and harvest mature outer salad foliage.
Indoor Hydroponic Gardens and Pest Reality
Eliminating dirt reduces pests, but fungus gnats, aphids, or spider mites can enter via open windows or nursery plants. Hang yellow sticky cards at canopy height for early visual radar, quarantine new store plants, cover exposed moist media with dry clay pebbles, and spot-treat minor arrivals with insecticidal soap or mild neem emulsion.
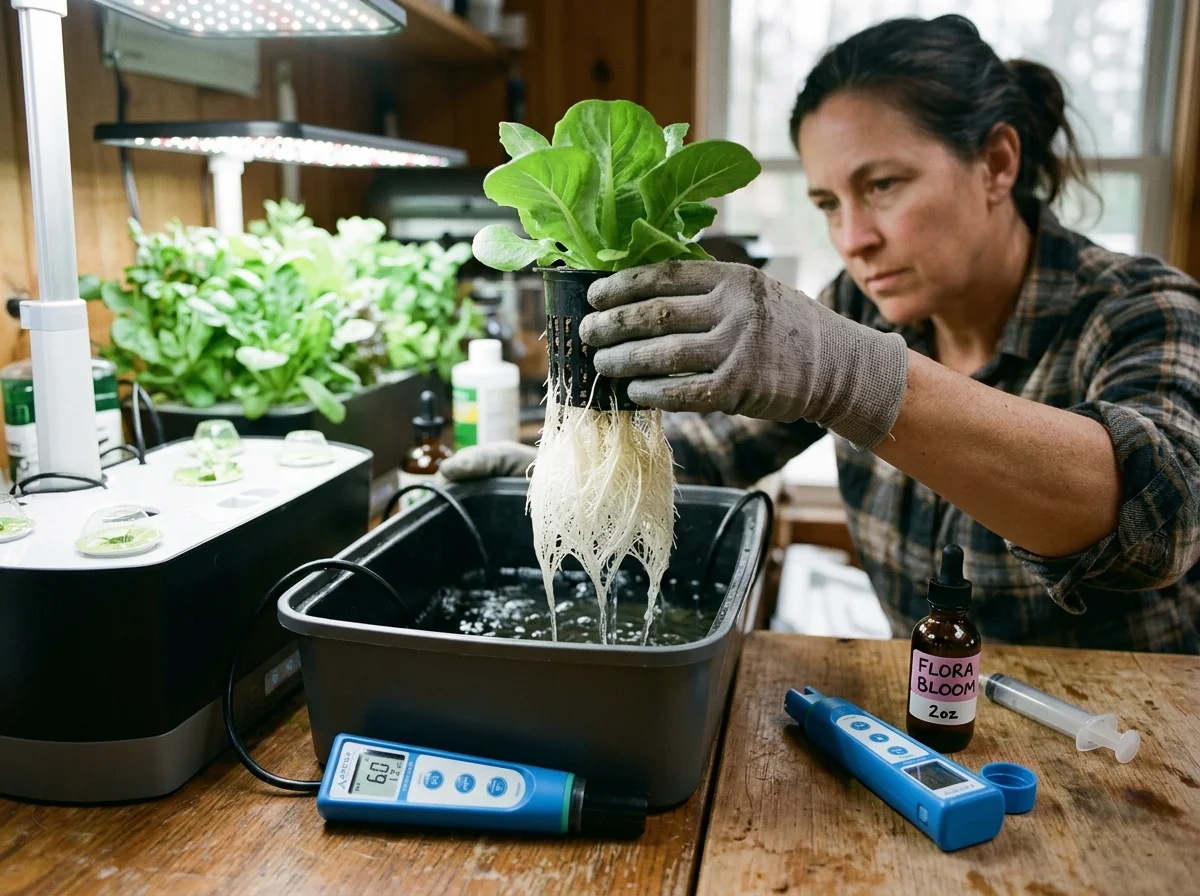
The Five Most Common Problems (and Their Immediate Fixes)
Frequently Asked Questions About Indoor Hydroponics
Do indoor hydroponic gardens attract bugs?
How much does a good indoor hydroponic system cost?
What is the easiest hydroponic system for a beginner?
Can I grow tomatoes indoors hydroponically?
How often do I need to change the water and nutrients?
Is hydroponics better than growing in soil?
Hydroponic System Engineering, Aeration & Solution Dynamics
Comparative hydraulic, mechanical aeration, and volume buffer specifications across primary indoor growing systems.
| System Architecture | Min Res Vol / Plant | Air Pump Capacity (LPM) | Hydraulic Flow Velocity | Solution Turnover Rate | EC Drift Risk |
|---|---|---|---|---|---|
| Deep Water Culture (DWC) | 3 – 5 Gallons | 1.5 – 2.0 LPM per gallon | Static (Air Stone Driven) | Continuous Aeration | Low (High Buffer) |
| Nutrient Film Technique (NFT) | 0.5 – 1.0 Gallon | 0.5 LPM / gal in sump | 1 – 2 Liters/minute channel | 100% Recirculating Constant | High (Rapid Evap) |
| Kratky Method (Passive) | 1 – 2 Gallons | None (Moist Air Root Gap) | Zero (Non-circulating) | Static Fill-and-Forget | Moderate (Top-off) |
| Ebb & Flow (Flood & Drain) | 2 – 3 Gallons | 0.5 LPM / gal in reservoir | 250 – 500 GPH Submersible | 4 – 6 Flood Cycles / Day | Low–Moderate |
| Dutch Bucket (Bato) | 3 – 5 Gallons | 0.5 LPM / gal in reservoir | 2.0 L/hr per pressure dripper | Intermittent Dripping Cycle | Low (Media Buffer) |
| High-Pressure Aeroponics | 1.5 – 2.0 Gallons | High Dissolved O2 (Fine Mist) | 80 – 100 PSI (50 Micron droplets) | 5 sec ON / 5 min OFF | Very High (Zero Media) |

Pingback: Indoor Hydroponics for Beginners: The Complete Guide