⚡ Quick Answer
Growing peppers at home in containers is straightforward — they need a 3–5 gallon pot, full sun (6+ hours) or grow lights, regular feeding with a high-potassium fertilizer, and consistent watering. Most varieties go from seed to first harvest in 3–5 months, with a single plant producing 20–50 peppers per season.
A pepper plant on a sunny windowsill will survive. A pepper plant under a grow light will thrive. The difference is about 300 pods a year.
Almost every beginner starts the exact same way. You buy a small plastic pot labeled “Bell Pepper” from a home improvement nursery in May. You set it on a sunny kitchen sill, water it faithfully every morning, and watch it stretch toward the glass. By August, you have a tall, skinny, three-foot stalk with four pale leaves and two undersized, bitter pods that took five months to form. You conclude that peppers are fussy, difficult, and require a half-acre farm in California to yield real food.
That assumption is dead wrong. Peppers are actually woody perennial shrubs that love container life. Given the right conditions, a single potted pepper plant will out-produce an entire row of neglected garden plants and keep fruiting continuously for three to five years inside your home.
Indoor and container growing is not a consolation prize for gardeners without a yard. It is a precision growing environment. You control the temperature, you eliminate soil-borne pests, and you decide exactly how many hours of intense photosynthetic light hit the canopy every day. Whether you want sweet snacking peppers, fruity zero-heat habanadas, fiery Thai bird chilies, or ornamental purple pods, this guide covers the entire journey from dry seed to overflowing harvest basket.
✓ Key Takeaways for Home Growers
- Light intensity determines your harvest: Peppers demand 6 to 8 hours of direct, high-intensity light daily. A standard window rarely delivers enough energy through window glass; a dedicated full-spectrum LED panel running 14 hours a day bridges the gap completely.
- Species predicts care and timing: Choosing between Capsicum annuum (fast, 60–90 days) and Capsicum chinense (slow, 100–150+ days) matters far more than the specific seed brand you buy.
- Drainage and air flow prevent root rot: Overwatering in dense soil suffocates pepper roots faster than any disease. Use a light, peat- or coco-based potting mix amended with 25% to 30% coarse perlite and containers with unobstructed drainage holes.
- Targeted pruning doubles branch yield: Topping small-fruited varieties at six inches forces rapid lateral branching, transforming a spindly single stalk into a dense, multi-stem bush loaded with flower nodes.
- Peppers are perennials: You do not need to restart from seed every spring. Potted peppers can be cut back and overwintered indoors to produce an explosive, early crop in year two.
Know Your Pepper: Species, Types, and Biological Identification
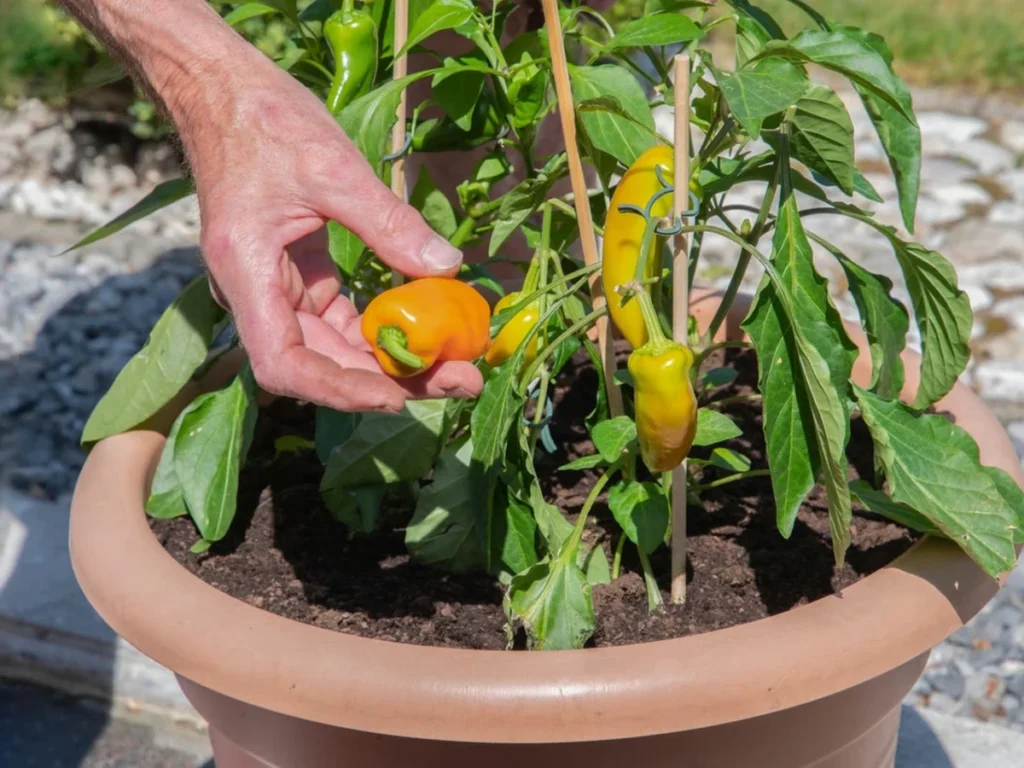
Research from Texas A&M AgriLife Extension confirms that container peppers require sharp-draining potting substrates with at least 20% horticultural perlite to prevent root compaction and blossom end rot during high summer transpiration.
All cultivated peppers belong to the botanical genus Capsicum. While nursery tags treat every variety like a generic “chili,” the species determines how warm the soil must be to sprout, how many months the plant needs to ripen pods, and how the root system behaves in a pot.
According to horticultural research from the University of Georgia Extension and Iowa State University Extension, cultivated peppers fall into five distinct domesticated species. Understanding these five groups eliminates guesswork from your indoor calendar:
For home and indoor growers, Capsicum annuum offers the fastest return on investment. Seeds sprout quickly at ordinary room temperature, the root systems stay manageable in two- to three-gallon pots, and pods start ripening within two months of transplanting.
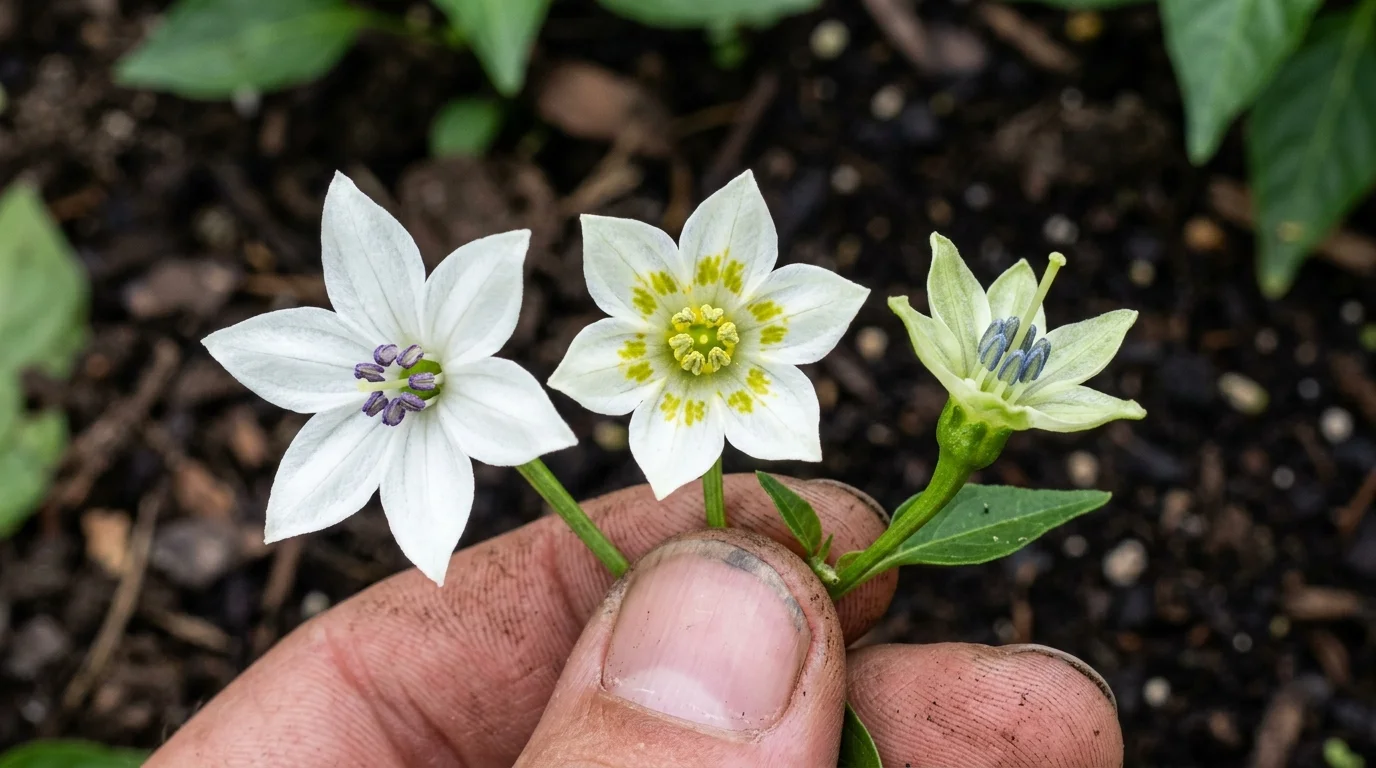
If you have volunteer seedlings or unmarked pots, read our complete botanical breakdown on identifying pepper plants to identify your plants by flower petal pigmentation, calyx constriction rings, and stem characteristics before setting up your grow space.
Custom Milestone Timeline: Indoor Growing Cycle Planner
Track week-by-week milestones from germination to harvest with custom lighting hours, pruning dates, and nutrient schedules for your specific crops.
Choosing the Right Pepper for Your Space and Goals
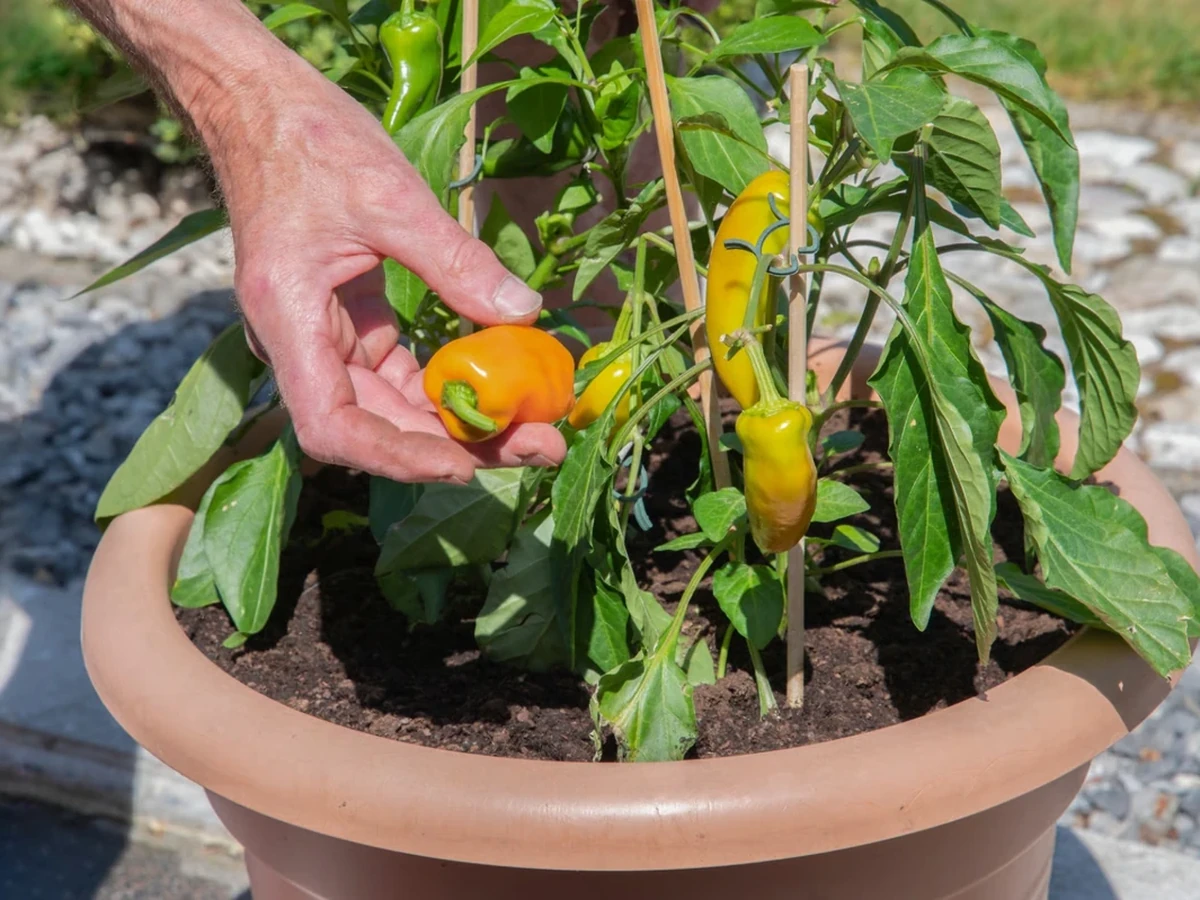
Match your variety choice to your actual physical constraints rather than a colorful seed catalog photo. Before ordering seeds, evaluate three primary physical constraints:
- Available vertical clearance: A micro-dwarf or ornamental pepper stays under twelve inches tall. A sprawling South American baccatum easily expands four feet wide and five feet tall.
- Household heat tolerance and culinary use: Growing ten super-hot Carolina Reaper plants yields hundreds of blisteringly hot pods that sit unused in a freezer. Balance your grow with sweet snacking peppers or culinary staples.
- Lighting infrastructure in your grow space: If you rely on windowsill daylight, choose rapid, compact annuum varieties. If you run a high-output LED grow light on an automatic timer, season length is irrelevant and you can grow 150-day tropical chinense varieties year-round.
Sweet and Mild Peppers: Snacking Without the Burn
Standard grocery store bell peppers are the slowest and most demanding sweet peppers you can grow indoors. Their massive, thick-walled fruit requires vast amounts of photosynthetic energy, consistent moisture, and large five-gallon containers. If you want sweet peppers in small spaces, grow smaller-fruited varieties that ripen twice as fast:
- Shishito (0 to 200 SHU): The premier culinary container pepper. Plants stay compact (18 to 24 inches), set heavy clusters of thin-walled wrinkled pods, and produce continuously. Harvest them green, blister them in a hot skillet with olive oil and coarse sea salt, and enjoy a sweet, savory snack where roughly one in ten pods carries a surprising mild kick.
- Lunchbox / Mini Sweet Peppers (0 SHU): Compact, productive bushes that yield dozens of two-inch red, orange, and yellow snacking peppers with thick, crisp, sugary walls. They ripen weeks ahead of full-sized bells in three-gallon pots.
- Sweet Banana Pepper (0 to 500 SHU): Long, tapered yellow-green pods that turn bright red when fully ripe. Highly productive in container setups and ideal for fresh slicing, salads, or quick refrigerator pickling.
Hot Peppers: Culinary Workhorses
The Scoville Heat Unit (SHU) scale measures capsaicin concentration. For everyday cooking, choose varieties that fit your household palate:
- Early Jalapeño (2,500 to 8,000 SHU): Bred specifically for cooler climates and shorter seasons. Plants stay sturdy and set heavy crops of classic blunt-tipped pods in two- to three-gallon pots.
- Serrano (10,000 to 23,000 SHU): Brighter, crisper, and noticeably hotter than a jalapeño. Serrano bushes produce abundant, slender green pods that hold their firm texture well in fresh salsas.
- Cayenne / Ring of Fire (30,000 to 50,000 SHU): Slender, wrinkled six-inch pods that turn crimson. Thin walls make them the easiest pepper to dry into homemade crushed pepper flakes or cayenne powder on a dehydrator rack.
Ornamental Peppers: Beauty and Function
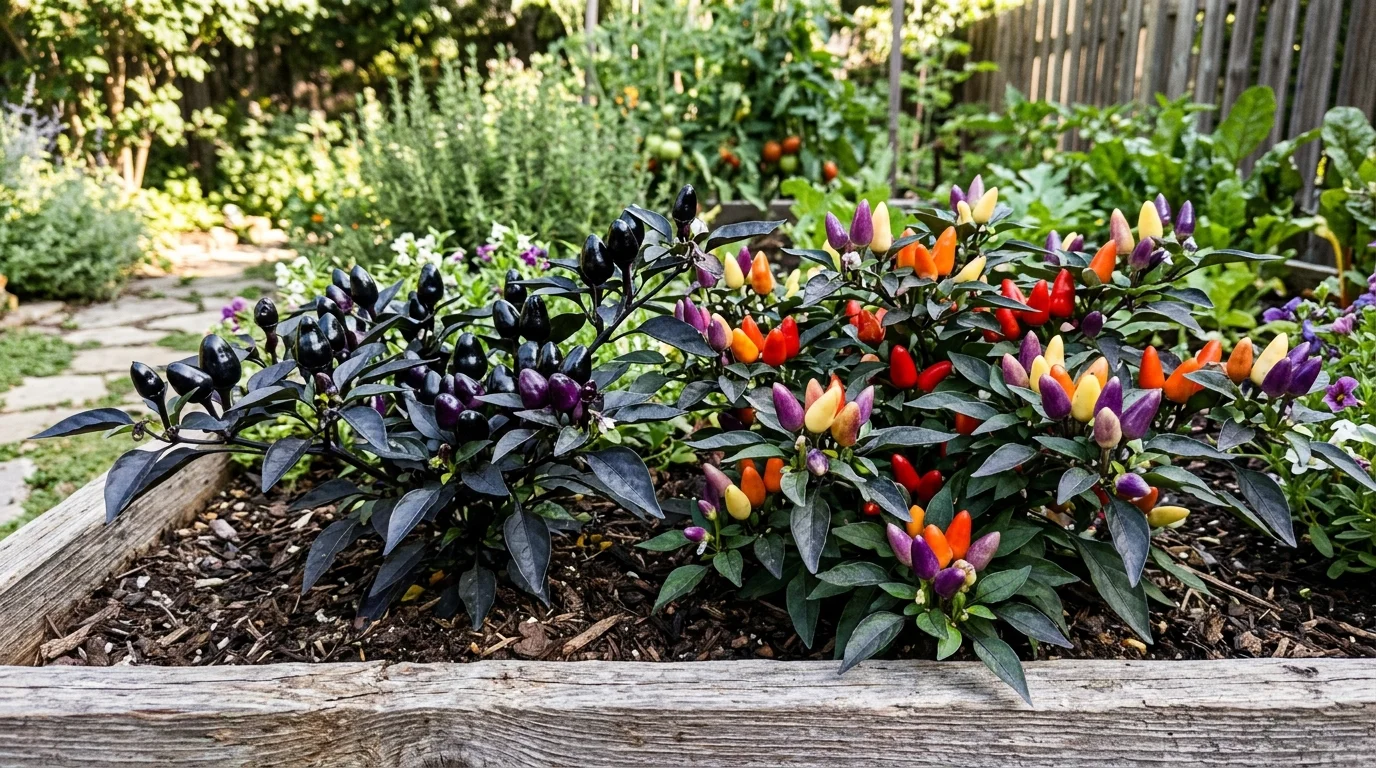
A widespread myth claims that ornamental peppers are poisonous. They are completely edible, but breeders selected them for compact stature, dark purple or variegated foliage, and upright flower clusters rather than tender culinary flesh. Their pods are often thin-walled, heavily seeded, and punch with intense, sharp heat.
To see which varieties excel on coffee tables and patio railings, read our detailed review of ornamental pepper plants. A prime recommendation for a six-inch windowsill pot is the Black Pearl—a striking cultivar with deep ebony foliage, lilac flowers, and round, glossy black pearl-like pods that ripen to fiery crimson (30,000 SHU).
Habanada: The Heatless Habanero
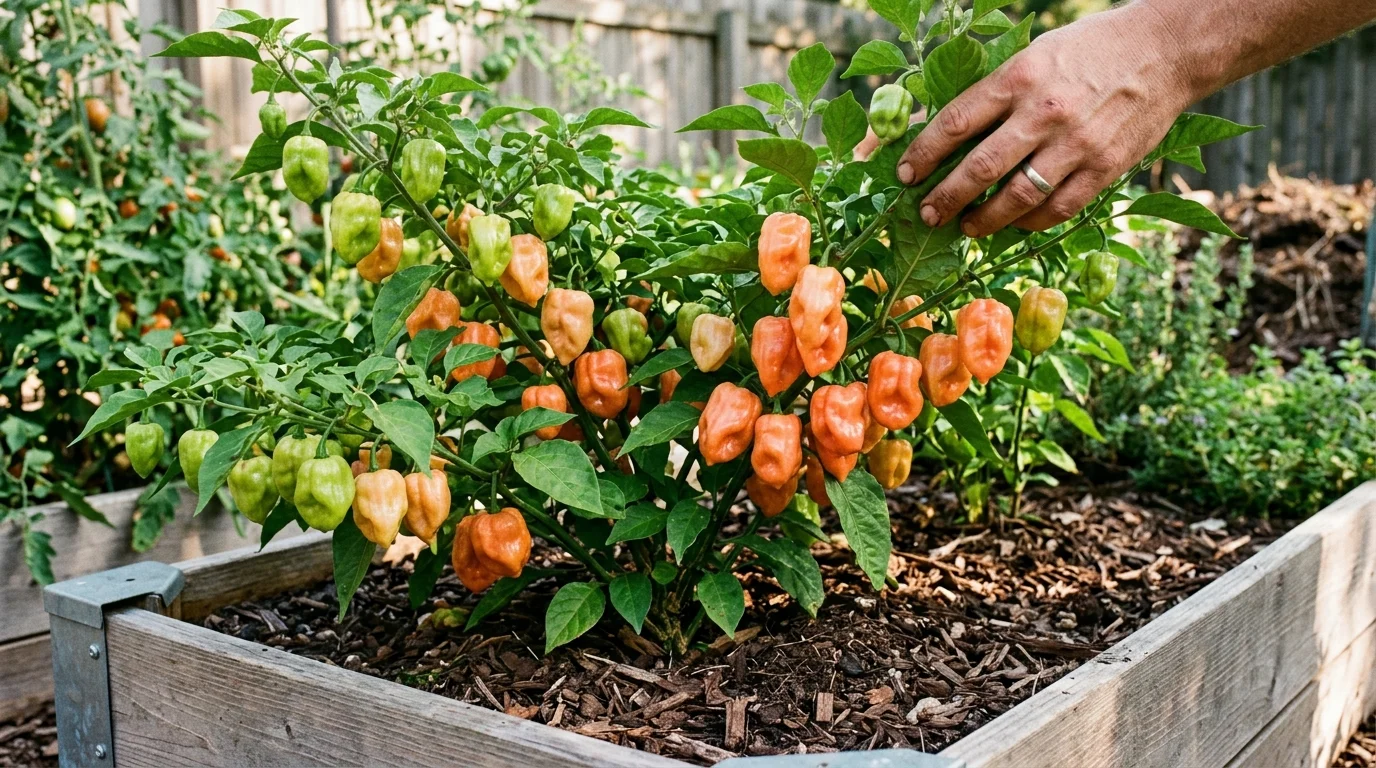
For decades, gardeners who could not tolerate extreme heat missed out on the world’s most fragrant pepper family: Capsicum chinense. Standard habaneros pack 200,000 to 350,000 Scoville units, blowing out tastebuds before you can register their complex apricot, melon, and floral aromatics.
Developed through selective breeding by plant geneticist Michael Mazourek at Cornell University, the Habanada solves this completely. It delivers 100% of the authentic tropical floral aroma of an orange habanero with precisely zero Scoville heat. You can slice it raw into fresh fruit salsas, ceviches, and salads. Discover growing requirements and kitchen pairings in our feature on habanada peppers.
If you have never grown a Capsicum chinense species before, choose Habanada. It shares the identical slow germination window (21–35 days) and long growing season of a Ghost Pepper or Scotch Bonnet. Learning to nurse a delicate chinense seedling to maturity is much more enjoyable when the end reward is a pepper you can actually eat raw right off the stem without gloves.
Growing Peppers Indoors: The Complete Setup
Growing peppers indoors is not a compromise. It is a controlled agricultural environment. You eliminate sudden hailstorms, cutworms, leafminers, and scorching 105°F heatwaves. To keep an indoor pepper thriving and flowering continuously, manage four essential environmental pillars:
1. Light: The Make-or-Break Factor
Peppers are light-hungry plants native to equatorial South and Central America. They require a minimum Daily Light Integral (DLI) of 25 to 30 mol/m²/day to produce heavy blossoms and dense, crunchy pod walls. A south-facing window with clean glass delivers around 10 to 15 mol/m²/day on clear summer days, and drops below 5 mol/m²/day in November. On a windowsill alone, your plant will survive, but it will drop its blossoms.
The solution is an artificial light setup. Use a modern, full-spectrum LED quantum board pulling 100 to 150 true wall watts (such as the Spider Farmer SF1000, Mars Hydro TS1000, or equivalent budget LED panel featuring Samsung LM301B diodes). Hang the panel 12 to 18 inches above the top foliage canopy and run it on a mechanical or smart timer for 14 to 16 hours daily. For a full breakdown of lighting metrics, check our complete blueprint for growing peppers indoors.
2. Containers and Soil Mechanics
Container volume directly governs canopy volume. Peppers develop fibrous root systems that fill containers quickly:
- Seedling Phase: 2-inch cell trays or 3-inch starter nursery pots.
- Intermediate Up-potting: 1-quart to 1-gallon container when roots reach the bottom edges.
- Final Fruiting Container: 2 to 3 gallons for compact varieties (Thai Chili, Shishito, Jalapeño); 5 gallons for large bells and sprawling chinense varieties.
Drainage is non-negotiable. Every container must have multiple drainage holes along the bottom rim. Never use outdoor garden dirt in a pot; garden topsoil contains dense clay and fine silt that pack into an impermeable brick in container confinement. Use a high-porosity potting mix composed of 60% peat moss or coco coir, 25% to 30% horticultural perlite, and 10% screened worm castings or aged compost.
3. Temperature and Humidity Targets
Peppers shut down root uptake in cold soil. Maintain daytime ambient temperatures between 72°F and 85°F (22°C to 29°C). Nighttime temperatures should remain above 62°F to 65°F (17°C to 18°C). If you grow on a winter windowsill, cold air drafts sinking off the glass can drop the root ball below 55°F while your room thermostat reads 70°F. Pull pots back three inches from winter glass, or rest them on an insulating wooden trivet.
Worked Example: Thai Chili Peppers on a Windowsill
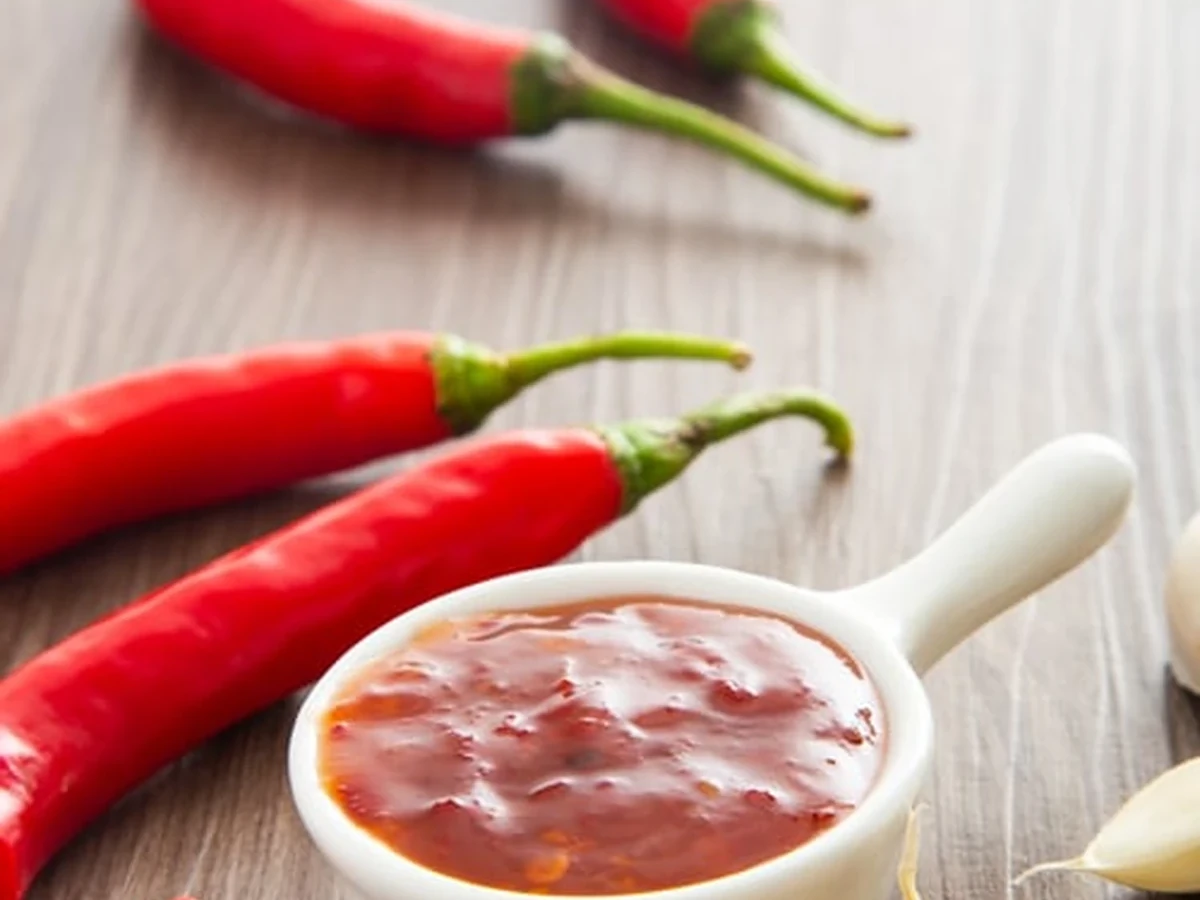
If you have limited space and want hundreds of spicy pods from a single compact pot, grow the Thai bird chili (Capsicum annuum). Discover the exact windowsill schedule in our detailed guide on growing Thai chili peppers indoors.
Thai chilies perform exceptionally well indoors because their root systems remain productive in a small, one-gallon container. The bush stays naturally tidy (12 to 16 inches tall), branches prolifically without aggressive pruning, and produces upright pointing, candle-like green pods that turn brilliant scarlet. A single healthy Thai chili on a bright ledge yields between 150 and 300 fiery pods (50,000 to 100,000 SHU) every season.
From Seed to Seedling: Getting Started
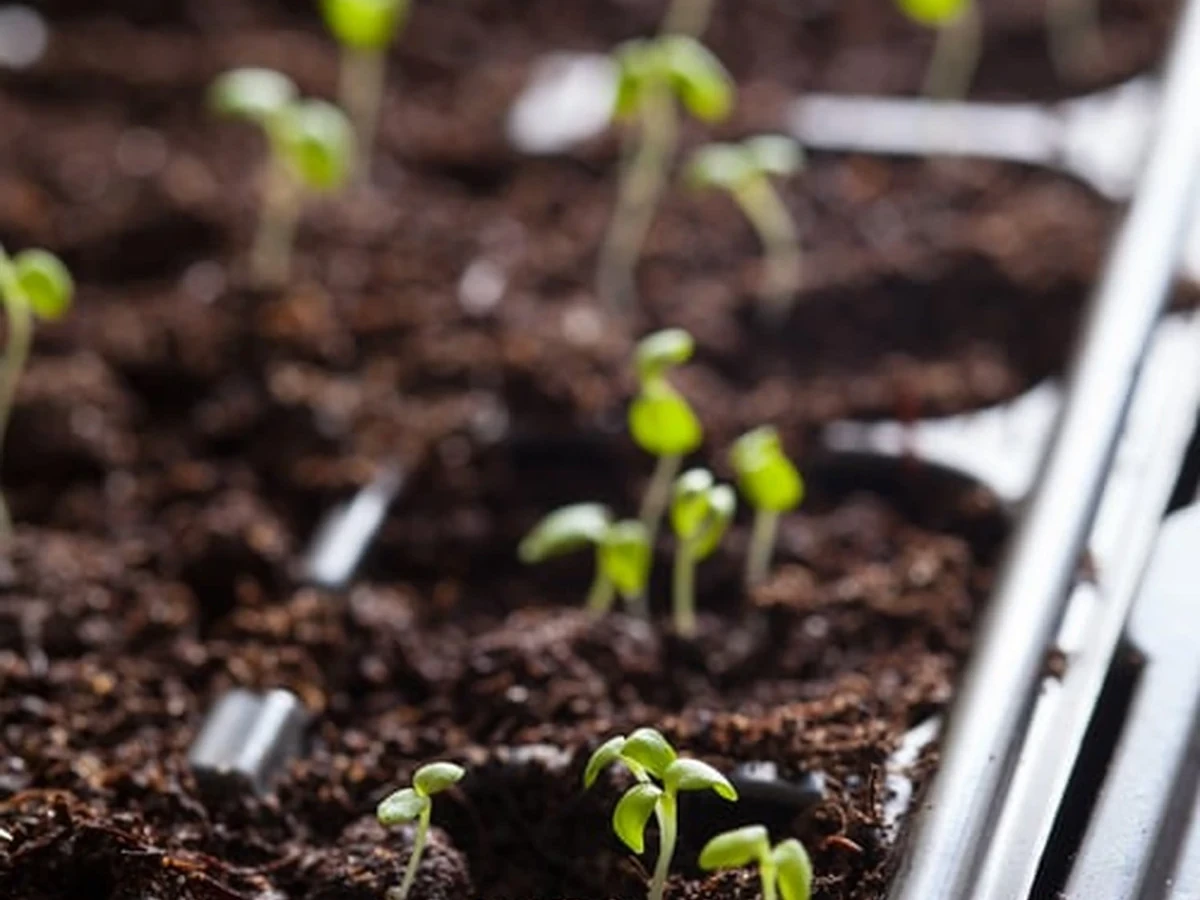
Starting peppers from seed takes patience. Unlike tomato seeds that burst out of warm soil in four days, pepper seeds possess hard, waxy outer seed coats that resist water penetration.
- When to Sow: For outdoor summer container growing, sow seeds indoors 8 to 10 weeks before your historical last spring frost date. For dedicated indoor grow light setups, sow seeds any week of the year.
- Sowing Depth: Fill seedling cells with fine, sterile seed-starting mix. Moisten with warm water until the mix feels like a wrung-out sponge. Press seeds 1/4 inch deep and gently tamp the surface to ensure full soil contact.
- The Bottom-Heat Imperative: Room temperature soil (68°F) yields sluggish, uneven germination taking 18 to 28 days. Set your seed flat on a seedling heating mat calibrated to 80°F to 85°F (27°C to 29°C) and cover with a clear humidity dome. At 85°F, C. annuum seeds sprout cleanly in 7 to 10 days.
- Immediate Light Exposure: The second green hooks break through the soil surface, remove the clear plastic humidity dome and position your grow light 2 to 4 inches above the seedlings (for fluorescent T5 lights) or 14 to 18 inches (for dimmed LED panels). Delaying light exposure by even twenty-four hours causes permanent, fragile stem elongation.
Do not abandon your seed tray if you see bare dirt at day twenty. Capsicum chinense varieties (Habanero, Habanada, Scotch Bonnet) and Capsicum pubescens varieties frequently take 25 to 35 days to emerge, even on a heat mat. Keep the surface evenly misted, maintain consistent 82°F bottom warmth, and let botanical biology take its course.
Pepper Plant Care: Watering, Feeding, and Environment
Keeping a potted pepper healthy through flowering and pod-fill requires establishing a consistent rhythm rather than reacting to emergencies.
Watering: The Two-Inch Rule
Peppers dislike wet feet. Saturated root balls trigger rapid root rot, anaerobic fungal pathogens, and lower-leaf chlorosis (yellowing). Check moisture using the finger test: push your index finger two inches straight down into the pot mix. If you detect dampness or cool particles cling to your skin, do not water. If your fingertip feels warm and dry, saturate the container thoroughly until clean runoff exits the bottom drainage holes. Always dump standing water from drainage trays after twenty minutes.
Targeted Nutritional Ratios: Vegetative vs. Flowering
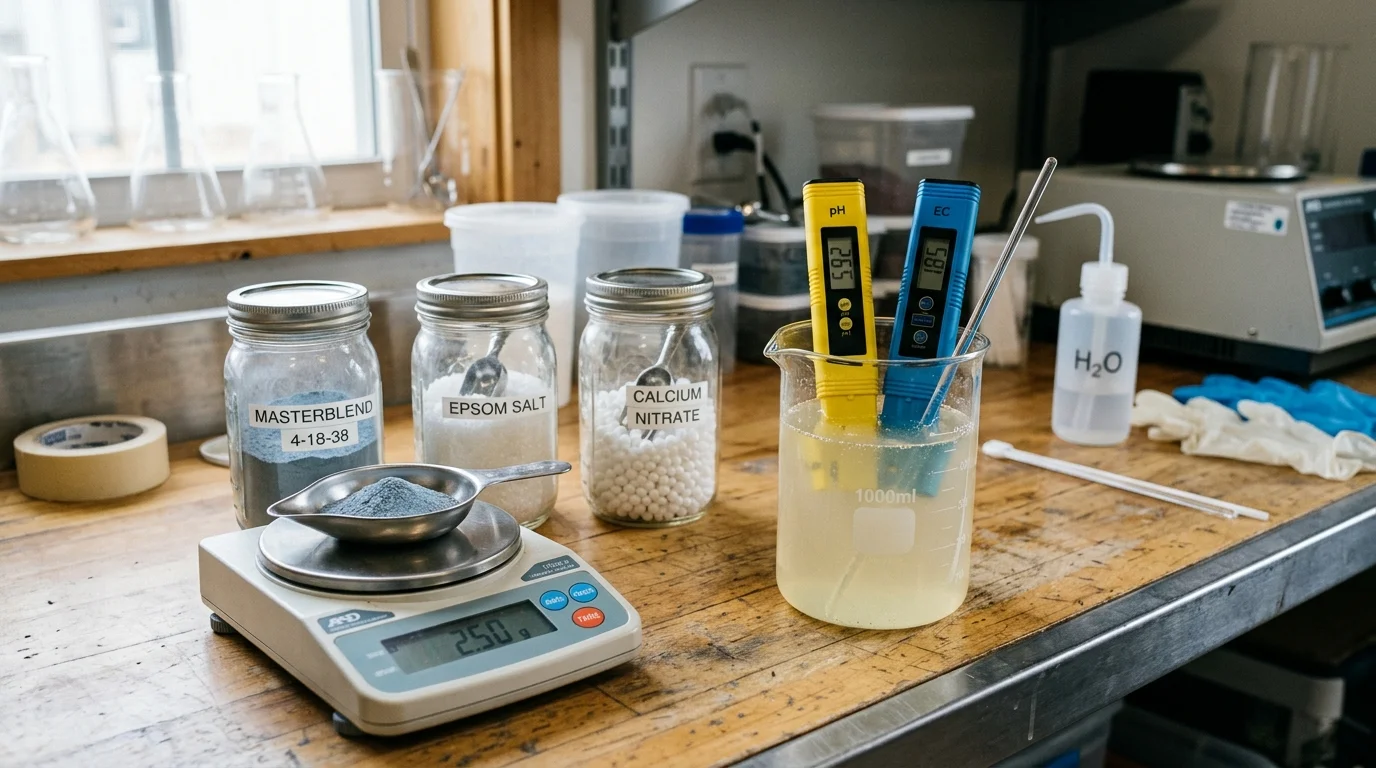
Peppers have specific nutritional stages. Applying excessive nitrogen during flowering creates massive, dark green bushes that refuse to set fruit. Follow this two-phase feeding schedule supported by university extension fertility research:
- Vegetative Stage (Transplant to First Flower Buds): Feed every 10 to 14 days with a balanced water-soluble organic fertilizer (such as an N-P-K ratio of 5-5-5 or 10-10-10) or dilute fish emulsion/kelp blend at half label strength. This supports rapid root development, sturdy main stems, and broad green leaf sets.
- Flowering and Pod Set: The moment flower buds appear at stem branch nodes, switch to a low-nitrogen, high-phosphorus, and high-potassium formula (such as 3-10-10, 5-10-10, or an organic tomato formulation). Phosphorus stimulates flower bud retention, while potassium drives sugar transport and pod wall thickening.
- Calcium and Magnesium: Peppers are susceptible to blossom-end rot—a physiological collapse of the bottom pod tissue caused by calcium transport failure. Add a half-teaspoon of agricultural gypsum (calcium sulfate) or Coco Cal liquid supplement once a month to protect rapid cell division in developing fruit.
Pruning Pepper Plants for Health and Maximum Yield
Pruning is optional. If you leave a pepper plant completely untouched, it will grow, bloom, and produce pods. However, thoughtful pruning transforms container growing by creating strong architecture, increasing branch points, and speeding up late-season ripening.
Explore step-by-step cutting techniques in our full manual on pruning pepper plants. There are three key pruning phases across a pepper’s life cycle:
The Three Pruning Phases
- Phase 1: Early-Season “Topping” (6 to 8 Inches Tall): When your seedling stands six inches tall and carries at least three to four sets of true leaves, use sharp, sanitized shears to snip off the central growing tip just above a leaf node. This removes apical dominance, forcing the plant to awaken dormant side buds. Within two weeks, the plant transforms from a single vertical stem into a stocky, four-branch bush with twice as many future flowering sites. Rule: Top small-fruited varieties (Jalapeño, Thai Chili, Shishito, Habanada). Do not top large bell peppers, which need their central stem to support heavy fruit.
- Phase 2: Mid-Season Airflow Clearing: Strip off all leaves and small suckers from the bottom three to four inches of the main stem near the soil line. This “bottom clearing” keeps soil-splashed bacteria off wet foliage, increases airflow through the canopy, and prevents powdery mildew in still indoor rooms.
- Phase 3: Late-Season “Topping for Ripening”: Four weeks before your growing season ends (or before taking indoor winter cuttings), pinch off all newly emerging flower buds and tiny, immature pods that have no chance to ripen. This forces the plant to channel all carbohydrate energy into ripening the mature green pods already hanging on the branches.
Common Problems and How to Fix Them
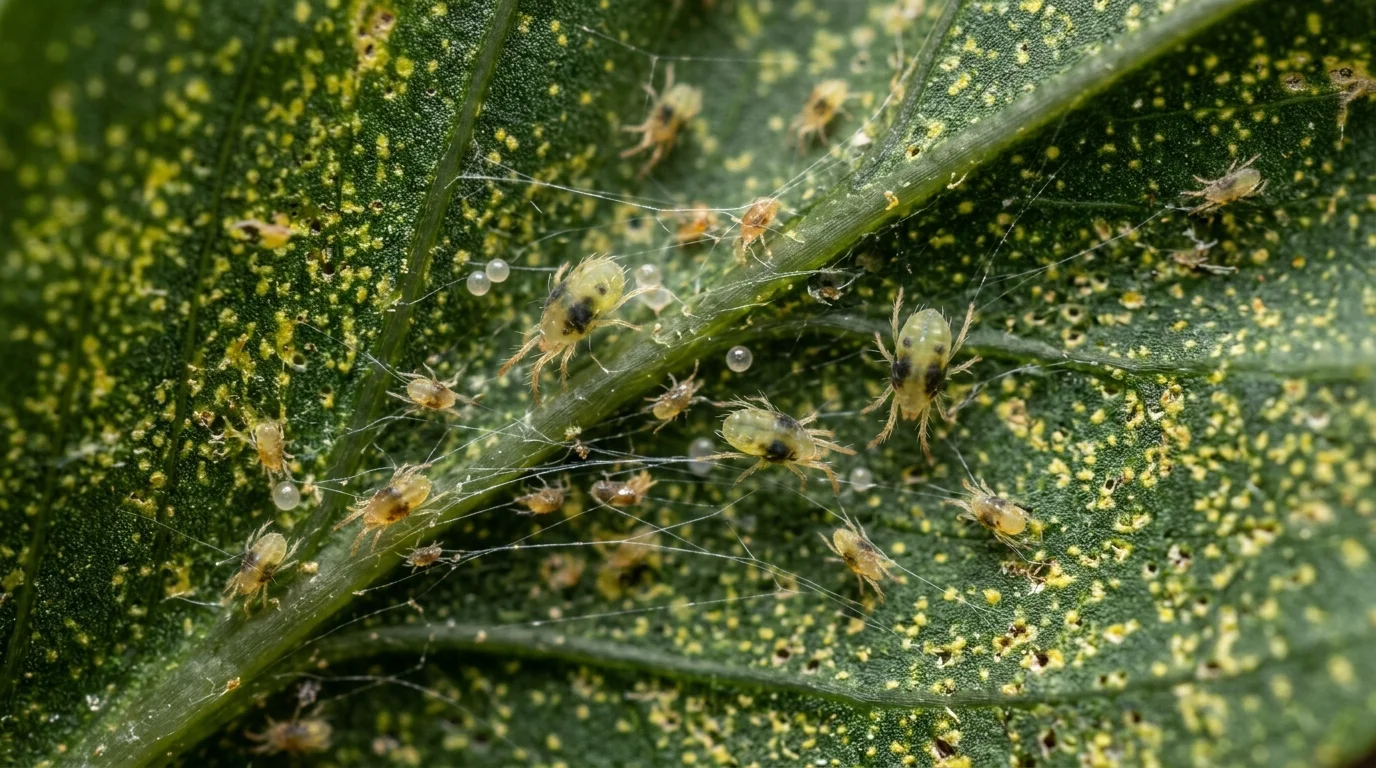
Indoor and container peppers face predictable environmental stressors. When an issue occurs, the plant shows it clearly through leaf color, posture, or blossom health. Use this diagnostic matrix to troubleshoot symptoms quickly:
Harvesting and Enjoying Your Peppers
Every pepper begins life green. Whether a pepper ripens to orange, golden yellow, chocolate brown, or fiery crimson, you can harvest it at any stage of development.
Harvesting Technique: Never grab a pepper and yank downward. Pepper branches are brittle and snap easily at the node, tearing off future flowering branches. Always use clean, sharp kitchen shears or bypass pruners to snip the stem half an inch above the pod’s calyx cap.
Preserving Your Harvest: Thin-walled peppers (Cayenne, Thai Chili) air-dry cleanly on a dehydrator tray or strung on twine. Thick-walled varieties (Jalapeño, Bell, Habanada) freeze whole in airtight freezer bags without blanching—slice them directly from frozen into hot pans.
Overwintering Bonus: When outdoor cold arrives in October, do not discard container peppers. Prune the plant back to six inches of main stem, leaving a few small leaves. Move the pot to a cool, bright indoor area, water sparingly once every two to three weeks, and let it rest. In early March, increase warmth and light; the established root ball will produce an explosive, heavy harvest two months ahead of any spring seedling.
Frequently Asked Questions: 6 Common Queries Answered
01
How long do peppers take to grow from seed to harvest?
How long do peppers take to grow from seed to harvest?
Harvest timing depends on botanical species. Fast Capsicum annuum varieties like Jalapeño, Shishito, and Thai chilies go from seed to mature green harvest in 60 to 80 days (and full ripe color in 85 to 100 days). Slow-maturing Capsicum chinense varieties like Habanero, Habanada, and Ghost peppers require 100 to 150 days or more. When growing indoors under dedicated LED lights, calendar seasons do not matter because you control lighting and temperature year-round.
02
Do I need a grow light to grow peppers indoors?
Do I need a grow light to grow peppers indoors?
In almost every case, yes. While a compact pepper on an unshaded south-facing window can survive and produce a modest handful of pods during midsummer, modern window glass blocks up to 50% of usable light. In winter, natural windowsill light is insufficient to sustain flowering. A 100- to 150-watt full-spectrum LED quantum panel running 14 hours daily delivers the exact 25 to 30 DLI target peppers need for continuous heavy yields.
03
Why are my pepper plant leaves turning yellow?
Why are my pepper plant leaves turning yellow?
Overwatering is the primary cause of yellow leaves in potted peppers. When soil stays continuously waterlogged, roots suffocate, die from lack of oxygen, and cannot transport nutrients upward. Check the top two inches of mix: water only when it feels dusty and warm. If the soil is well-drained and only older, lower leaves show uniform yellowing while new growth remains healthy, the plant is signaling a nitrogen deficiency, easily corrected with a balanced organic liquid feed.
04
Can I grow peppers from seeds taken from grocery store peppers?
Can I grow peppers from seeds taken from grocery store peppers?
Seeds from grocery store peppers will usually sprout, but the results are highly unpredictable. Most commercial produce comes from F1 hybrid varieties. Seeds saved from an F1 hybrid do not breed true; the resulting offspring often produce wildly inconsistent pod shapes, thin walls, weak yields, or unexpected heat levels. For guaranteed disease resistance, compact growth habit, and true-to-type flavor, buy open-pollinated or stable heirloom seed from an established seed house.
05
How often should I water pepper plants?
How often should I water pepper plants?
Never follow a rigid calendar schedule like every Monday or Thursday. Watering frequency shifts based on pot volume, humidity, ambient temperature, and plant size. In hot summer weather, a three-gallon container on a breezy balcony may require daily watering. Indoors in winter, that same pot may go seven to ten days between waterings. Use the finger test: insert your finger two inches into the soil. Water deeply only when your fingertip feels completely dry.
06
When should I prune my pepper plants?
When should I prune my pepper plants?
Prune in three key moments. First, top the central stem of small-fruited varieties when the seedling reaches six inches tall to force heavy branching. Second, throughout the season, trim away lower leaves touching the soil line to ensure air circulation and prevent soil-borne fungi. Third, four weeks before the season concludes, pinch off new flower buds and marble-sized pods so the plant directs its remaining sugars into ripening the existing crop.
Container & Home Pepper Nutrition & Photoperiod Matrix
Container root volume thresholds, stage-specific N-P-K ratios, and lighting requirements across popular home pepper cultivar classes.
| Cultivar Class | Min Pot / Res Volume | Veg N-P-K Ratio | Bloom N-P-K Ratio | Target EC (mS/cm) | Min Daily PPFD | Days to First Ripe Pod |
|---|---|---|---|---|---|---|
| Compact Thai & Ornamentals | 1 – 2 Gallons | 3-1-2 | 1-2-3 | 1.4 – 1.8 | 300 µmol/m²/s | 55 – 65 Days |
| Jalapeño & Serrano | 3 – 5 Gallons | 3-1-2 | 1-3-4 | 1.8 – 2.4 | 450 µmol/m²/s | 70 – 85 Days |
| Bell & Sweet Italian | 5 – 7 Gallons | 3-1-2 | 1-3-4 | 2.0 – 2.6 | 500 µmol/m²/s | 85 – 100 Days |
| Habanero & Scotch Bonnet | 3 – 5 Gallons | 2-1-2 | 1-2-4 | 2.0 – 2.5 | 550 µmol/m²/s | 95 – 115 Days |
| Superhot (Ghost, Reaper) | 5 – 7 Gallons | 2-1-2 | 1-3-4 | 2.2 – 2.8 | 600 µmol/m²/s | 110 – 140 Days |