⚡ Quick Answer
Growing flowering plants indoors requires matching each plant to the right light level — succulents and cacti need bright direct light, while peace lilies and pothos thrive in low light. Most indoor flowering plants need well-draining soil, temperatures between 60–80°F, and monthly fertilizing during spring and summer.
Most new gardeners do not kill plants by neglect. They kill them with kindness, usually a watering can.
You buy a flowering pot at the garden center because the blossoms look radiant under greenhouse skylights. You bring it home, set it on a side table, and pour a little water into the saucer every morning before making coffee. Within two weeks, the buds drop unopened. The lower leaves turn a sickly, translucent yellow. Stems go soft at the soil line. You decide right then that you were born without some magical gardening gift, dump the pot in the trash, and vow never to waste fifteen dollars on a houseplant again.
That failure had nothing to do with luck, genetics, or innate talent. Gardening is not an artistic gift handed down at birth. It is a tiny cluster of learnable physical habits.
Once you understand three specific variables—how to match a plant to your actual light instead of your wishful thinking, how to water deeply by feel rather than by a calendar, and how to multiply healthy stems for free—the mystery disappears. You stop second-guessing every drooping leaf. Whether you have an east-facing apartment windowsill, a rented balcony, or a strip of bare soil beside your back steps, this guide gives you the exact blueprint to keep flowers alive, blooming, and expanding across your home.
✓ Key Takeaways for Beginners
- Light dictates survival, not plant food: Match the species to the actual sun hitting your space. Buying a sun-worshipping flower for a dim bedroom corner guarantees failure within thirty days regardless of fertilizer.
- Overwatering is the number one plant killer: Drowning roots from constant surface dampness causes far more casualties than brief dry spells. Check the top two inches of soil with your finger before picking up a watering can.
- Containers require real drainage: Decorative pots without bottom drainage holes trap stagnant water and cause anaerobic root rot. Keep plants in nursery liner pots with holes inside decorative planters.
- You can grow flowers anywhere: You do not need a fenced backyard. Windowsills support reliable bloomers like African Violets and Peace Lilies, while outdoor steps can hold towering sunflowers in five-gallon buckets.
- Propagation turns one purchase into many: Simple stem and leaf cuttings rooted in plain tap water or coarse potting mix give you endless free plants without spending another cent at a nursery.
Understanding Your Growing Space: Light, Dirt, and Climate
According to environmental horticulture studies from the University of Florida IFAS Extension, indoor flowering plants require careful balancing of relative humidity (50% to 65%) and appropriate photoperiod cycles to trigger bud initiation without inducing powdery mildew.
Before browsing seed racks or nursery aisles, reframe the first question you ask. Beginners focus entirely on whatever flower catches their eye at the garden center. Experienced growers do the opposite: they ignore the flowers and evaluate what the space can realistically sustain.
Your space controls what can survive. Forcing a full-sun perennial into a dim hallway produces weak, stretched stems that drop their buds. Conversely, parking a tender woodland fern in an unshaded south-facing window scorches its leaves to paper in an afternoon.
The Three Environmental Factors That Decide Everything
- Direct Sunlight (Duration and Intensity): Sunlight is food. While fertilizer supplies micro-nutrients, photons power photosynthesis. Light through standard modern window glass loses roughly 30% to 50% of its usable outdoor photosynthetic intensity. A spot directly against the glass is drastically brighter than a table set six feet back into the room.
- Root Volume and Drainage Medium: In-ground beds allow roots to wander deep for moisture during summer heatwaves. Containers restrict root volume entirely. In a pot, the quality of your soil mix and the existence of unrestricted drainage holes dictate root oxygenation.
- Frost Timing and Temperature Swings: Outdoors, your regional last-frost date in spring and first-frost date in autumn define your growing season. Indoors, heating vents, drafty window sashes, and air conditioning compressors create localized microclimates that shock sensitive foliage.
Do not guess your light exposure. Pick a sunny weekend day and check your target windowsill or patio corner at three exact times: 9:00 AM, 1:00 PM, and 5:00 PM. Note whether direct sunlight hits the floor or sill, or whether the area receives bright indirect reflection. A windowsill that looks blindingly bright at breakfast may sit in deep building shadow by midday. Knowing your exact hours of direct sun prevents 90% of beginner buying errors.
Choosing What to Grow: The Shortlist of Forgiving Plants
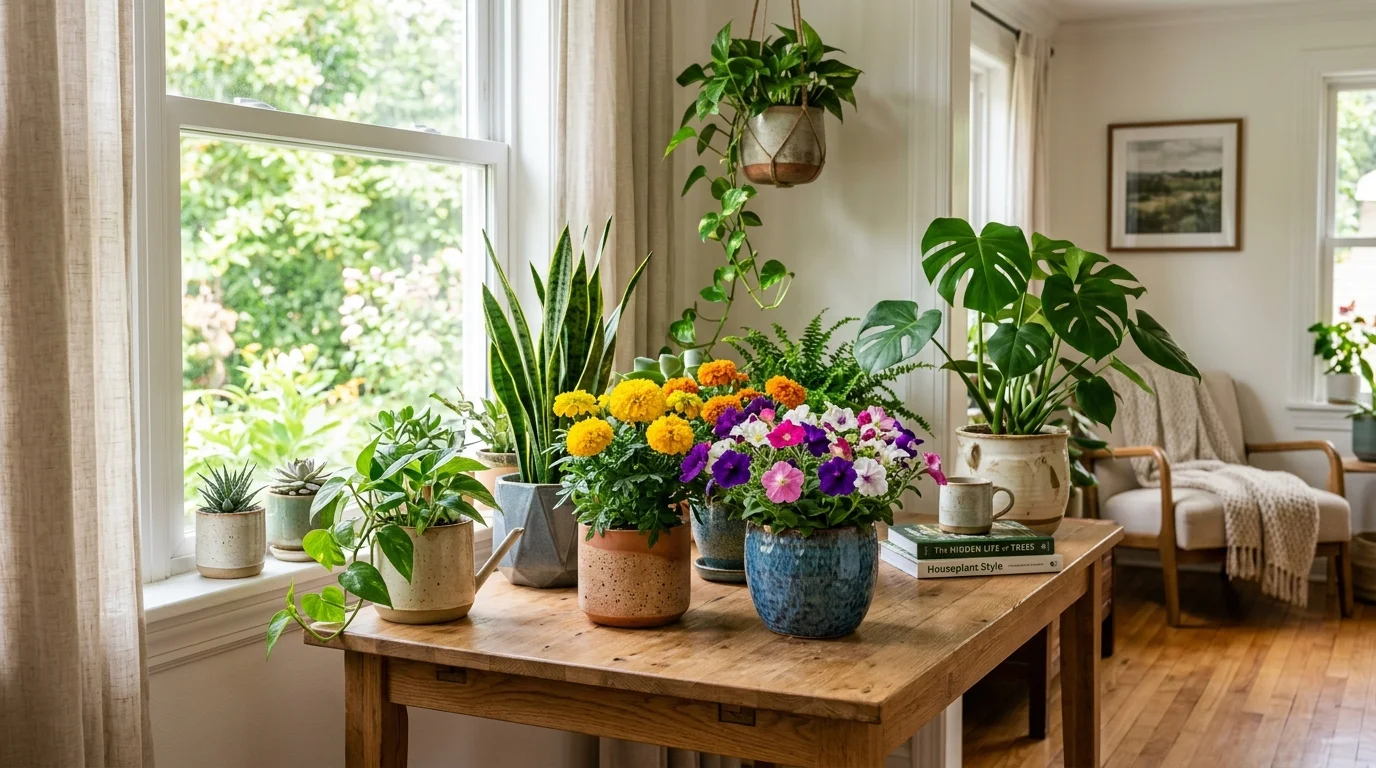
Nursery display tables are engineered to trigger impulse purchases. They place temperamental blooming shrubs right at the entrance, freshly misted and forced into unnatural greenhouse bloom. Walk right past them.
Your goal on your first outing is building confidence. Start with two or three specimens known for tolerance and rapid recovery. A resilient plant tolerates missing a watering by two days or enduring a gloomy spell without collapsing into mold.
Flowers You Can Grow Indoors
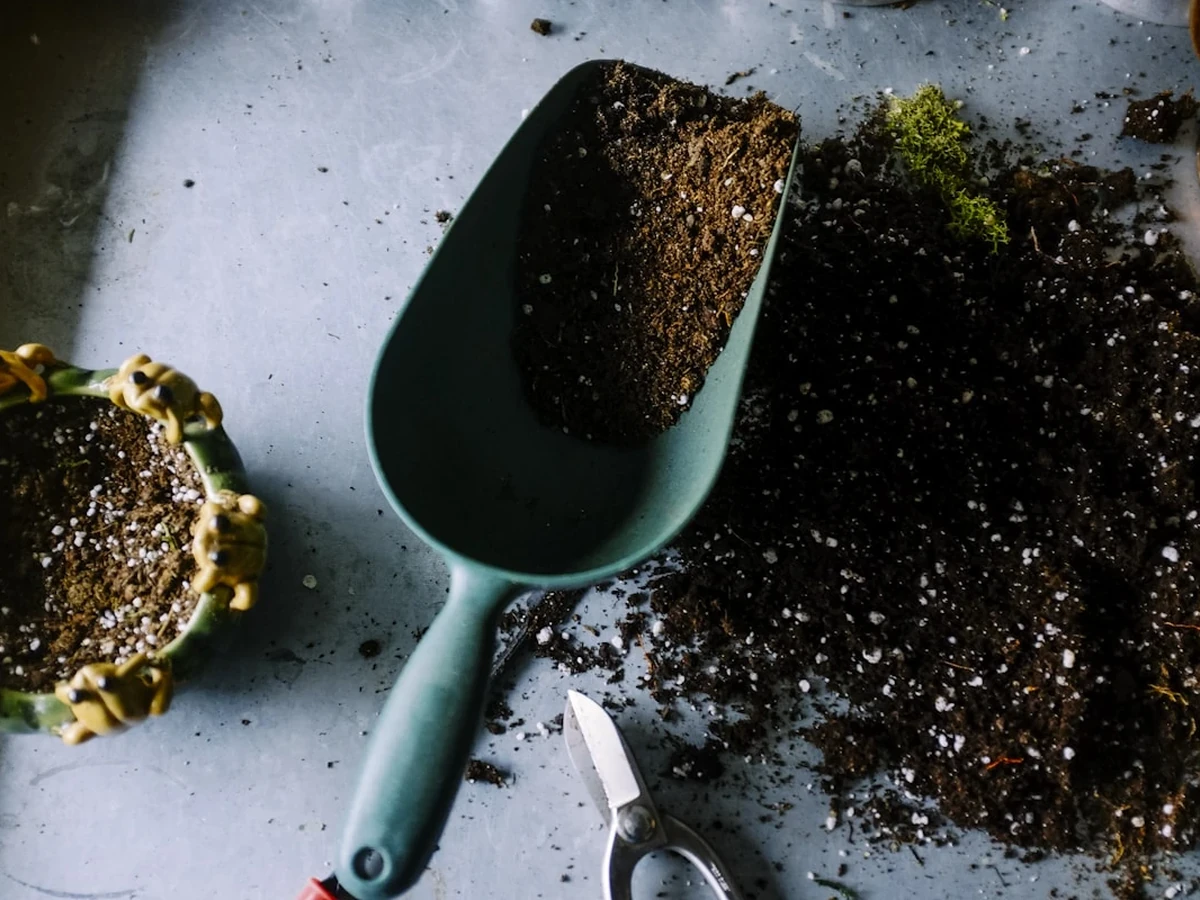
Indoor living spaces present real biological hurdles for flowering plants: lower air exchange, low humidity from winter furnaces, and filtered light. Outdoor annuals like petunias and geraniums survive poorly in standard living rooms unless placed under intense, high-output grow lights. To explore the full roster of indoor bloomers, read our comprehensive guide on growing flowers indoors.
If you want color inside without running dedicated grow lights, focus on these three bulletproof candidates:
- African Violets (Saintpaulia): The undisputed champion of windowsill flowers. They thrive in moderate, indirect light on an east-facing ledge. Their compact root systems stay small, meaning they bloom best when slightly snug in a four-inch pot. Keep cold water off their fuzzy leaves to avoid white spotting, and they reward you with near-continuous violet, pink, or white flowers nine months a year.
- Peace Lily (Spathiphyllum): If you routinely forget when you last watered, buy a Peace Lily. It produces elegant white spathes above glossy green spears and tolerates moderate to low indoor light. When it needs water, its stems drop dramatically, signalling thirst without sustaining permanent damage if soaked within twelve hours.
- Moth Orchids (Phalaenopsis): Sold in grocery checkout aisles everywhere, moth orchids are surprisingly durable if you discard one common piece of bad advice: never use ice cubes to water them. Cold ice water shocks tropical roots. Instead, place their bark medium under a lukewarm tap for thirty seconds once a week, let it drain completely, and set them on a bright table out of direct sun. A single bloom spike stays open for two to three months.
Edible Flowers You Already Have in Your Backyard
You do not need a greenhouse to harvest culinary flowers. Some of the most nutrient-dense, visually striking blossoms grow wild along garden borders, lawn edges, and herb pots. Adding fresh flower petals to salads and summer drinks elevates ordinary cooking with zero grocery expense.
Never eat any flower unless you have achieved 100% positive botanical identification using flower petals, leaf shape, and stem structure. Never harvest flowers from roadsides, public dog parks, or lawns treated with chemical weed killers or synthetic lawn fertilizers. Flowers from florists and garden center ornamentals are heavily sprayed with systemic fungicides and are toxic for human consumption. Grow them from organic seed or harvest from untreated home beds. For positive visual identification guides and culinary recipes, check our breakdown of edible flowers in your backyard.
- Dandelions (Taraxacum officinale): Look closely at an unsprayed yard in early May. Young dandelion blossoms gathered in morning sunshine offer a delicate honey-like flavor. Pull the yellow petals free from the bitter green base sepals to toss over grain bowls, blend into herb butter, or steep into tea.
- Nasturtiums (Tropaeolum majus): A beginner gardener’s dream plant. Seeds are large, easy to handle, and sprout in seven days in lean soil. Both the round lilypad leaves and the trumpet-shaped orange, red, and yellow blossoms carry a peppery, radish-like bite that cuts through rich cheeses and vinegars.
- Calendula / Pot Marigold (Calendula officinalis): Known as “poor man’s saffron,” calendula produces bright golden-orange ray petals that add peppery warmth and natural color to rice dishes, broths, and salads. The plants bloom heavily from early summer right through the first light autumn frost.
- Wild Violets and Johnny Jump-Ups (Viola family): Delicate purple, violet, and yellow blooms appear in shaded lawn corners in early spring. They taste mild, sweet, and vegetal, making them the classic choice for candying in sugar or floating on iced lemonade.
Sunflowers and Other Outdoor Favorites
If you have outdoor space—whether a dedicated raised bed, a plot along a fence, or a sunny porch step—sunflowers (*Helianthus annuus*) are the ultimate beginner confidence builder.
Few gardening experiences match the speed and scale of a sunflower. You bury a single striped seed one inch deep in warm garden soil in May. Within ten days, broad green cotyledons emerge. By July, that seedling transforms into an eight-foot stalk topped by a dinner-plate-sized golden disk tracking the sun across the sky.
Sunflowers teach beginners the three essentials of outdoor gardening:
- Unforgiving Light Demands: Sunflowers require six to eight hours of direct, baking sunlight daily. If planted in partial shade under tree branches, they stretch, curve, and produce thin stalks unable to hold the weight of their flower heads.
- Root Depth and Stability: Sunflowers anchor themselves with a heavy central taproot and wide lateral root mats. In garden beds, space them twelve to eighteen inches apart. If growing in containers, use a minimum five-gallon container per stalk so the root system does not tip over in summer windstorms.
- Watering Physics: Because of their rapid growth and huge leaf surface area, sunflowers transpire gallons of moisture on hot July afternoons. Discover exact moisture management techniques in our dedicated tutorial on how to water a sunflower.
Custom Milestone Timeline: Indoor Growing Cycle Planner
Track week-by-week milestones from germination to harvest with custom lighting hours, pruning dates, and nutrient schedules for your specific crops.
Watering: The Skill That Decides Everything
Here is the uncomfortable truth about watering: following a rigid calendar schedule like “I water all my plants every Sunday morning” kills more container plants than pests, diseases, and bad lighting combined.
The Problem: A beginner notices a plant looking slightly dull or sees dry dust on the top quarter-inch of potting mix. They grab a mug or a watering can, dump a cup of water over the foliage, and walk away. Three days later, the plant wilts. Assuming the plant is thirsty, the grower pours two more cups into the pot.
The Agitation: Beneath the soil surface, a slow catastrophe unfolds. The bottom half of the pot was already saturated. By adding water on top of water, the grower fills every microscopic air pocket between soil particles. Roots require oxygen just as much as they require moisture. Deprived of oxygen, the delicate root hairs suffocate, die, and turn into black, foul-smelling mush. Because the dead roots can no longer pull moisture up into the stems, the foliage wilts. The grower sees a wilting plant, assumes it needs water, pours more in, and accelerates the rot until the plant collapses completely.
The Solution: Throw away the calendar schedule. Water according to the physical condition of the root zone, water deeply when you do, and give the soil time to breathe between drinks.
The Golden Rules of Beginner Watering
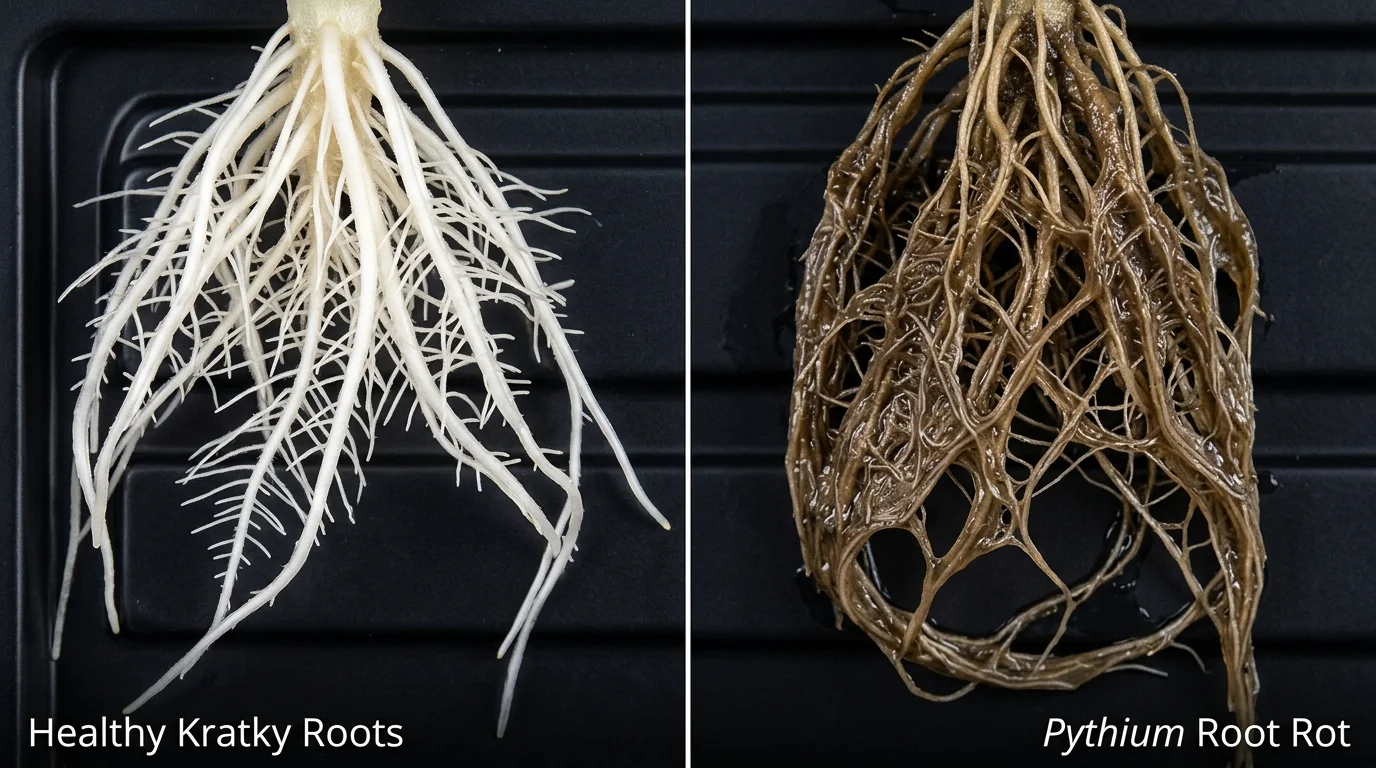
Insert your index finger two inches straight down into the soil mix. If you feel cool moisture or damp particles cling to your skin, leave the plant alone. If your fingertip feels dry and warm, it is time to soak.
Never sprinkle the top soil. Pour water evenly around the base until liquid streams freely from the pot’s bottom drainage holes. This flushes stagnant salts and ensures deep roots get thoroughly hydrated.
Allow the pot to wick up residual water for fifteen to twenty minutes after soaking. Then dump whatever water remains standing in the drip tray. Never leave plant roots submerged in stagnant runoff.
A pot containing moist soil feels noticeably heavy. A pot whose root ball has completely dried out feels surprisingly light when lifted. With two weeks of practice, lifting a pot tells you its moisture level faster than any probe.
Watering Frequency: Reading the Plant Instead of the Calendar
Frequency shifts constantly across the year. A six-inch clay terracotta pot sitting on a sunny patio in breezy 85°F weather may dry out completely in twenty-four hours. That identical pot kept indoors in 65°F winter air with low light might stay moist for ten full days.
Factors that speed up soil drying include porous unglazed terracotta pots, high temperatures, intense sun, active spring growth, and high indoor airflow. Factors that slow soil drying include glazed ceramic or plastic containers, cool weather, humid air, and winter dormancy when plants stop producing new leaves. For a concrete example of managing seasonal shifts and growth stages, read our guide on how often to water a sunflower.
If you find the finger test difficult to calibrate initially, pick up a basic two-prong analog soil moisture meter. Insert the probes midway into the root ball. Treat the meter as training wheels: use it to verify what your finger feels, and within a month you will no longer need the gauge.
Multiplying Your Plants for Free: The Magic of Propagation
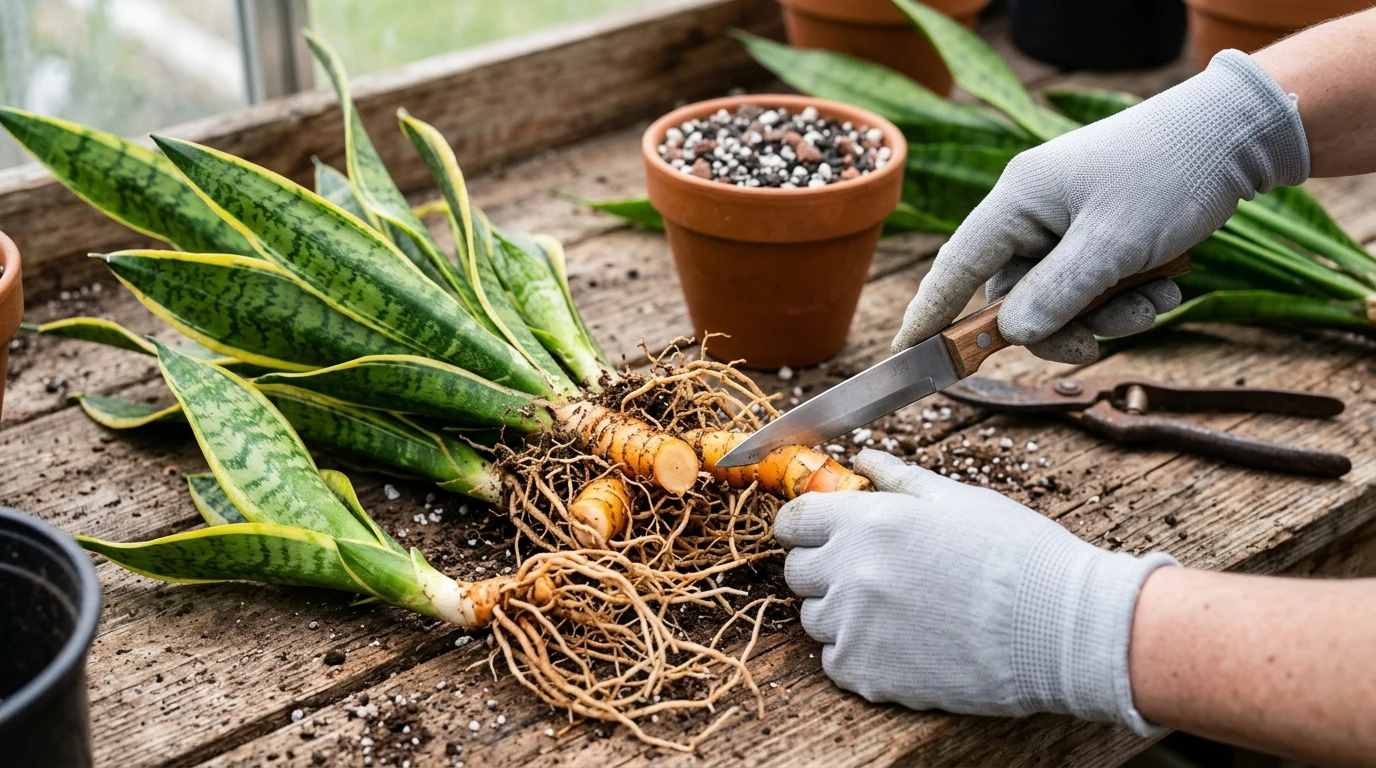
Propagation is the precise turning point where plant ownership shifts from an occasional shopping trip into a self-sustaining home craft. When you realize that a six-inch cutting snipped from a friend’s thriving vine can produce three fully rooted new plants by next month at zero financial cost, you never look at plant prices the same way again.
Propagating plants gives you backup copies if an outdoor storm damages a favorite container, provides free handmade gifts for neighbors, and builds a deep understanding of plant vascular systems.
Propagating a Snake Plant: The Easiest Win in Gardening
The Snake Plant (Sansevieria / Dracaena trifasciata) is virtually indestructible. It tolerates deep indoor shade, survives weeks without water, and roots effortlessly from leaf cuttings. For the complete photo-driven walkthrough, see our detailed step-by-step on propagating a snake plant.
The 4-Step Snake Plant Leaf Cutting Method:
- Select and Snip: Choose a firm, healthy outer leaf. Using sharp shears sanitized with rubbing alcohol, cut the leaf cleanly off near the soil base.
- Cut into Sections: Slice the long leaf horizontally into three- to four-inch segments. Critical Rule: Keep track of which end pointed down toward the roots! If you plant a leaf segment upside down, it cannot form roots. Cut a small notch or “V” in the bottom edge to identify the rooting end.
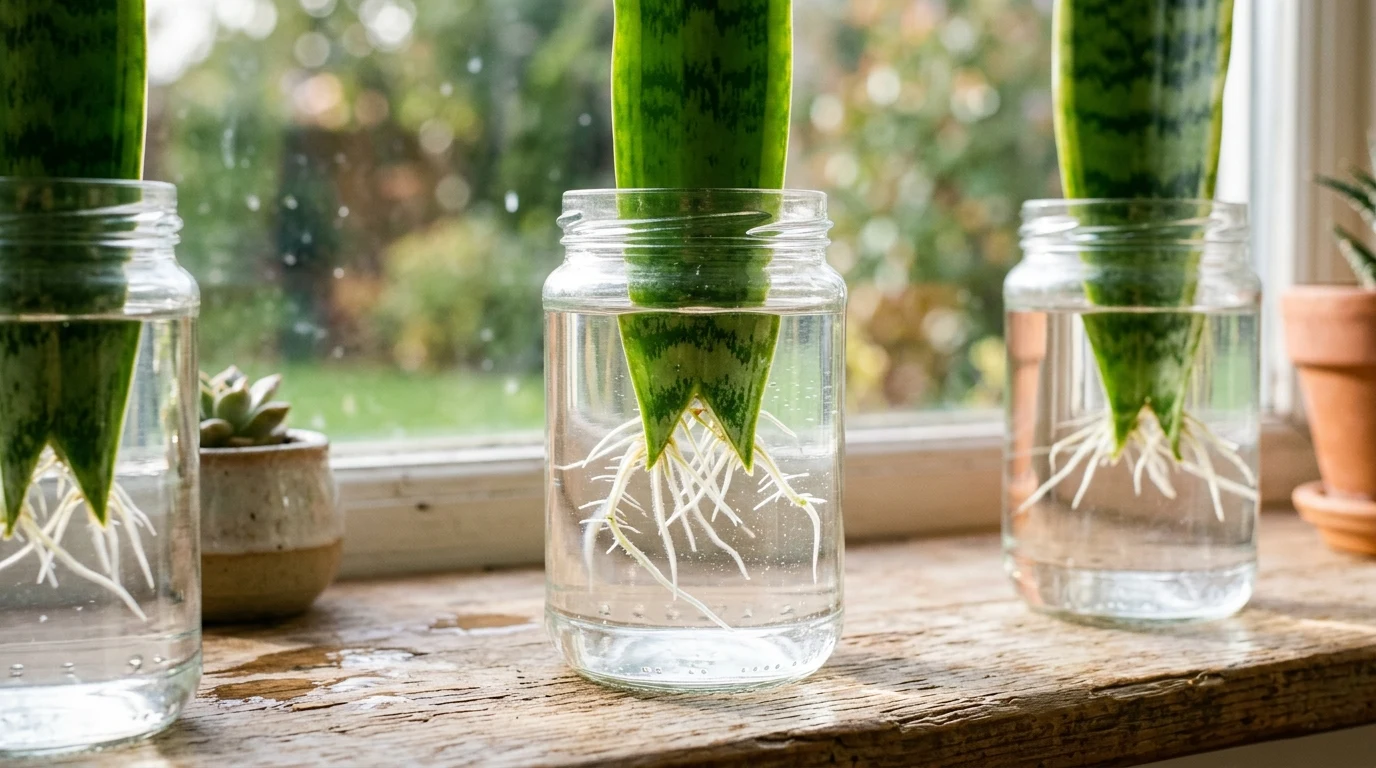
- Callus the Cut: Set the cuttings on a dry paper towel for 48 hours out of direct sun. Allowing the cut edge to seal and form a dry callus prevents fungal decay once placed in water or damp substrate.
- Root in Water or Coarse Mix: Submerge the bottom inch of the callused segment in a clean glass jar with tap water, or press it one inch deep into a mix of 50% potting soil and 50% perlite. Within four to six weeks, thick white root clusters emerge, followed by tiny green pup shoots.
- Sanitized Cutting Blade: Kitchen scissors or utility shears wiped down with 70% isopropyl alcohol to stop bacterial spread.
- Clear Glass Jars: Clean recycled condiment jars, jam jars, or drinking glasses that allow you to monitor root emergence without disturbing delicate tissue.
- Fresh Water or Lean Medium: Clean room-temperature tap water changed weekly, or a 50/50 blend of coarse perlite and standard peat-free potting soil.
- Gentle Indirect Light: A warm windowsill shielded from harsh direct sunbeams that would overheat water jars.
- Patience: Roots do not appear overnight. Give cuttings three to six weeks of undisturbed peace.
Common Mistakes That Kill Beginner Plants (And How to Fix Them)
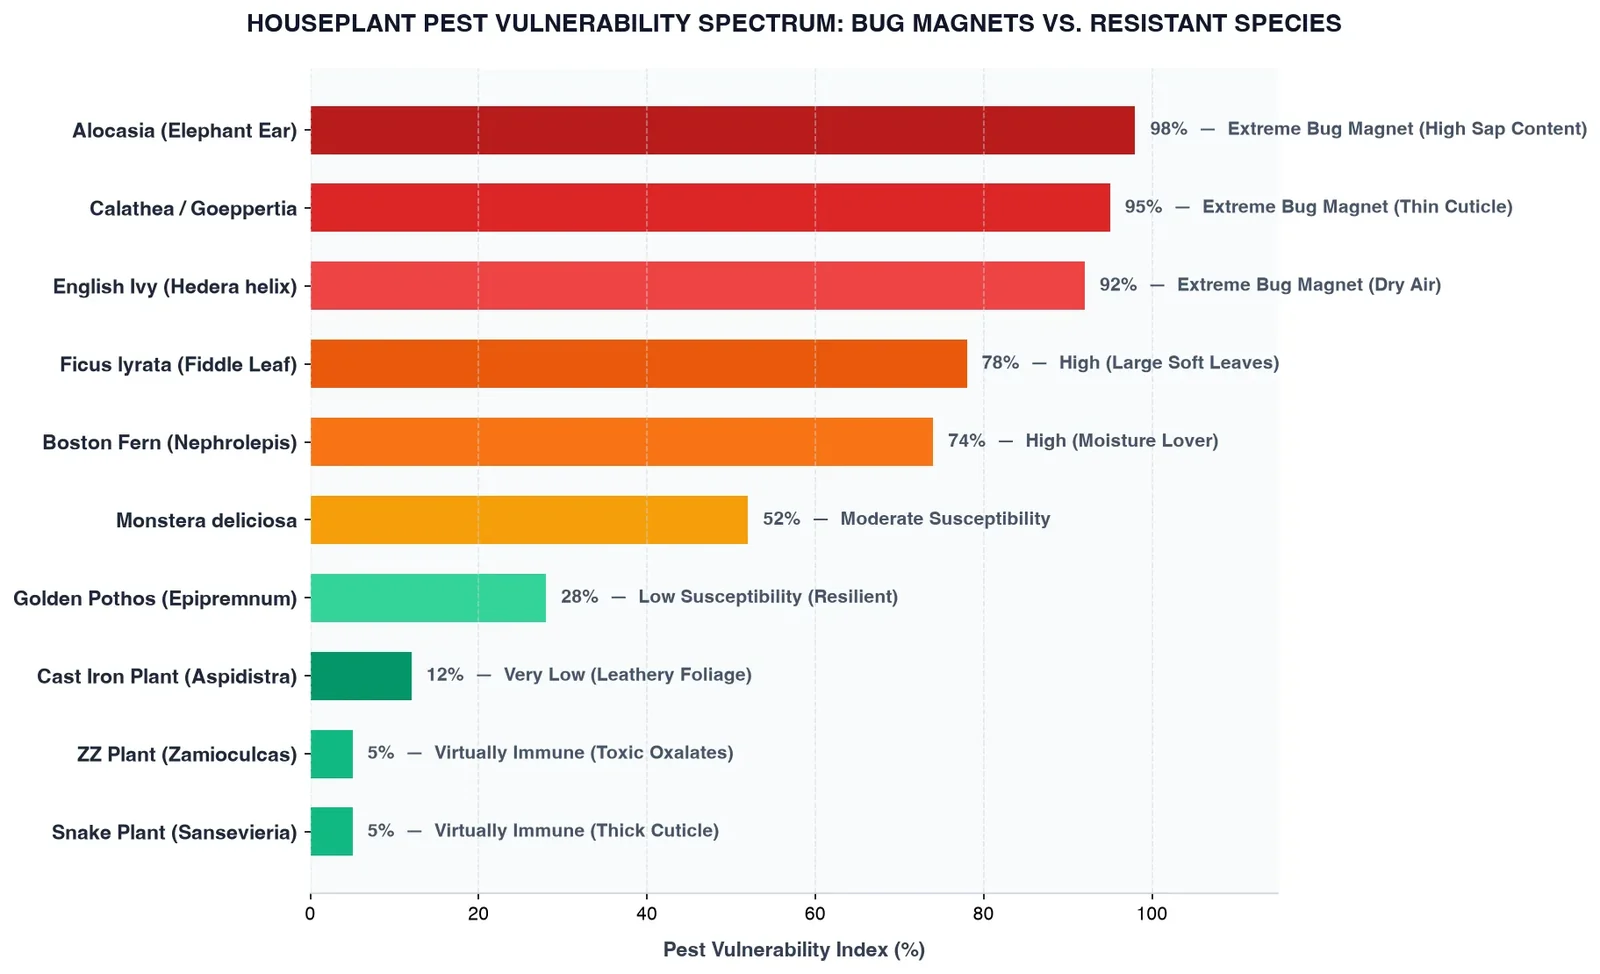
Every confident gardener you meet has killed dozens of plants. The difference between someone who quits and someone who grows a lush home garden is simply learning how to read the plant’s distress symptoms before the root system collapses beyond recovery.
Here are the five most frequent mistakes beginner gardeners make, framed with the exact symptom, root cause, and immediate fix:
Frequently Asked Questions: 5 Common Queries Answered
01
How do I know if I am overwatering or underwatering my plant?
How do I know if I am overwatering or underwatering my plant?
Check the texture of the leaves and the moisture deep in the soil. Overwatered plants develop soft, yellowing leaves, mushy stem bases, and sit in soil that stays wet for many days. Underwatered plants show dry, crispy brown leaf margins, drooping stems that spring back within two hours of a deep soak, and soil that contracts away from the pot’s inside edges. When in doubt, perform the finger test: push your index finger two inches into the dirt. If it feels cool and damp, wait. If it feels dusty and warm, soak it.
02
Can I grow flowers if I only have a windowsill and no yard?
Can I grow flowers if I only have a windowsill and no yard?
Yes, absolutely. Many flowering species thrive on an apartment windowsill without ever touching outdoor soil. The secret is selecting compact varieties naturally adapted to partial light and stable temperatures. African Violets, Peace Lilies, and Phalaenopsis Orchids thrive in four- to six-inch pots on east- or west-facing window sills. Avoid large outdoor garden annuals like big marigolds or climbing roses indoors unless you install high-powered LED grow lights .
03
How often should I water my flowers?
How often should I water my flowers?
There is no universal calendar schedule. Watering frequency changes based on season, humidity, container material, and ambient temperature. A pot in dry summer air may need watering every two days, while that same container in cool winter conditions may need water once every ten days. Water whenever the top one to two inches of soil feels completely dry to the touch, and always saturate the soil until water runs freely through the base drainage holes.
04
Are the flowers in my backyard safe to eat?
Are the flowers in my backyard safe to eat?
Only if you have 100% positive botanical identification and know with certainty that the area has never been sprayed with chemical herbicides, synthetic pesticides, or contaminated by street runoff. Many common ornamental flowers—such as foxglove, lily of the valley, and oleander—are intensely toxic. Common backyard flowers like unsprayed dandelions, nasturtiums, and wild violets are delicious and completely safe once properly verified. If you have any uncertainty, leave them in the garden.
05
What is the easiest plant to start with if I have never grown anything?
What is the easiest plant to start with if I have never grown anything?
For indoors, start with a Snake Plant or a Peace Lily. Both survive irregular watering, tolerate moderate to low indoor light, and display clear physical signs when they need attention before permanent damage occurs. For an outdoor container or bed, start with dwarf sunflowers or nasturtiums. Their large seeds sprout within a week, they resist moderate drought, and they produce dramatic, rewarding blooms in sixty to seventy days.
Indoor Floral & Foliage Environmental Nutrition Matrix
Target illuminance (Foot-Candles/Lux), moisture depletion cycles, and dilute nutrient feeding guidelines for domestic houseplants.
| Ornamental Classification | Foot-Candles / Lux | Moisture Depletion Cycle | Feeding EC Range | Target pH | Ideal Room Humidity % |
|---|---|---|---|---|---|
| Low-Light Foliage (Snake, Pothos, ZZ) | 50 – 150 fc (500–1,500 lux) | Allow 80% – 100% Dry Out | 0.6 – 0.8 mS/cm (Monthly) | 6.0 – 6.8 | 35% – 50% |
| Tropical Flowering (Peace Lily, Anthurium) | 150 – 400 fc (1,500–4,000 lux) | Allow Top 40% Dry Out | 0.8 – 1.2 mS/cm (Bi-weekly) | 5.8 – 6.5 | 55% – 70% |
| High-Light Blooming (African Violet, Kalanchoe) | 400 – 800 fc (4,000–8,000 lux) | Allow Top 50% Dry Out | 1.0 – 1.4 mS/cm (Every Watering) | 6.0 – 6.5 | 50% – 65% |
| Indoor Succulents & Cacti | 800 – 1,500+ fc (8,000–15,000 lux) | 100% Completely Bone Dry | 0.4 – 0.6 mS/cm (Growing Season) | 6.2 – 7.0 | 25% – 40% |
| Epiphytic Orchids (Phalaenopsis) | 300 – 600 fc (3,000–6,000 lux) | Roots Turn Light Silvery Gray | 0.6 – 0.8 mS/cm (Weakly Weekly) | 5.5 – 6.2 | 60% – 75% |